The Terrarium Drainage Layer — What Each Layer Does and Why the Order Is Non-Negotiable Unlocked
I’ve built more terrariums than I have windowsills, and my earliest ones all failed the same way: fogged glass, swampy smells, and plants melting at the base. Every time, the culprit was a sloppy drainage layer or layers in the wrong order. In this guide, I’ll show you exactly what each layer does, why the sequence is non-negotiable, and how to build it with garden-centre materials. You’ll finish knowing how to prevent rot, mold, and stagnant water before they start.
What the Drainage Layer Actually Does (And What It Doesn’t)
The drainage layer is a gravel-like base that parks excess water below the roots. It doesn’t make overwatering safe — it buys you a margin for error. Water still wicks upward if you soak the terrarium, but a proper base stops roots from sitting in a puddle.
In a closed container with no hole, trapped water needs a holding zone. That’s the drainage layer’s job: create a physical reservoir and air pocket so the root zone stays oxygenated. No reservoir, no oxygen; no oxygen, dead roots.
Action today: Pick your drainage material before anything else — 1 to 2 inches of washed pebbles or LECA for small jars, 2 to 3 inches for large vessels over 8 inches tall.
The Non-Negotiable Order of Layers (From Bottom to Top)
Order creates function. If you shuffle layers, you break the water path and airflow.
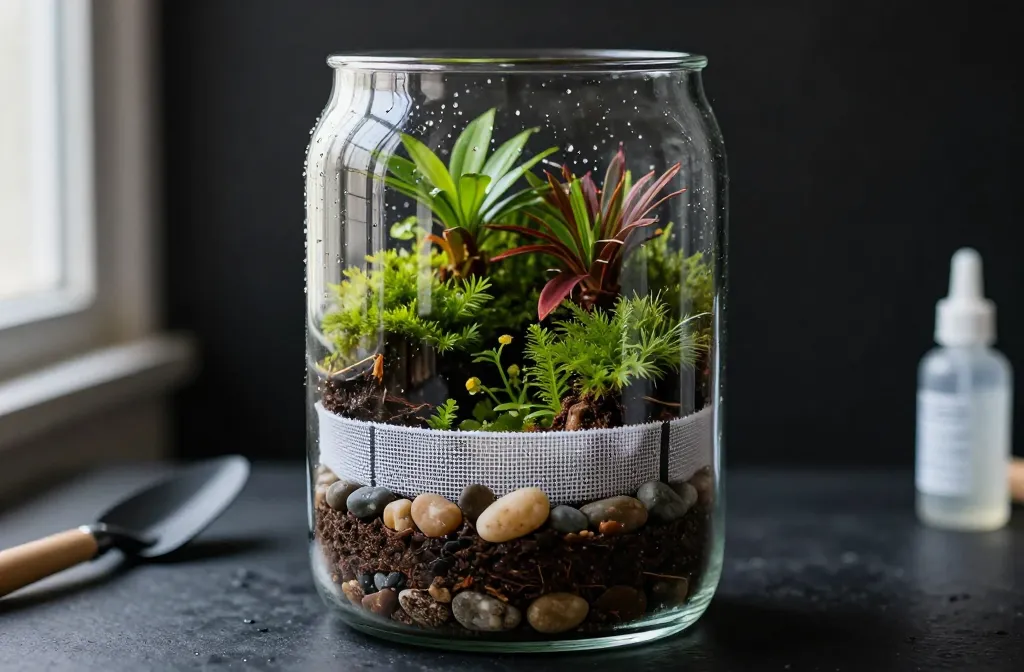
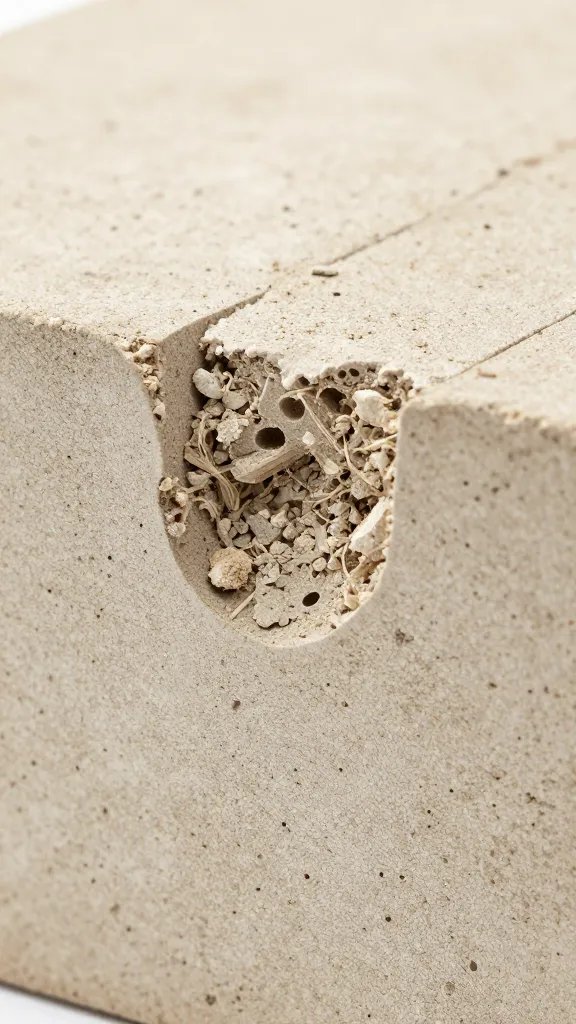
- 1) Drainage Layer: Washed aquarium gravel, decorative pebbles, or LECA. Depth: 10–30% of vessel height.
- 2) Barrier/Mesh: A cut circle of fiberglass screen or nylon mesh to stop soil falling into the rocks.
- 3) Activated Charcoal: A thin sprinkling (2–5 mm) to adsorb odors and keep the reservoir from going sour.
- 4) Substrate (Growing Layer): Good potting mix lightened with orchid bark or perlite, or a pre-mixed terrarium substrate. Depth: enough to cover the root balls by 1–2 inches.
- 5) Moss/Topdress (Optional): Sphagnum or sheet moss to stabilize moisture and keep soil off the glass.
Reverse any two of these and you cause failure. For example, charcoal under the rocks does nothing; mesh on top of soil blocks planting; moss under soil becomes a wet sponge that rots.
Takeaway: Lay everything out in order on your counter before you start — you’ll build faster and avoid swaps.
Layer-by-Layer: What Each One Does and How to Get It Right

Drainage Layer: The Water Parking Lot
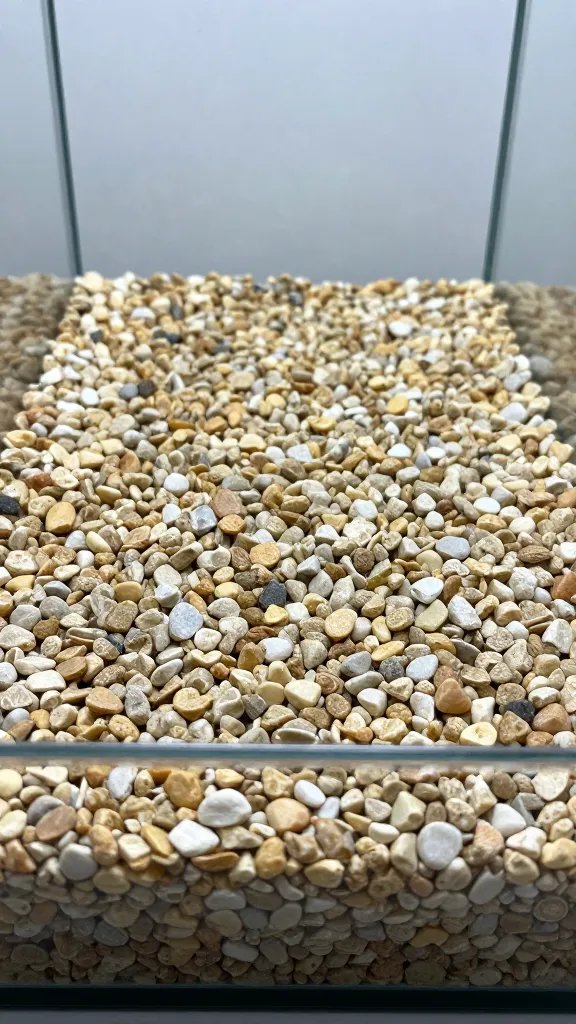
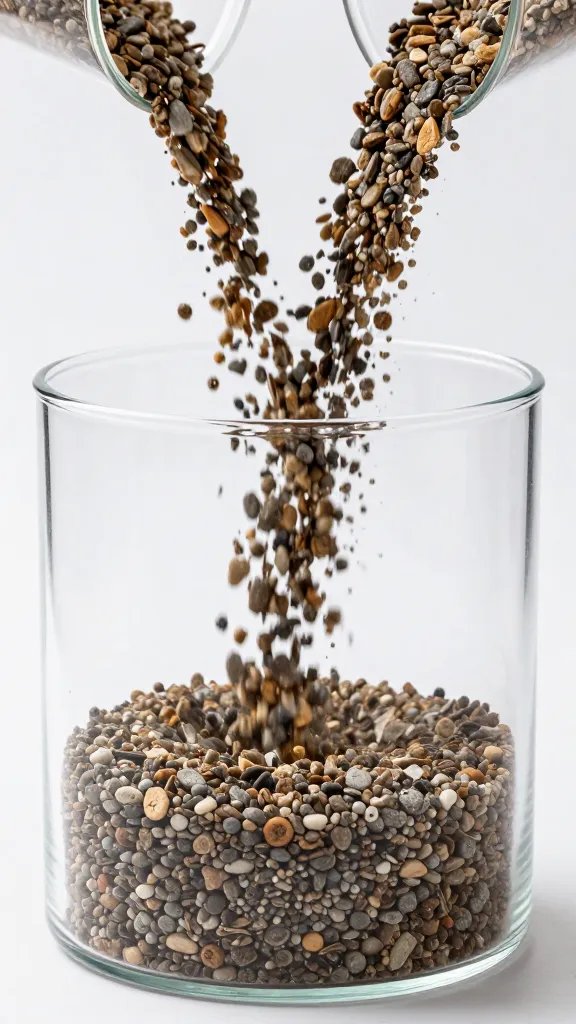
Role: Holds extra water away from roots and creates air space. Use pea gravel, aquarium gravel, or LECA from the garden centre. Rinse until the water runs clear.
Depth guide:
– 4–6 inch jar: 1 inch
– 8–10 inch vessel: 1.5–2 inches
– 12+ inch vessel: 2–3 inches
Common mistake: Too shallow. A half-inch of gravel won’t buffer a heavy watering.
Barrier/Mesh: The Silt Stopper
Role: Stops soil from trickling into the rocks, which would erase your reservoir. Cut a circle of fiberglass window screen or nylon craft mesh to fit snugly.
Tip: If you can’t find mesh, use a double layer of coffee filters trimmed to size. They hold up long enough to matter.
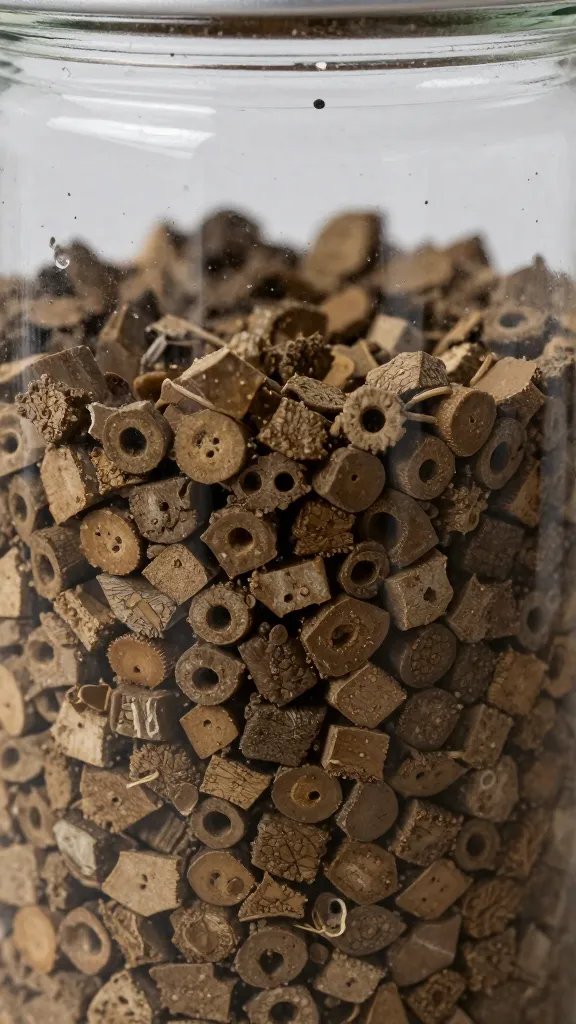
Activated Charcoal: Odor Control, Not a Magic Filter
Role: Adsorbs organic compounds so the reservoir doesn’t smell swampy. It does not “purify” water or fix chronic overwatering.
How much: A light sprinkle — think salt on fries, not a whole new layer. Too much charcoal dries the soil edge and can cause uneven wicking.
Substrate: The Root Zone
Role: Holds moisture and air around roots. Use a high-quality potting mix and lighten it by mixing in a few handfuls of fine orchid bark or perlite. For mossy, humid builds, I prefer 60% potting mix, 30% fine bark, 10% perlite.
Depth: 2–4 inches, or enough to cover the deepest root ball by 1–2 inches.
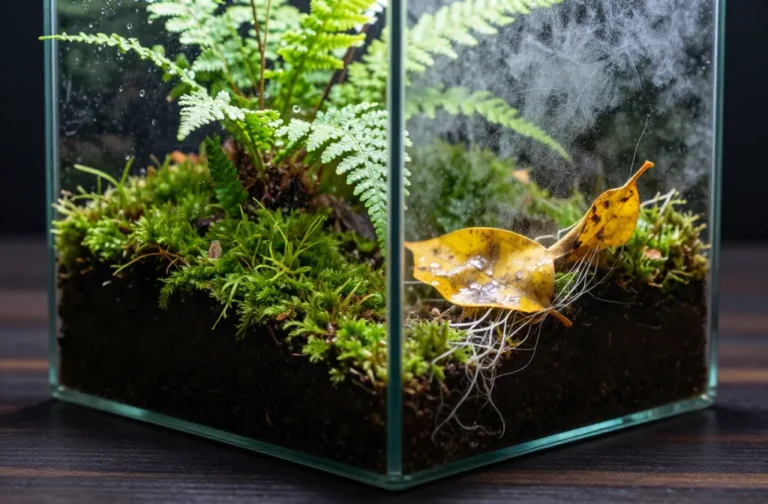
Moss/Topdress: The Moisture Stabilizer
Role: Evens out evaporation, hides soil, and prevents splash against the glass. Use live sheet moss or pre-soaked sphagnum pressed flat.
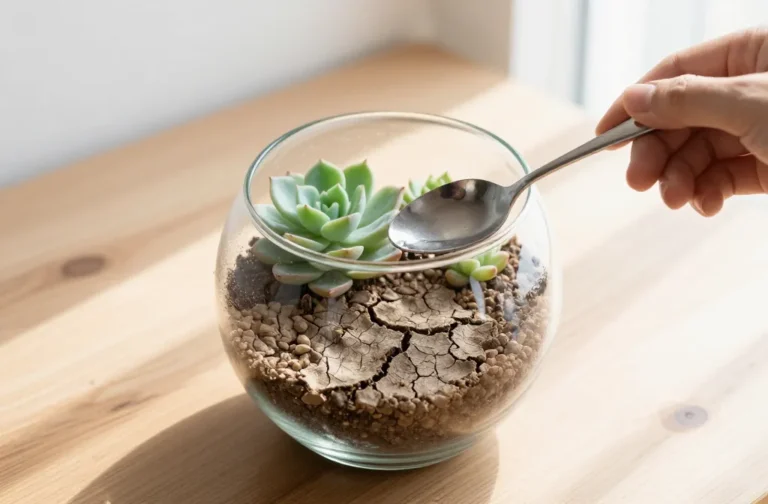
Action today: Rinse your drainage material in a colander until the water is clear — dirty gravel is the fastest route to cloudy glass and funk.
Water Movement 101: Why This Sequence Works

Water enters from above, saturates the substrate, and pulls down by gravity. The mesh stops silt, so the reservoir stays open and airy. The charcoal reduces odor where water collects. As the sun warms the terrarium, water evaporates, condenses on the glass, and drips back into the substrate — a loop that only works cleanly if the reservoir stays clear.
Swap the order and you break the loop. Soil in the rocks turns the base into mud, blocks airflow, and pushes stagnant water back into the root zone. That’s where rot begins.
Takeaway: After watering, look for a thin water line visible in the rock layer — that’s a healthy reservoir doing its job.
Build Steps You Can Follow in 15 Minutes
- Clean the vessel with warm soapy water, rinse, and dry. Clear glass tells you what’s happening inside.
- Add the rinsed drainage layer to the planned depth and level it with your hand.
- Place the mesh barrier snugly. Trim edges so soil can’t slip past.
- Sprinkle a thin layer of activated charcoal evenly.
- Add your substrate mix, press lightly to remove big air gaps, and shape gentle mounds where plants will sit.
- Plant, then topdress with moss if you like. Brush soil off the glass.
- Water slowly around the base of plants until you see the rock layer just begin to glisten with pooled water — then stop.
- Seal the lid for closed builds or leave ajar for 24 hours if you used very wet materials.
Action today: When you water the first time, add half a mug of water to a 6–8 inch jar, then wait 10 minutes. Only add more if the rock layer still looks dry.
Warning Signs You Got the Layers Wrong (And How I Fix Them)
Signs
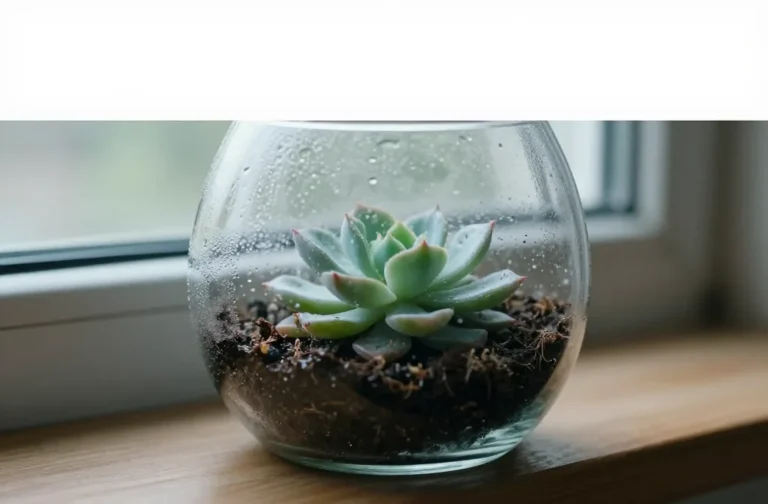
- Persistent full-day fogging: Too much water or too little drainage depth.
- Soil slumping into rocks: Missing or poorly fitted mesh.
- Rot smell or rainbow sheen on water: No charcoal or a clogged reservoir.
- Mold blooms on leaves: Stagnant air from saturated substrate.
Step-by-Step Fixes
- Open the terrarium for 2–3 hours at midday to vent moisture.
- Wick water from the reservoir: twist a paper towel into a rope, push it down one corner to the rocks, and let it siphon for 30–60 minutes.
- If soil has fallen through, lift plants, add mesh, rebuild layers, and replant. It takes 15 minutes and saves the build.
- Trim any rotting leaves and reduce watering by half next time.
Takeaway: Keep a roll of paper towels and a chopstick nearby — they’re your emergency siphon and planting tool.
Material Shortcuts That Still Work
- Drainage: Aquarium gravel, fish-safe pebbles, or LECA from the garden centre.
- Mesh: Fiberglass window screen, nylon craft mesh, or trimmed coffee filters.
- Charcoal: Activated aquarium carbon granules — not barbecue charcoal.
- Substrate: Good potting mix plus a handful of orchid bark or perlite per quart.
Action today: If you already have a terrarium, shine a flashlight through the base — if you can’t see clean gaps between stones, plan a quick rebuild with a proper mesh.
Frequently Asked Questions

Can I skip the mesh layer if my gravel is coarse?
No. Soil fines always find their way down, especially after the first few waterings. Without mesh, the reservoir silts up and stops draining. Cut a circle of fiberglass screen to fit tight, or use two layers of coffee filters as a stopgap. That single barrier adds months of stability.
How thick should the drainage layer be in a very small jar?
Use at least 1 inch, even in a 4–6 inch jar. If you go thinner, a single routine watering can flood the root zone. For tiny vessels, plant smaller root systems rather than shaving the drainage layer — the reservoir matters more than extra soil depth.
Do I really need activated charcoal?
Use a light sprinkle if the terrarium is closed or mostly sealed. It helps control odors where water collects and slows the “swamp” effect. If you run open-top terrariums and water lightly, you can omit it, but expect to vent more often. Never substitute barbecue charcoal — it contains additives.
How do I know when to stop watering after a rebuild?
Watch the rock layer. When you first see water glistening between stones, stop and wait 10 minutes. If the rocks still look dry, add another tablespoon or two. Aim for a visible but shallow reservoir — not a fully submerged rock layer.
Why is my terrarium always foggy in the morning?
Morning fog is normal as temperatures rise and humidity condenses. It should clear by midday. If fog persists all day, you’ve overwatered or lack drainage depth. Vent at midday for two hours and wick a little water from the reservoir with a paper towel rope.
Can I use sand as the drainage layer?
No. Sand compacts and behaves like soil, not like a rock reservoir. It clogs, holds water against roots, and removes the air pocket you need. Keep sand in the decorative top layer only if you want the look, and even then, keep it thin.
Conclusion
You don’t need special tools to build a terrarium that lasts — you need the right order and just enough depth where it counts. Set the drainage layer first, lock it in with mesh, and keep the substrate clean and breathable. If you already have a struggling build, rebuild the base once and you’ll stop chasing fog, funk, and rot. Next step: pick a vessel you like, lay your materials out in sequence, and give yourself 20 minutes to build it right the first time.