Stop the Rot: 5 Terrarium Substrate Mistakes That Kill Succulents Before They Root
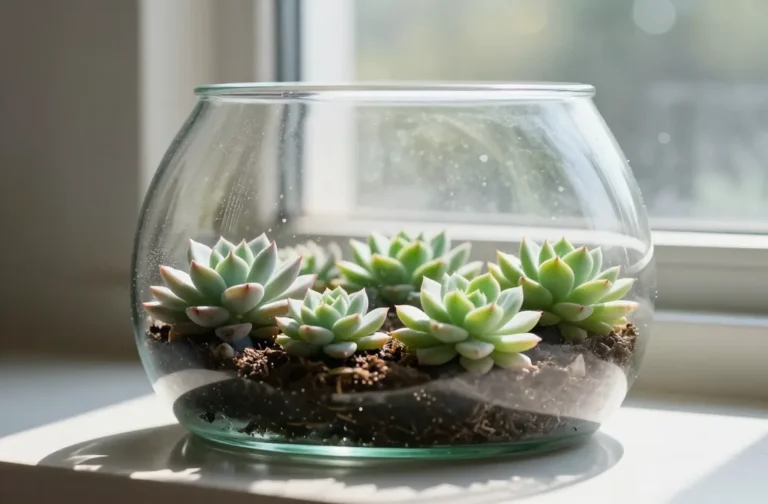
I’ve watched more than one glass bowl of succulents collapse into mush before they ever threw roots. Friends bring me their terrariums with the same story: “They looked fine for a week, then everything melted.” The fix isn’t fancy tools — it’s choosing and layering the right substrate so cuttings can dry fast and root cleanly. Here’s exactly what to avoid and what to do instead, so your succulents survive the first critical month.
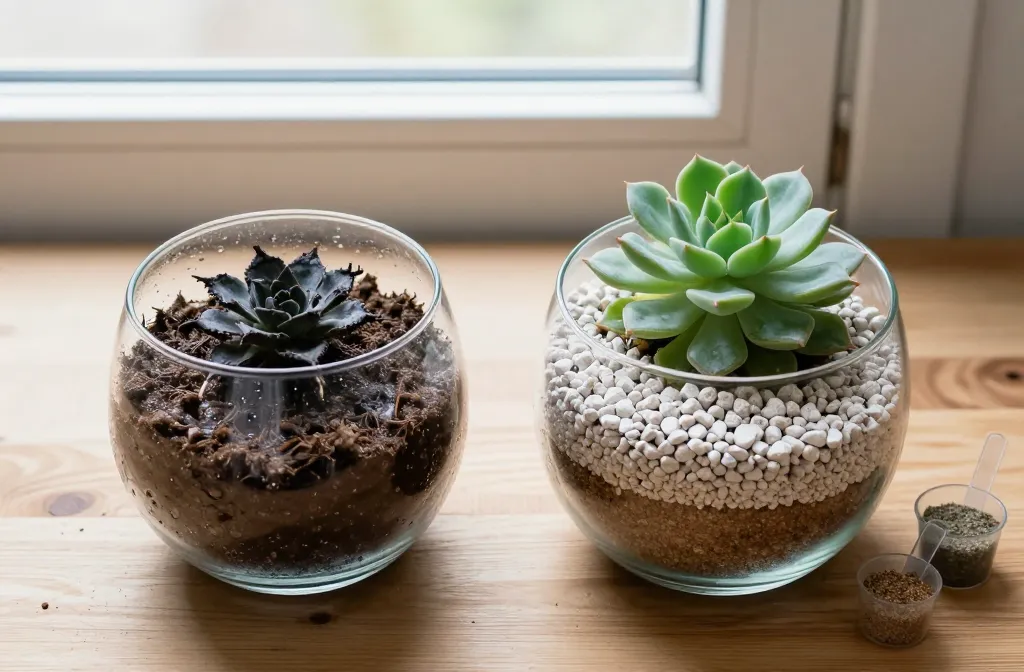
1. Using Regular Potting Soil: Water Holds Around Cuttings And Rots Them
Standard potting mixes stay damp for days, which suffocates unrooted succulent stems. In a terrarium’s limited airflow, moisture lingers even longer, inviting rot before roots can form.
Signs To Watch For
- Cutting bases turning brown or black and soft within 7–10 days
- Soil sticking to your finger like cake batter after 3 days
- A sour, swampy smell when you open the terrarium
What To Use Instead
- Gritty base mix: 2 parts cactus/succulent mix + 1 part coarse horticultural sand + 1 part 3–6 mm pumice or perlite
- If your garden centre only has cactus mix and perlite, blend 3:1 cactus mix to perlite. It should feel light, crumbly, and fall off your fingers
- A thin decorative top layer of pea gravel to keep stems off damp particles
How To Fix It
- Scoop out the top 3–4 cm of regular potting soil
- Replace with the gritty blend above and top with 0.5–1 cm of pea gravel
- Let the terrarium sit open for 24 hours before re-placing cuttings
Takeaway: Swap any all-purpose potting soil for a fast-draining succulent blend bulked with sand and perlite before you add a single cutting.
2. Skipping A Drainage Layer: Water Pools Under The Roots With Nowhere To Go
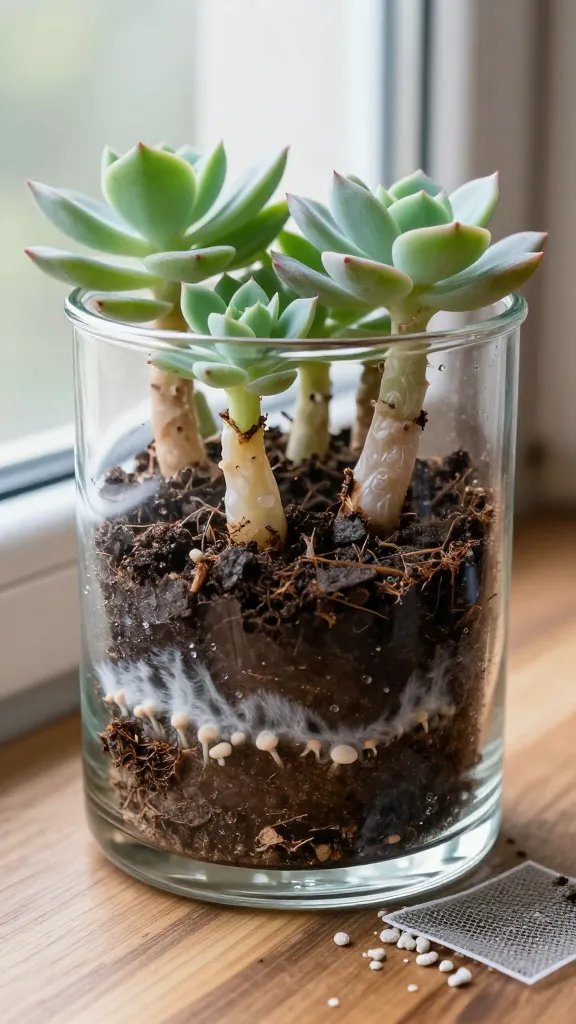
Terrariums don’t have holes. Without a drainage layer, extra water gathers around the substrate and wicks back up into cutting wounds. That standing moisture rots stems from the bottom.
Signs To Watch For
- Condensation lingering at the bottom third of the glass all day
- Soil that looks dry on top but feels soggy 2–3 cm down
- Mushrooms or white fuzz appearing along the glass line
How To Build A Simple Drainage Layer
- Pour 1.5–2.5 cm of rinsed aquarium gravel or small pebbles into the bottom
- Add a thin sheet of window screen or a circle cut from a clean mesh produce bag to keep mix from falling through
- Layer your gritty substrate 4–6 cm above that
What To Use If You Can’t Find Mesh
- Paper coffee filter trimmed to size (it will last long enough for rooting)
- A piece of landscaping fabric from the hardware store
Action today: If your terrarium lacks a drainage layer, dismantle the planting, add 2 cm of pea gravel with a mesh separator, and replant — your cuttings will thank you within a week.
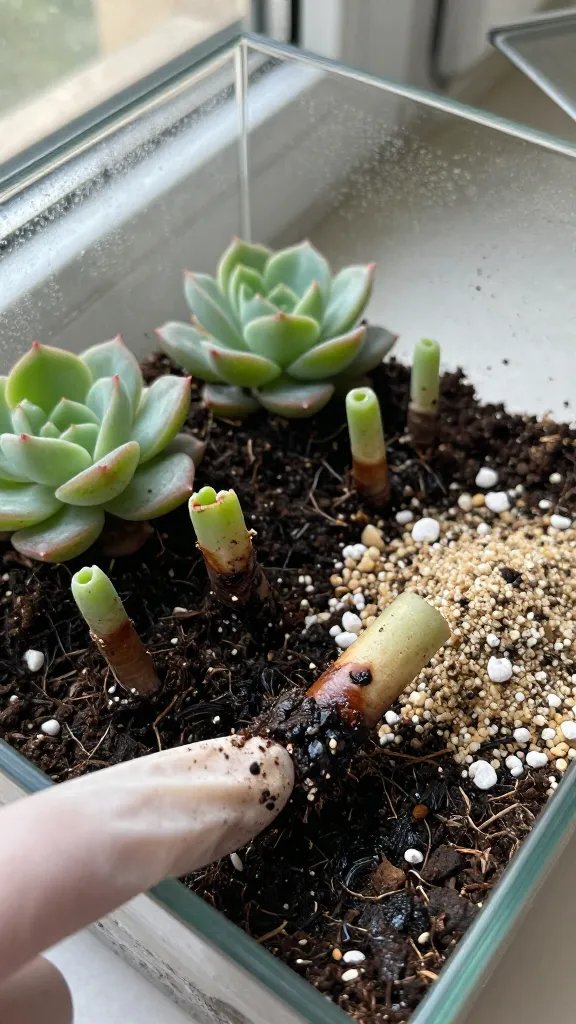
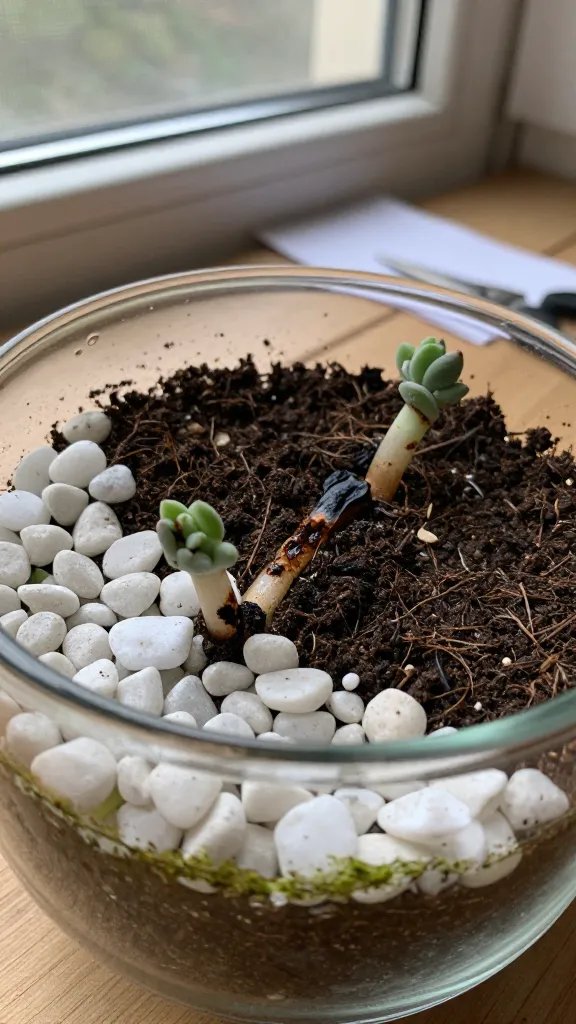
3. Planting Fresh Cuttings Into Damp Mix: Open Wounds + Moisture = Guaranteed Rot
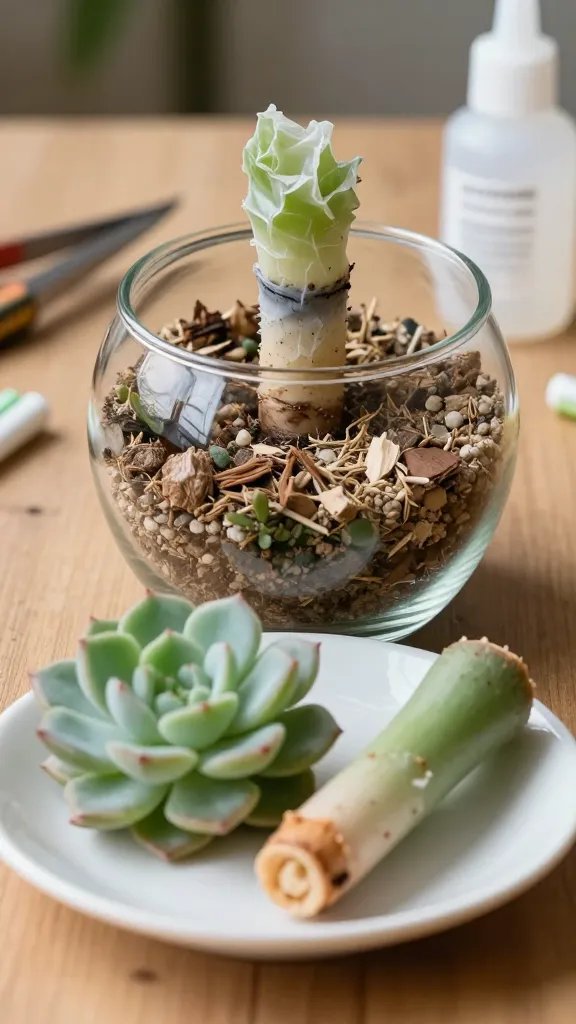
Freshly cut succulent stems and leaves leak sap and need to callus before touching moisture. If you set them into a damp substrate, bacteria have a free runway into the tissue.
Signs To Watch For
- Leaf cuttings turning translucent or wrinkling unevenly after 5–7 days
- Stems collapsing at the base while the top still looks fine
- Black dots or a grey ring where the cutting meets the substrate
The Callus-Then-Place Method
- Let cuttings dry on a plate out of direct sun for 24–72 hours until the cut end feels dry and slightly firm
- Prep completely dry gritty substrate and a 0.5–1 cm gravel top
- Set cuttings on top of the gravel, or nestle stems just 0.5 cm into the dry mix
- Do not water for 7 days; then mist the substrate lightly, not the leaves
Extra Insurance
- Dip the cut end in cinnamon from your spice rack — a mild antifungal barrier
- Use a wooden skewer to make a tiny pilot hole so you don’t bruise the stem
Takeaway: Always let cut ends dry for 1–3 days and place into dry mix; delay the first light mist until day seven.
4. Fine Sand Or Silt-Heavy Layers: Particles Compact And Suffocate New Roots
Play sand and cheap “decorative sand” often contain fine silt that packs tight. Compaction blocks air, so baby roots stall, rot, or circle on the surface searching for oxygen.
Signs To Watch For
- Water puddling on top for more than a minute after a light mist
- Surface crust that cracks when you press it
- Roots developing only on the side that touches a rock or the glass
Choose The Right Grit
- Coarse horticultural sand labeled “sharp” or “builder’s sand,” not play sand
- Pumice (preferred) or chunky perlite sized 3–6 mm
- Chicken grit (crushed granite) from a farm supply store if garden grit is unavailable
How To Fix A Compacted Layer
- Fluff the top 2 cm with a chopstick to break the crust
- Blend in a handful of pumice or perlite per cup of mix
- Top with 0.5 cm pea gravel so mist doesn’t cement the surface again
Action today: Pinch the substrate; if it molds into a smear, mix in pumice or perlite until it crumbles cleanly in your fingers.
5. No Barrier Between Decorative Stones And Soil: Wicking Keeps Everything Wet
Layered terrariums look great, but bare contact between decorative stones and soil acts like a sponge chain. Moisture wicks up from the bottom and never gives cuttings a dry spell.
Signs To Watch For
- Pretty layers, unhealthy plants — especially rot that starts at the interface line
- Condensation forming where stones meet soil, even when the top looks dry
- Algae greening the glass along the boundary
Add A Simple Capillary Break
- Place a sheet of window screen, landscaping fabric, or trimmed coffee filter between rock and soil layers
- Use a 0.5–1 cm pea gravel cap on top of the soil under cuttings to keep stems off damp fines
- Avoid sand-only “design” layers; they compact and bridge moisture
Watering Protocol For Layered Displays
- Mist the substrate at the inner edge, not down the glass where it meets the stones
- Water sparingly: 1–2 tablespoons every 10–14 days in a dry home, every 3–4 weeks in a humid home
Takeaway: Insert a mesh barrier wherever stones touch soil and add a thin gravel cap so moisture can’t wick into fresh cuttings.
Frequently Asked Questions
Can succulents actually live in a closed terrarium?
Succulents prefer dry air and fast-drying soil, which closed terrariums don’t provide. Use open-top vessels or keep the lid off. If you inherit a lidded jar, remove the lid permanently and move the jar near bright indirect light. Aim for a dry-down period of 7–10 days between light mistings while they root.
How do I know when to give the first water after placing cuttings?
Wait a full 7 days after placing callused cuttings on dry substrate. Then give a light mist to dampen only the top 1 cm, not a pour. If your home feels humid or you see any condensation on the glass in the morning, delay to day 10. The goal is to nudge roots to seek moisture, not soak the wound.
What’s a simple substrate recipe I can buy in one trip?
Pick up a bag of cactus/succulent mix, a bag of coarse perlite or pumice, and a small bag of pea gravel. Blend 3 cups cactus mix with 1 cup perlite and 1 cup pumice or extra perlite. Use pea gravel for the 2 cm drainage layer and a 0.5–1 cm top dressing. This combination drains fast, stays airy, and protects cutting bases.
My cuttings keep shriveling instead of rotting. What’s wrong?
Slight shriveling is normal as cuttings use stored water to make roots. If they wrinkle deeply within a week, the air is too hot or the light is too intense. Move the terrarium to bright indirect light near a window, not direct sun, and give a light mist to the substrate on day 7. Add a thin gravel cap to reduce surface evaporation around the stem.
Do I need activated charcoal in the substrate?
Charcoal helps control odours and keeps water fresher in closed tropical terrariums. For succulents in open vessels, it’s optional. If you already have it, sprinkle a thin layer (about 0.5 cm) above the drainage pebbles before the mesh. Don’t mix large amounts into the soil — you want gritty, not spongy.
How deep should the substrate be for rooting succulent cuttings?
Keep it shallow so it dries predictably: 4–6 cm of gritty mix over 1.5–2.5 cm of drainage pebbles. A shallow bed warms and dries evenly, which speeds rooting. Deep beds stay wet in the middle and invite rot from below. Once rooted in 4–8 weeks, you can transplant to a larger container if desired.
Conclusion
Succulent terrariums thrive when the substrate drains fast, stays airy, and keeps fresh cuts off moisture. Build those layers once, and you’ll stop the rot cycle before it starts. Start today by rebuilding one small vessel with a gravel base, mesh, and a gritty mix — you’ll see cleaner calluses and new roots within weeks.