Stop Killing Plants 5 Potting Mix Mistakes That Compact Soil and Suffocate Roots
I’ve watched healthy houseplants stall, yellow, and collapse because their roots couldn’t breathe. Every time, the culprit lived in the pot: a heavy, compacted mix I trusted far too long. If your soil feels like a brick or water sits on top, you’re in the same boat. In this guide, you’ll learn the five mistakes that compress potting mix and choke roots, plus simple fixes you can do today with supplies from a garden centre or hardware store.
1. Packing The Mix Too Tightly When Repotting
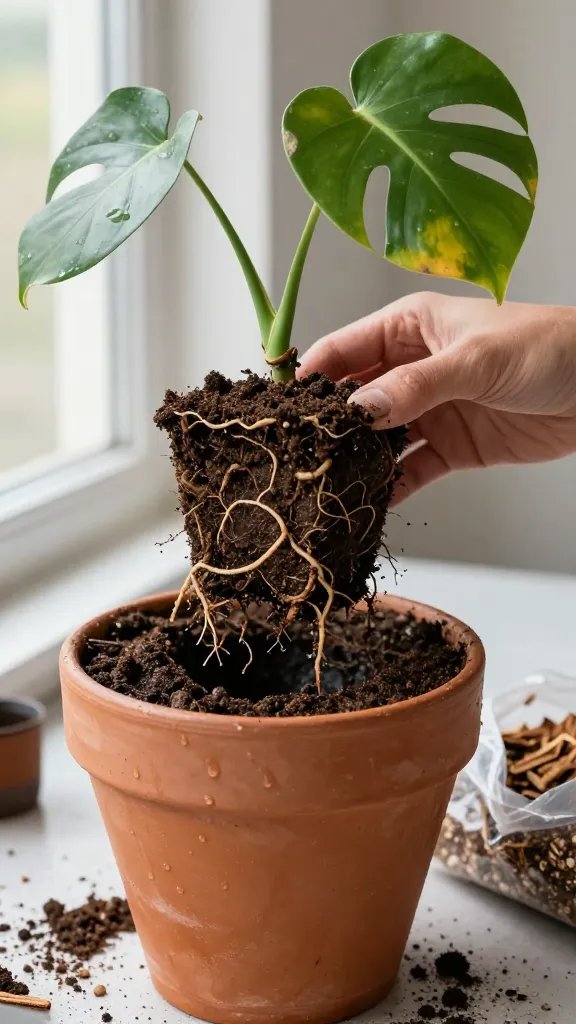
Compacted soil squeezes out air pockets that roots need. Water then runs down channels at the edge or puddles on top, while the center stays wet and airless. Plants stop growing, leaves droop, and rot sets in from the crown down.
Signs To Watch For
- Water beads on the surface before slowly sinking in
- Root ball feels like a dense cake when you push a finger in
- Leaves droop after watering and perk up only slightly
- Soil pulls away from the pot walls as a single hard mass
How To Fix It
- Repot and backfill in layers, tapping the pot’s sides to settle mix instead of pressing down with your palm.
- Use your fingers to gently crumble the root ball’s outer 1–2 cm so new mix can interlock without crushing it.
- Stop adding mix when the surface sits 1–2 cm below the rim for a watering well. Don’t compress the top layer.
What To Use Instead
- A good-quality, peat- or coir-based potting mix from the garden centre labeled for houseplants
- Optional add-ins for structure: perlite or pumice to keep air gaps
Action today: Press a chopstick into the potting mix; if it meets uniform resistance like rubber, lift the plant, loosen the outer roots by hand, and repot without packing the soil.
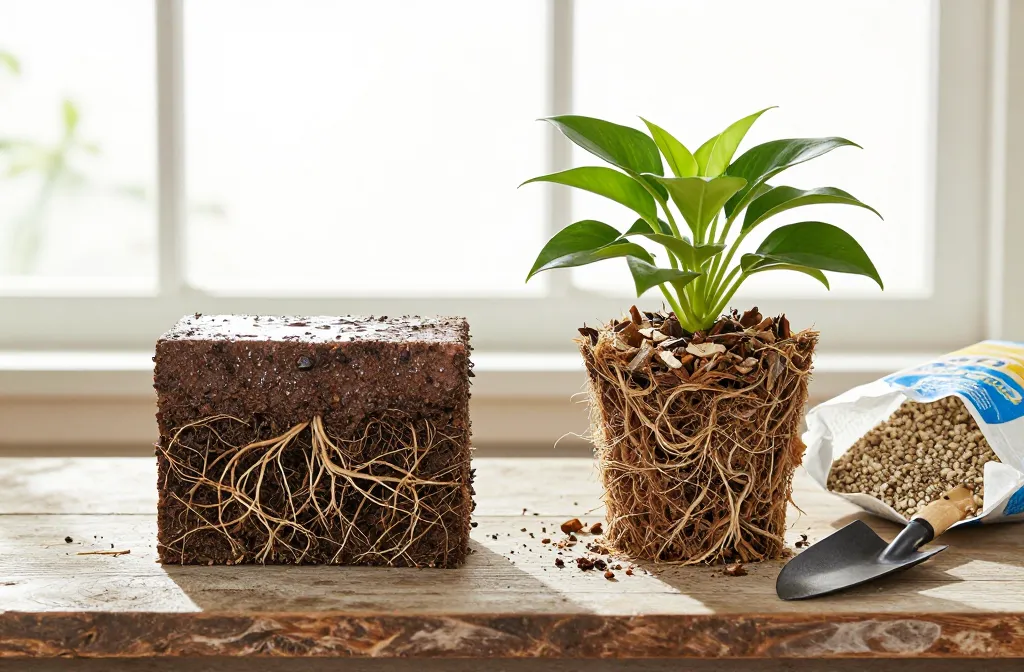
2. Using Straight Garden Soil Or “Topsoil” In Pots
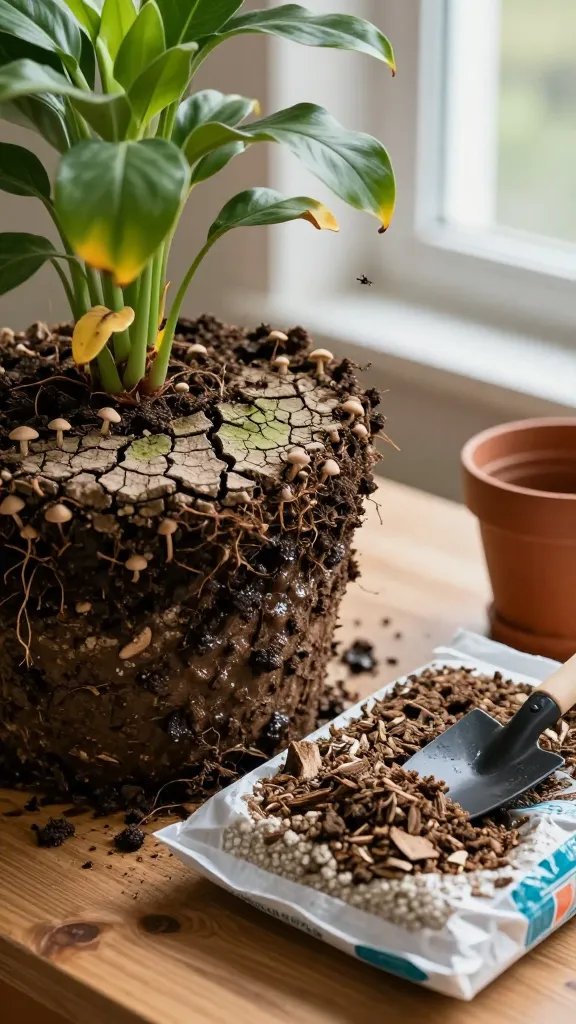
Garden soil and bagged “topsoil” were made for the ground, not containers. They settle into a dense slab, hold water unevenly, and create an airless zone where roots suffocate. Even vigorous plants stall, then develop root rot from the soggy center.
Signs To Watch For
- Soil dries like cracked earth on top but stays wet deep down
- Mushroom caps or green algae on the surface
- Foul, swampy smell after watering
- Gnats hovering when you disturb the soil
How To Fix It
- Replace at least the top half of the pot with a true potting mix; blend into the old to avoid shocking roots.
- For heavy plants, blend 2 parts potting mix with 1 part perlite or fine bark to keep it open.
- Switch to a pot with a drainage hole if yours doesn’t have one. No hole means guaranteed compaction and stagnation.
What To Use Instead
- Bagged houseplant potting mix from a garden centre (look for “light” or “aerated” on the bag)
- For moisture-loving plants like Ferns or Peace Lily, add a handful of fine bark to prevent slumping
Takeaway: If the bag doesn’t say “potting mix” and feels heavy when wet, don’t use it in containers—swap it for a light, store-bought mix designed for pots.
3. Skipping Chunky Aeration (Perlite, Pumice, Or Bark)
Even a good mix collapses over months as fine particles wash down. Without chunky pieces to prop it open, the soil compresses and stays wet longer than roots can handle. You get yellowing leaves, blackened root tips, and a plant that looks thirsty even though the soil is wet.
Signs To Watch For
- Pot feels heavier week by week with the same amount of water
- Watering frequency stretches longer and longer, then the plant still wilts
- Roots look tan or black at the tips instead of white and crisp
How To Fix It
- Blend in 20–40% chunky aeration by volume: perlite, pumice, or fine orchid bark. For water-hungry plants, use 20%; for drought-tolerant plants like Snake Plant or ZZ, use 30–40%.
- Top-dress with a thin layer (0.5–1 cm) of bark or perlite to slow compaction and crusting on the surface.
- When repotting, keep aeration evenly mixed—don’t let perlite float to the top. Stir thoroughly before filling.
What To Use Instead
- Perlite: light, white granules that hold air pockets
- Pumice: heavier and cleaner, ideal indoors if you dislike perlite dust
- Fine orchid bark: adds structure and gentle drainage
Action today: Scratch back the top 3–4 cm of soil and mix in a handful of perlite or fine bark around the edges—instant breathing room without a full repot.
4. Letting Fine Particles Clog The Drainage Hole
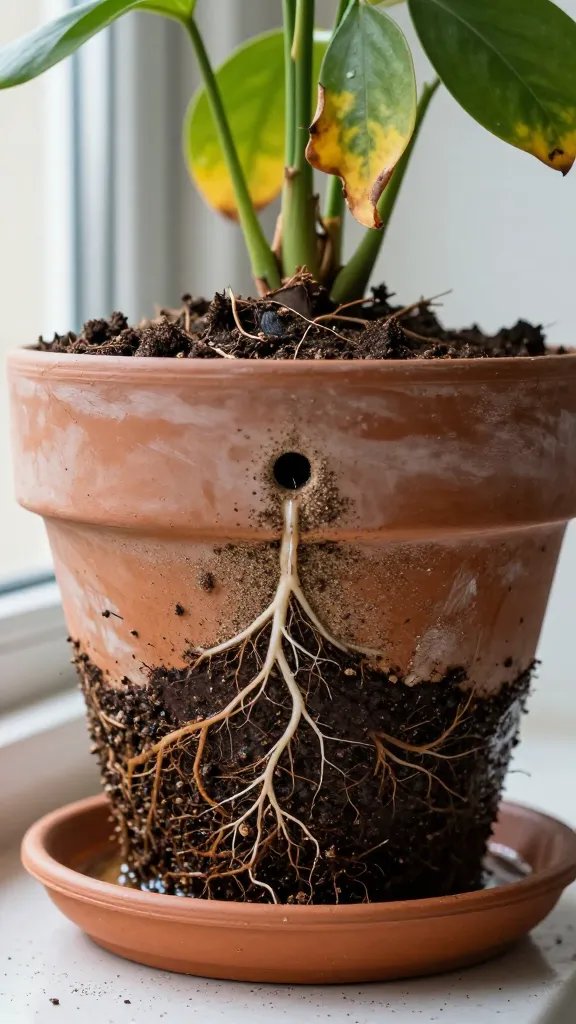
When fines clog the exit, water pools at the bottom, creating a hidden swamp that suffocates roots from below. Even with a “well-draining” mix up top, the base turns anaerobic and sour. Plants decline for no obvious reason until you unpot and find a soggy layer at the bottom.
Signs To Watch For
- Water trickles from the drainage hole several seconds after you start pouring
- Soil line sinks noticeably month to month
- Brown, mushy roots at the base, healthy white roots only near the sides
How To Fix It
- Before filling, cover the drainage hole with a curved shard of a broken terracotta pot or a piece of plastic mesh from a sink strainer—this holds mix back but lets water through.
- Skip rocks at the bottom. A “drainage layer” pushes water into the root zone and speeds compaction.
- Water in short rounds—pour, count to 10, pour again—so the mix settles without forcing fines down the hole.
What To Use Instead
- Mesh from a garden centre, a piece of window screen, or a coffee filter folded once (change yearly)
- Terracotta or nursery pots with honest, unobstructed holes
Takeaway: Lift your pot after watering; if it feels sloshy at the base or drains slowly, unpot, clear the hole, add a mesh cover, and refill with your mix—no rock layers.
5. Watering Habits That Collapse Structure
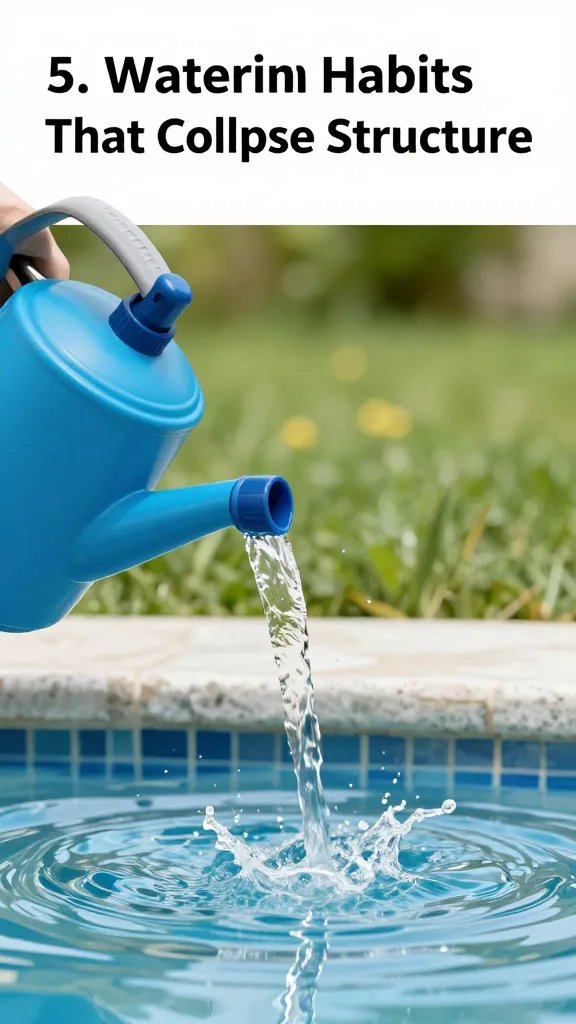
Hard, heavy pours and constant “sips” both break down soil. A forceful stream compacts the top few centimeters into a crust. Frequent small waterings keep the whole column damp, dissolving the structure so it slumps and starves roots of oxygen.
Signs To Watch For
- Crusty or mossy surface that repels water
- Runoff racing down the pot’s sides while the center stays dry
- Wilting only hours after watering because water bypassed the root zone
How To Fix It
- Use a small watering can with a fine rose or a squeeze bottle to deliver a gentle shower.
- Water deeply but less often: apply water until it drains from the hole, then wait until the top 3–5 cm feel dry before the next session. For succulents, let the mix dry completely.
- If the surface repels water, poke 6–8 holes with a chopstick, then water in three slow rounds so moisture soaks evenly.
What To Use Instead
- A watering can with a diffuser head from any hardware store
- A simple plastic squeeze bottle for precision around stems
Action today: Before your next watering, aerate the surface with a chopstick, then water in two gentle passes till you see steady drainage—your soil will absorb instead of collapse.
Frequently Asked Questions
How can I tell if my potting mix is too compact without unpotting?
Push a wooden skewer or chopstick into the soil to the bottom. If it’s hard to insert and comes out mostly clean, the mix is dense and water isn’t moving through. If it slides in and comes out slightly damp with a few crumbs, you still have air spaces. Repeat in three spots to be sure.
Do I need different mixes for different plants, or can I use one base mix?
Start with one good houseplant potting mix and tune it. Add 30–40% perlite or pumice for Snake Plants, ZZ, and Succulents. Add 10–20% fine bark for Monsteras and Philodendrons. Keep it closer to straight mix for Ferns and Peace Lily, with just a handful of bark to prevent slumping.
Is terracotta better than plastic for preventing compacted soil?
Terracotta breathes and wicks moisture, so mixes dry more evenly and resist staying soggy. Plastic holds moisture longer, which is fine if you add enough aeration and water less often. For heavy-handed waterers, terracotta is more forgiving. For plants that like steady moisture, plastic works if you manage watering.
My pot has no drainage hole. Can I still avoid compaction?
Without a hole, water collects and compresses the mix from the bottom up. If you must use a decorative pot, nest a nursery pot with holes inside it and empty any collected water after each session. Add 20–30% perlite or pumice and water lightly in stages. Long term, switch to a pot with a hole to protect roots.
How often should I refresh or repot to prevent compaction?
Most houseplants benefit from a refresh every 12–18 months. If growth slows or watering acts “weird” (runs off or takes forever to drain), repot sooner. Replace at least the top third of the mix annually and mix in fresh perlite or bark. Fast growers like Pothos and Spider Plants may need a full repot each spring.
Does adding sand to potting soil improve drainage?
Play sand and builder’s sand often make mixes heavier and more compact, especially indoors. They fill air gaps instead of creating them. Use perlite, pumice, or fine bark to add structure and oxygen. If you want a gritty mix for succulents, choose a commercial cactus mix and still add 20–30% perlite or pumice.
Conclusion
You don’t need special tools to keep roots breathing—just a lighter mix, a bit of chunky aeration, gentle watering, and a clear path out the drainage hole. Start with one pot today, fix the compaction, and watch how quickly new growth follows. When you’re ready, dial mixes by plant type and repot on a yearly schedule to stay ahead of the squeeze.