Explore the World of Mini Terrariums: Tiny Ecosystems at Home
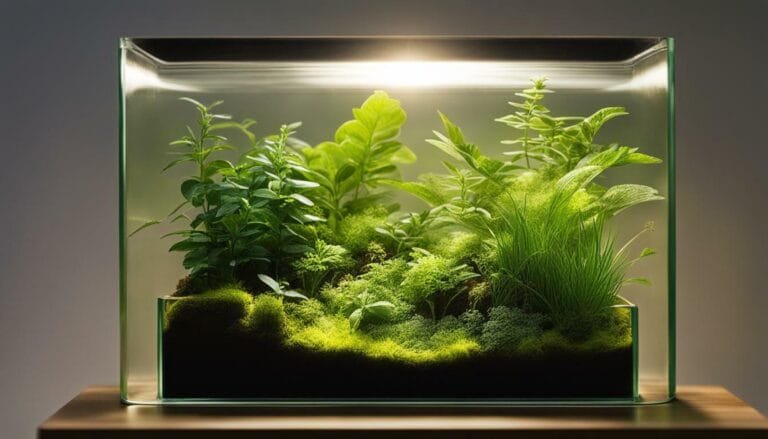
Mini terrariums offer a captivating glimpse into the wonders of nature, allowing you to create and maintain your own miniature world within the confines of your home. These tiny ecosystems bring the beauty of the outdoors indoors, providing a unique and enchanting addition to any living space.
Creating a mini terrarium is a creative and rewarding experience. With just a few simple materials such as a clear bottle or jar, moss, small rocks, and optional soil and decorative accessories, you can build a self-sustaining miniature ecosystem that will thrive and evolve over time.
Key Takeaways:
- Mini terrariums allow you to create and maintain your own miniature world at home.
- They bring the beauty of nature indoors, adding a touch of enchantment to any living space.
- Creating a mini terrarium requires basic materials such as a clear bottle or jar, moss, and small rocks.
- Optional soil and decorative accessories can be added to enhance the terrarium.
- Sealing the terrarium creates a self-sustaining environment.
Whether you are a nature lover, a DIY enthusiast, or simply looking for a unique and visually stunning decoration for your home, mini terrariums are an excellent choice. They offer a sense of tranquility and provide a connection to the natural world in a small and manageable form.
What are Mini Terrariums?
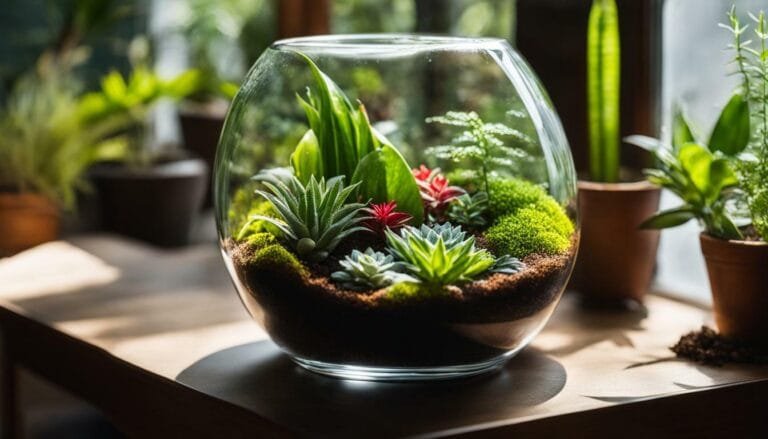
Mini terrariums are encapsulated ecosystems that mimic the natural world on a small scale, creating a miniature environment that can thrive within the confines of a glass container. These tiny ecosystems are a beautiful way to bring a touch of nature into your home, as they allow you to create a self-sustaining world within a jar. With careful selection of materials and proper maintenance, mini terrariums can thrive for months or even years, offering a mesmerizing glimpse into the wonders of nature.
Creating a mini terrarium is like building your own little paradise. It all starts with a clear bottle or jar that acts as a transparent window into this miniature world. The jar is filled with layers of rocks for drainage, soil for stability (optional), and damp moss that acts as a natural carpet. Once sealed, the terrarium becomes a self-sustaining ecosystem, with the moss growing and creating a lush green landscape.
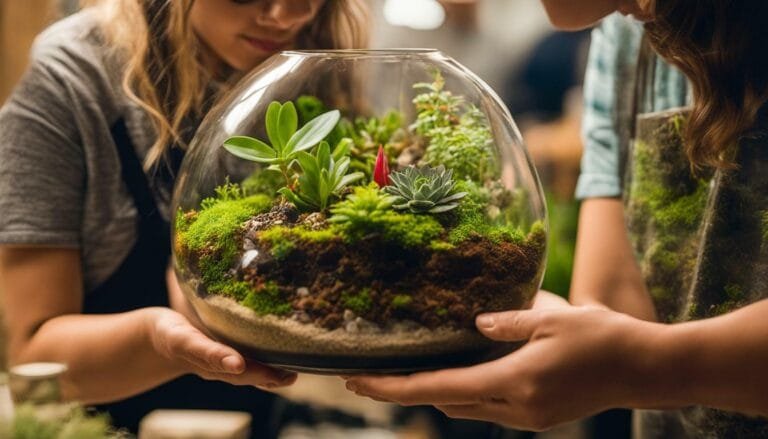
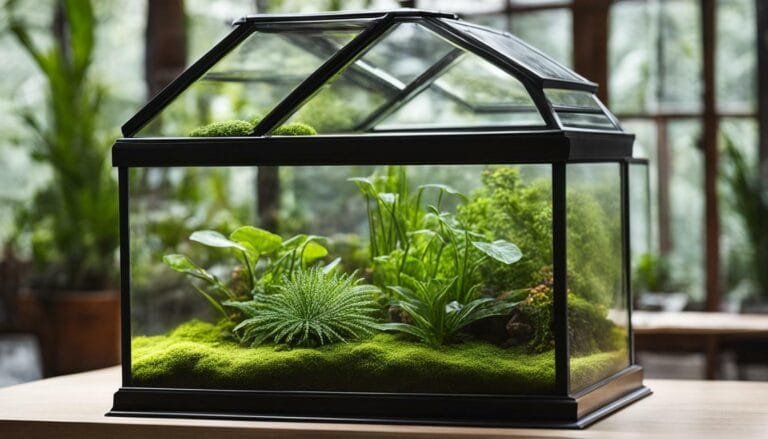
Exploring the world of mini terrariums is not only a rewarding and creative endeavor, but it can also be a great learning experience. Terrarium workshops offer the opportunity to delve deeper into this fascinating hobby, providing guidance and inspiration for creating unique terrarium designs. Additionally, there are various variations of terrariums to explore, including the option to incorporate small invertebrate animals, adding an extra element of interest to your tiny ecosystem.

Building your own mini terrarium is a simple yet satisfying process. By following a step-by-step guide, you can bring your miniature oasis to life. With just a few basic materials and a little bit of creativity, you can create a beautiful and self-sustaining ecosystem that will bring joy and tranquility to your living space.
| Materials Needed: | Optional Accessories: |
|---|---|
| Clear bottle or jar | Tiny figurines |
| Small rocks | Decorative pebbles |
| Moss | Miniature plants |
| Soil (optional) | Fairy lights |
Once you have gathered your materials, the process begins with layering the rocks at the bottom of the jar, providing a stable foundation and ensuring proper drainage. You can then add a layer of soil (if desired) and carefully place the damp moss on top. Seal the jar to create a self-sustaining environment, and find a sunny spot in your home where your terrarium can thrive.
With time, you will witness the moss growing, creating a miniaturized world within the jar. The beauty of mini terrariums lies in their ability to bring nature indoors, providing a sense of peace and tranquility. So why not embark on this enchanting journey and create your own small wonder of nature with a mini terrarium?
Creating a Mini Terrarium: Step-by-Step Guide
Creating your own mini terrarium is a rewarding and creative endeavor that requires just a few simple materials and some patience. With these easy steps, you can bring a miniature ecosystem to life right in your own home.
Materials Needed for a Mini Terrarium
Before getting started, gather the following materials:
- A clear bottle or jar with a lid
- Small rocks or pebbles
- Damp moss
- (Optional) Soil
- (Optional) Decorative accessories
Step 1: Building the Foundation with Rocks
Start by adding a layer of small rocks or pebbles to the bottom of the bottle or jar. This layer will provide drainage for excess water and create a stable foundation for your mini terrarium.
Step 2: Adding Soil (Optional)
If you choose to incorporate soil into your terrarium, carefully add a layer on top of the rocks. Soil can provide additional nutrients for plants and help them thrive within the ecosystem.
Step 3: Adding Damp Moss
Next, add a layer of damp moss on top of the soil or rocks. The moss acts as a natural carpet, retaining moisture and creating a lush environment for your mini terrarium.

Sealing the Terrarium and Maintenance Tips
Once you have added all the layers, seal the bottle or jar to create a self-sustaining environment. The closed container will create a mini greenhouse effect, keeping moisture trapped inside. Place your terrarium in a spot with indirect sunlight and monitor the moisture levels over time. If needed, open the lid briefly to allow excess moisture to escape. Avoid placing the terrarium in direct sunlight, as it may cause the interior to become too hot.
Exploring Terrarium Workshops and Variations
If you want to learn more about mini terrariums and explore different variations, consider attending a terrarium workshop. These workshops provide hands-on guidance and inspiration for creating unique terrarium designs. You can also experiment with incorporating small invertebrate animals into your terrarium, such as tiny snails or insects.
Creating your own mini terrarium allows you to bring a touch of nature into your living space. With a little creativity and care, you can create a captivating miniature world that will bring joy and tranquility to your home.
Materials Needed for a Mini Terrarium
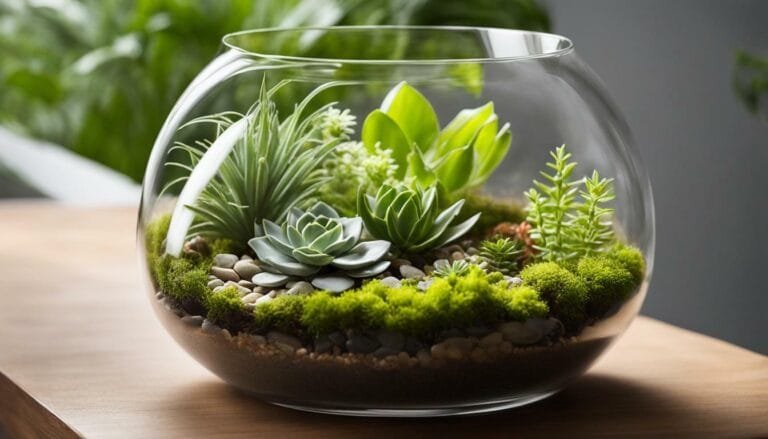
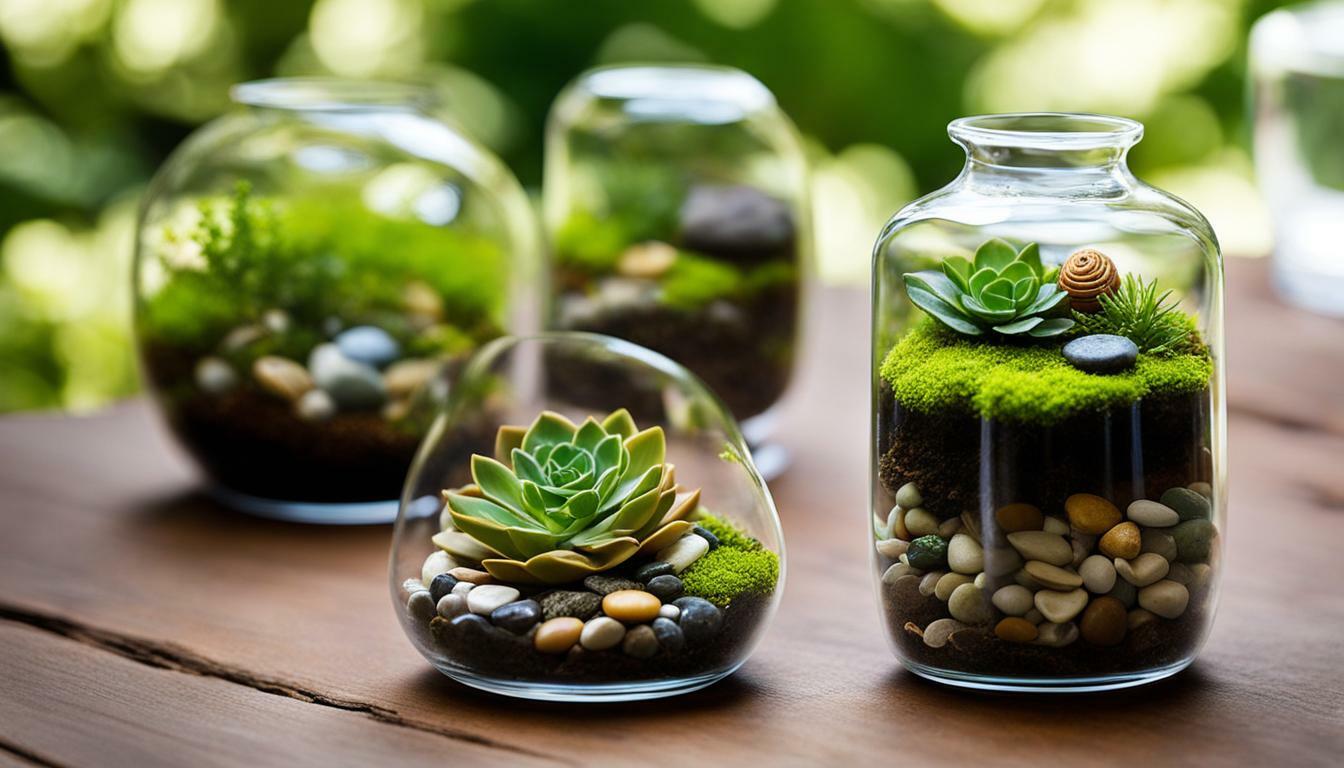
To get started on your mini terrarium journey, gather the following materials: a clear glass bottle or jar, moss, small rocks, and if desired, soil and decorative elements. These components are essential for creating a self-contained ecosystem that will thrive in your mini terrarium.
Using a clear glass bottle or jar will allow you to observe the growth and development of your mini terrarium from all angles. The transparency of the container will also enhance the visual appeal of your tiny ecosystem, as it will showcase the intricate details of the plants and other elements within.
Moss is a key ingredient for creating a mini terrarium. It acts as a natural carpet, providing a cozy home for the plants and helping to retain moisture within the enclosed environment. Look for damp moss that is well-suited to the conditions you plan to create in your terrarium.
The addition of small rocks is important for drainage purposes. These rocks will create a stable foundation within the terrarium, allowing excess water to flow away from the plants and preventing them from becoming waterlogged. Opt for rocks that are small in size and have smooth surfaces, as they will be easier to work with and provide a more aesthetic appeal to your mini terrarium.

At this stage, you can choose to add soil to your mini terrarium if desired. Soil can provide additional nutrients and support for the plants that you will introduce into the ecosystem. However, it is important to select the appropriate type of soil, considering the needs of the plants you plan to incorporate.
Lastly, consider adding decorative elements to personalize your mini terrarium. These can include small figurines, pebbles, or even tiny fairy lights to create a whimsical atmosphere. Choose elements that complement the overall theme and design of your miniature ecosystem.
With these materials in hand, you are well-equipped to embark on your mini terrarium journey. Follow the step-by-step guide in the next section to bring your tiny ecosystem to life.
Step 1: Building the Foundation with Rocks
The first step in creating your mini terrarium is to establish a solid foundation by adding a layer of rocks at the bottom of the container. These rocks serve a dual purpose: they provide drainage for excess water and create a stable base for your miniature ecosystem to thrive.
Choose small rocks that are not too bulky to ensure they fit comfortably in the container. You can use decorative rocks or stones of various colors and sizes to add a touch of visual interest. Place the rocks evenly across the bottom of the container, ensuring they cover the entire surface area.

By building a foundation with rocks, you create a space for excess water to drain, preventing root rot and maintaining the overall health of your mini terrarium. This step also adds an aesthetic element, serving as a visually appealing base for the layers to come.
Creating a Stable Environment
Establishing a stable environment is crucial for the success of your mini terrarium. The rocks not only aid in drainage but also act as a barrier between the soil and the water, preventing soil erosion and providing a suitable habitat for the plants and moss to grow.
| Materials Needed: | Clear container (bottle or jar) | Small rocks or stones | Optional: Decorative rocks |
|---|---|---|---|
| Step-by-Step Guide: | |||
| 1. Start by adding a layer of small rocks at the bottom of the container. | |||
| 2. Spread the rocks evenly to cover the entire surface area. | |||
| 3. Ensure the rocks are not too bulky, allowing space for the other layers of the terrarium. | |||
Now that you’ve laid a solid foundation, your mini terrarium is ready for the next step: adding soil. Stay tuned for the next section where we’ll guide you through this optional but beneficial step in creating your own tiny ecosystem at home.
Step 2: Adding Soil (Optional)
If you choose to incorporate soil in your mini terrarium, this step will provide essential nutrients for your miniature plants to thrive. The soil acts as a foundation for the plants, allowing their roots to anchor and absorb water and nutrients. When selecting soil for your mini terrarium, it’s important to choose a high-quality potting mix that is well-draining and sterile to prevent the growth of harmful bacteria or fungi.
To add the soil to your terrarium, carefully pour a thin layer on top of the rocks, ensuring that it is evenly spread. Use a spoon or small gardening tool to level the soil and create a smooth surface. Take care not to add too much soil, as it can lead to water retention issues and may hinder the growth of your plants.
When choosing plants for your mini terrarium, opt for those that thrive in humid environments and require low to moderate light conditions. Some popular choices include ferns, mosses, and small succulents. Carefully place the plants into the soil, arranging them in a visually appealing way and ensuring that their roots are covered. Pat down the soil gently around the plants to secure them in place.

Remember to research the specific care requirements of the plants you choose and provide them with the appropriate amount of light, water, and humidity. Regularly monitor the moisture levels in your terrarium and adjust accordingly. Avoid overwatering, as excess moisture can lead to root rot and other plant health issues. With the right balance of soil, plants, and care, your mini terrarium will flourish and bring a touch of nature to your home.
| Step 2 Recap |
|---|
| Add a thin layer of high-quality potting mix on top of the rocks. |
| Ensure the soil is well-draining and sterile to support plant growth. |
| Choose plants that thrive in humid environments and require low to moderate light. |
| Place the plants in the soil, arranging them in an aesthetically pleasing manner. |
| Monitor moisture levels, avoiding overwatering to prevent root rot. |
Step 3: Adding Damp Moss
Damp moss is a crucial component of your mini terrarium, as it serves multiple purposes, including retaining moisture and creating a visually pleasing landscape. Not only does it provide a soft and lush backdrop for your miniature world, but it also helps to create a humid microclimate within the terrarium, which is essential for the overall health and growth of the plants.
When adding the damp moss, gently press it down onto the soil or rocks, ensuring that it covers the surface evenly. You can use a small misting spray bottle to lightly moisten the moss before placing it in the terrarium. This is important to ensure that the moss stays hydrated and helps to maintain the moisture levels within the ecosystem.
“Damp moss acts as a natural carpet, creating a beautiful and organic landscape within your mini terrarium. It adds texture, depth, and a touch of natural beauty to the overall composition.”
One of the advantages of using damp moss in your mini terrarium is that it helps to prevent excessive evaporation, as it acts as a barrier between the soil and the open air. This helps to retain moisture and creates a more stable and humid environment for the plants to thrive.

Summary:
Adding damp moss is an important step in creating a mini terrarium. It serves multiple purposes, including retaining moisture, creating a visually pleasing landscape, and maintaining a humid microclimate within the terrarium. By gently pressing it down onto the soil or rocks, you can ensure even coverage and use a misting spray bottle to lightly moisten the moss. This helps to prevent excessive evaporation and provides a stable environment for the plants to flourish. With damp moss, your mini terrarium will come to life, creating a vibrant and captivating display of nature in your own home.
| Key Points: |
|---|
| Damp moss retains moisture and creates a visually pleasing landscape. |
| Press the moss onto the soil or rocks, ensuring even coverage. |
| Lightly mist the moss to keep it hydrated. |
| Moss acts as a barrier, preventing excessive evaporation and maintaining a stable environment. |
Sealing the Terrarium and Maintenance Tips
Once all the elements are in place, sealing your mini terrarium will create a self-contained ecosystem that requires minimal maintenance. This step is crucial to ensure the longevity of your tiny world and the well-being of its inhabitants. By sealing the terrarium, you create a microclimate where water is recycled and the plants receive the right amount of humidity.
To seal your terrarium, place the lid securely on the jar or bottle, ensuring that it is airtight. This will prevent moisture from escaping and maintain the perfect balance for your mini ecosystem. It’s important to note that while a sealed terrarium reduces the need for frequent watering, it does not eliminate the need for occasional monitoring. Keep an eye on the condensation inside the jar, as excessive moisture may indicate the need for ventilation, while lack of condensation may require a light misting of water.

Maintenance Tips:
- Place your sealed terrarium in a spot with indirect sunlight. Too much direct sunlight can cause excessive heat and damage the delicate ecosystem.
- Ensure proper ventilation by occasionally opening the lid slightly to allow fresh air to circulate.
- Monitor the moisture levels by checking the condensation inside the jar. Adjust watering or misting as needed.
- Trim and remove any dead or overgrown plants to maintain a balanced and visually appealing terrarium.
- Prevent the growth of mold or fungi by avoiding overwatering and ensuring good air circulation.
By following these maintenance tips, you can enjoy the beauty and serenity of your mini terrarium for years to come. With its self-sustaining nature and low-maintenance requirements, it’s no wonder that mini terrariums have become a popular choice for nature enthusiasts and home decor enthusiasts alike.
| Materials Needed | Step-by-Step Guide | Maintenance Tips |
|---|---|---|
| Clear bottle or jar | Building the foundation with rocks | Place terrarium in indirect sunlight |
| Moss | Adding soil (optional) | Ensure proper ventilation |
| Small rocks | Adding damp moss | Monitor moisture levels |
| Optional: Soil and decorative accessories | Sealing the terrarium | Trim and remove dead plants |
Exploring Terrarium Workshops and Variations
If you’re looking to further expand your knowledge and creativity with mini terrariums, consider attending a terrarium workshop, where you can explore various techniques and discover exciting variations. These workshops provide a hands-on experience that allows you to learn from experts in the field and gain valuable insights into the art of terrarium making.
During a terrarium workshop, you’ll be guided through the step-by-step process of creating your own mini ecosystem. You’ll have the opportunity to select unique materials, experiment with different plant species, and personalize your terrarium with decorative elements. Whether you’re a beginner or a seasoned terrarium enthusiast, these workshops offer a fun and educational environment to indulge in your love for nature and design.
Not only do terrarium workshops provide a platform for learning, but they also offer a chance to connect with like-minded individuals who share your passion for mini terrariums. You can exchange ideas, get inspired by other participants’ creations, and build a supportive network within the terrarium community. It’s a wonderful opportunity to make new friends and nurture your interest in this captivating hobby.
Exciting Variations
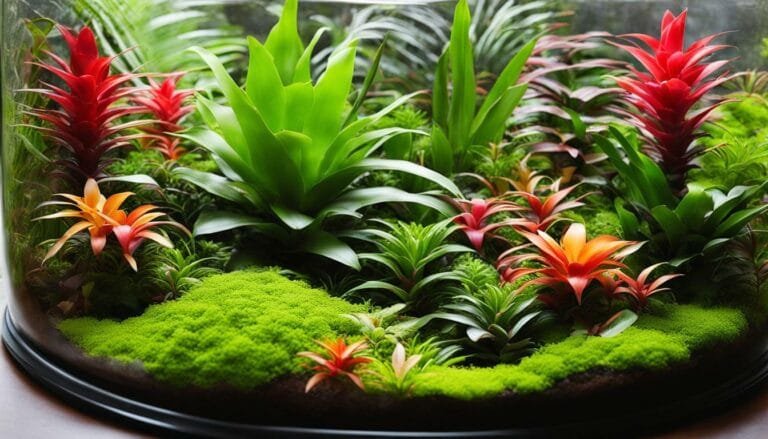
One of the most exciting aspects of attending a terrarium workshop is discovering the endless variations and possibilities within the world of mini ecosystems. From open-air terrariums to closed jars, from tropical plant arrangements to desert landscapes, there are countless styles and themes to explore. You can experiment with different textures, colors, and sizes to create a unique terrarium that reflects your personal style and preferences.
For those who want to take their terrarium to the next level, some workshops even offer the opportunity to incorporate small invertebrate animals. From tiny frogs to snails, these creatures can add an extra element of fascination and intrigue to your mini ecosystem. Learning how to care for these animals and maintain a harmonious balance within the terrarium environment can be a rewarding challenge for those seeking a more interactive and dynamic experience.
| Terrarium Workshop Highlights | Benefits |
|---|---|
| Hands-on learning experience | Enhances your knowledge and skills |
| Opportunity to explore various techniques | Unleashes your creativity |
| Connect with like-minded individuals | Builds a supportive community |
| Discover exciting variations | Expand your horizons |
| Possibility of incorporating small animals | Adds a unique and interactive element |
Attending a terrarium workshop is a wonderful way to delve deeper into the enchanting world of miniature ecosystems. Whether you’re a beginner or a seasoned terrarium enthusiast, these workshops offer a wealth of knowledge, inspiration, and creativity. So why not embark on this adventure and let your imagination bloom within the confines of a tiny glass jar?

Mini terrariums are not merely decorative pieces; they are enchanting miniature worlds that bring the beauty and wonders of nature into your home. These tiny ecosystems, carefully crafted inside clear bottles or jars, allow you to create your own self-contained natural habitat. With just a few simple materials like moss, rocks, and soil, you can build a mesmerizing landscape that will captivate you and your guests.
Creating a mini terrarium is a creative and rewarding process. By following a step-by-step guide, you can assemble your terrarium with ease. Start by building the foundation with rocks, which provide a stable base and help with drainage. Optionally, you can add a layer of soil to support plant growth. Next, add damp moss, which acts as a lush carpet and retains moisture, creating the perfect environment for your terrarium’s inhabitants.

Once your mini terrarium is complete, seal the jar to create a self-sustaining ecosystem. Place it in a sunny spot, and watch as the moss grows and transforms your terrarium into a thriving world of greenery. It’s a delight to witness the cycle of life within these tiny spaces, as nature takes its course.
If you’re interested in learning more about mini terrariums or want to explore different variations, consider attending a terrarium workshop. These workshops provide valuable insights and guidance for creating unique terrarium designs. You can also experiment with incorporating small invertebrate animals for an added touch of biodiversity.
Discover the Magic of Mini Terrariums
Mini terrariums offer a glimpse into the intricate beauty of nature, condensed into a captivating display. As you observe the delicate balance of life within these miniature worlds, you’ll gain a deeper appreciation for the wonders of our natural environment. Whether you’re a plant enthusiast, a nature lover, or simply someone looking to add a touch of enchantment to your home, mini terrariums are a delightful addition that brings a sense of tranquility and harmony.
Conclusion
In conclusion, mini terrariums offer a delightful and accessible way to create your own tiny, self-sustaining ecosystems at home, providing a source of relaxation, creativity, and connection with the natural world. These miniature wonders allow you to bring a touch of nature into your living space, no matter how small or urban it may be.
By following a few simple steps and gathering a handful of materials, you can build your very own mini terrarium. The process of assembling the layers of rocks, optional soil, and damp moss is not only satisfying but also allows you to exercise your creativity. As you carefully seal your terrarium, you create a self-sustaining environment where moss can thrive and grow, constantly transforming your jar into a tiny world of its own.
If you’re interested in learning more and exploring different variations of terrariums, consider attending a terrarium workshop. These workshops offer valuable guidance and inspiration, helping you expand your knowledge and skills in this captivating hobby. You may even discover the option to incorporate small invertebrate animals, such as snails or insects, to further enhance the biodiversity of your miniature ecosystem.
So, why not embark on your own mini terrarium adventure? Immerse yourself in the calming beauty of these small wonders of nature, and let your creativity and connection with the natural world flourish in the comfort of your own home.
What Are the Benefits of Mini Terrariums Compared to Greenhouse Terrariums for Home Use?
Mini terrariums offer several benefits compared to greenhouse terrariums for home use. Their small size makes them perfect for displaying in any room, and they require less maintenance. Mini terrariums also provide a great opportunity for creative expression and can be easily customized to fit any home decor.
FAQ
What are mini terrariums?
Mini terrariums are miniature ecosystems that can be created at home using a clear bottle or jar, moss, small rocks, and optional soil and decorative accessories. They are self-sustaining and contain a small world of plants and sometimes small invertebrate animals.
How do I create a mini terrarium?
To create a mini terrarium, you will need a clear bottle or jar, moss, small rocks, and optional soil and decorative accessories. The process involves adding rocks for drainage, a layer of soil (optional), damp moss, and then sealing the jar to create a self-sustaining environment.
What materials do I need for a mini terrarium?
The essential materials needed for a mini terrarium include a clear bottle or jar, moss, small rocks, and optional soil and decorative accessories.
How do I build the foundation for a mini terrarium?
The first step in creating a mini terrarium is building the foundation with rocks. This layer of rocks provides drainage and creates a stable base for the ecosystem.
Can I add soil to my mini terrarium?
Adding soil to your mini terrarium is optional. It can provide additional nutrients for your plants, but it’s important to consider the moisture levels and the type of plants you plan to include.
What is the next step after adding soil (optional)?
After adding soil (optional), the next step is to add damp moss to your mini terrarium. The moss acts as a natural carpet, helping to retain moisture and provide a lush environment for the plants.
How do I seal my terrarium and maintain it?
Sealing the terrarium is important to create a self-sustaining environment. It helps retain moisture and allows the ecosystem to thrive. Maintenance tips include placing the terrarium in a sunny spot, monitoring the moisture levels, and occasionally misting the plants if needed.
Are there any terrarium workshops available?
Yes, there are terrarium workshops available for those who want to learn more about creating mini terrariums. These workshops provide hands-on guidance and often explore different variations of terrariums, including incorporating small invertebrate animals.
What makes mini terrariums special?
Mini terrariums are small wonders of nature that add an element of enchantment to any living space. They are self-sustaining ecosystems that allow you to create and enjoy a tiny world within a jar. The beauty and charm of mini terrariums make them a unique and captivating addition to your home or office.