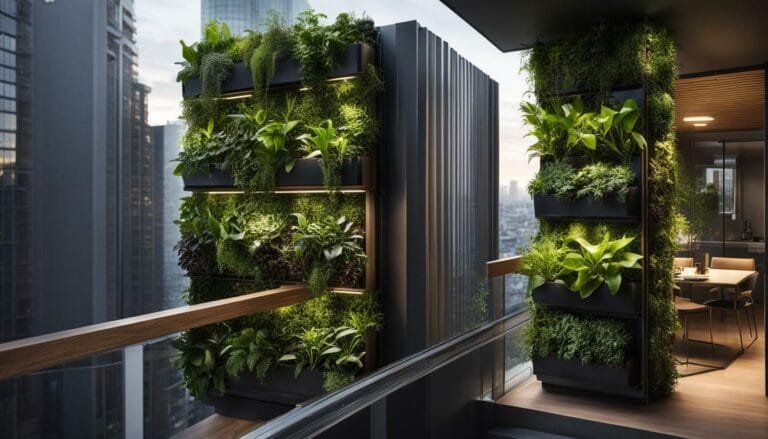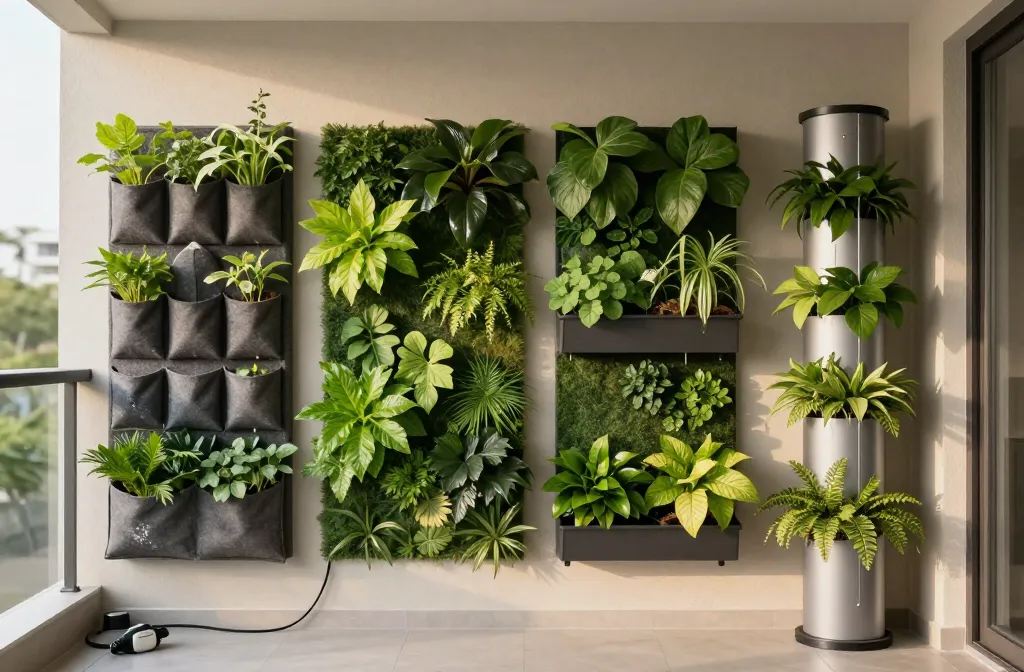
Diy Guide 6 Living Wall Systems Compared — Pocket, Felt Panel, Modular Tray and Hydroponic
I built my first living wall on a rental apartment balcony with nothing but a drill, a basic drip kit, and far too much optimism. The difference between a lush wall and a soggy mess came down to choosing the right system for my space, light, and routine. In this guide, I’ll compare pocket, felt panel, modular tray, and hydroponic setups so you can pick what works with standard tools and weekend energy. You’ll learn realistic costs, watering routines, and plant choices that survive in real homes, not showrooms.
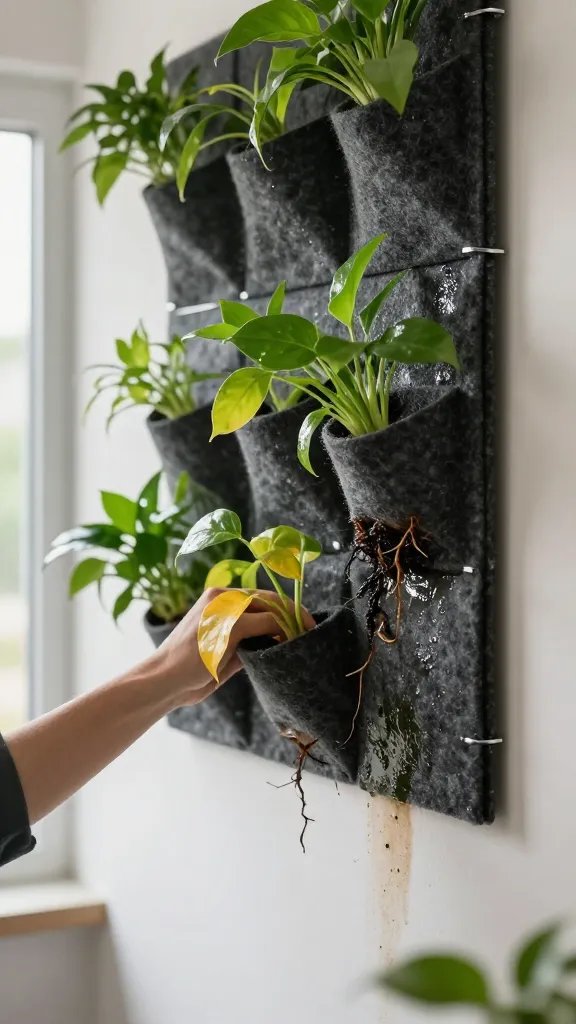
1. Pocket Systems: Fabric Pouches That Dry Out Fast And Sag Under Weight
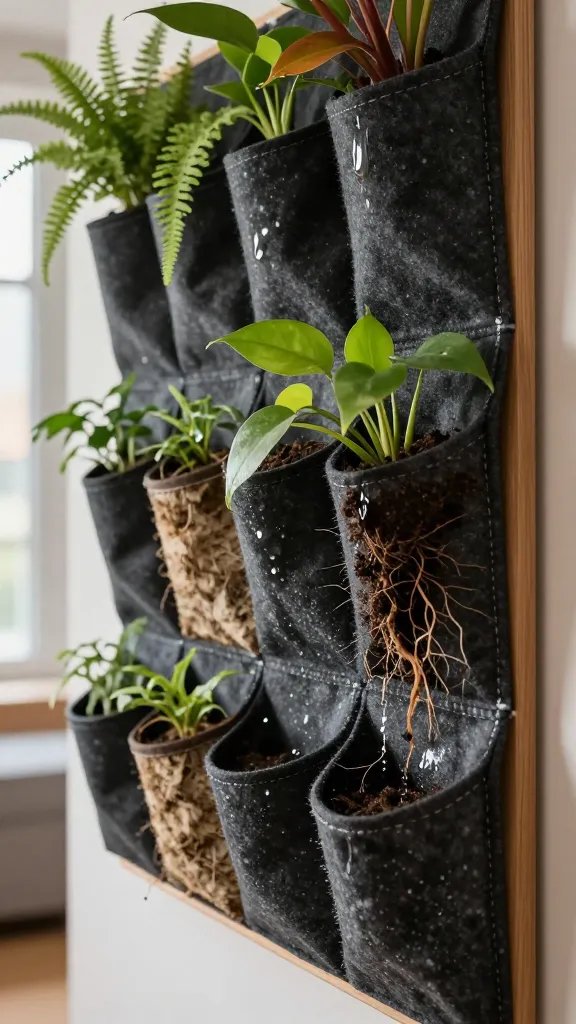
Pocket walls look simple and affordable, but they punish inconsistent watering. Plants sit in small fabric pouches with minimal soil, so they dry within days and slump forward as the fabric stretches.
Signs To Watch For
- Lower pockets droop and shade the plants below
- Soil pulls away from the fabric, exposing roots
- Water runs straight through, leaving dry patches within 24–48 hours
- Salt crust or white marks on the fabric from repeated watering
How To Fix It
- Line each pocket with a thin plastic nursery pot with holes side-cut for airflow — it holds shape and soil
- Use a moisture-retentive potting mix plus a handful of coconut coir for each pocket to slow drying
- Install a basic drip kit along the top row so water trickles down; add a saucer or gutter at the base to catch spills
- Plant drought-tolerant, shallow-rooted species like Pothos, Philodendron hederaceum, Peperomia, and Fern allies like Asparagus fern rather than thirsty herbs
What To Use Instead (If You Struggle With Watering)
- Switch to a modular tray or felt panel with irrigation strip if your room is warm or you travel frequently
Action today: Slip a thin nursery pot or yogurt cup (perforated) inside each pocket to stop sagging and extend watering intervals by several days.
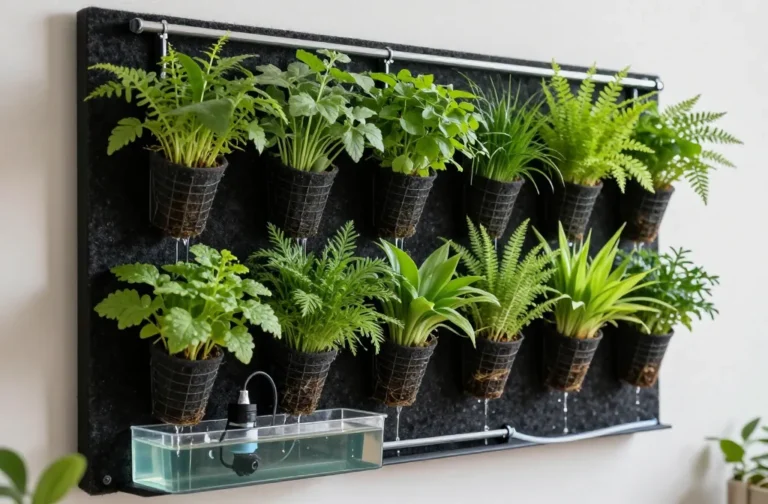
2. Felt Panel Systems: Even Moisture But Hidden Rot If You Overwater
Felt panels wick water evenly across the surface, which creates beautiful coverage but hides waterlogging behind the fabric. When the back layer stays wet, roots rot quietly for weeks before plants collapse.
Signs To Watch For
- Musty smell from behind the panel
- Leaves yellowing from the base upward while the felt still feels damp
- Blackened or slimy roots when you tug a plant gently
- Brown water staining on the wall below the panel
How To Fix It
- Mount the panel on spacers (1–2 cm) to allow airflow behind; use simple rubber doorstops or furniture pads
- Water from the top once, then wait 10–15 minutes; only rewater if the felt surface feels dry to the touch
- Feed lightly: add half-strength liquid houseplant fertilizer to your watering can once a month to avoid salt buildup
- Plant felt-friendly species with fine roots: Nephrolepis (Boston fern), Pilea, Tradescantia, small Philodendrons
What To Use Instead (For Edibles Or Thick Roots)
- Use a modular tray system so each plant has real potting mix depth; felt struggles with basil, mint, and lettuce long-term
Takeaway: Add simple spacers and water in one thorough pass, then stop — excess moisture behind felt panels is what kills roots, not dryness at the surface.
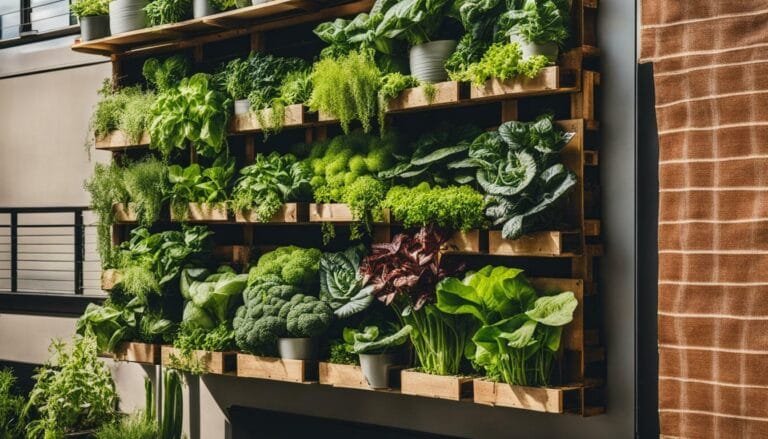
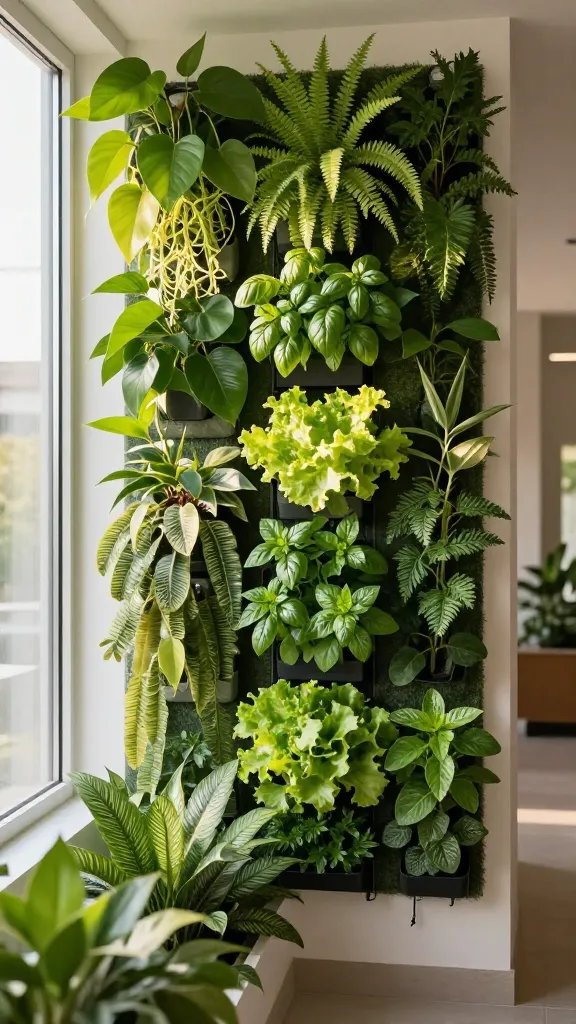
3. Modular Tray Systems: Forgiving, Heavier, And Best For Beginners
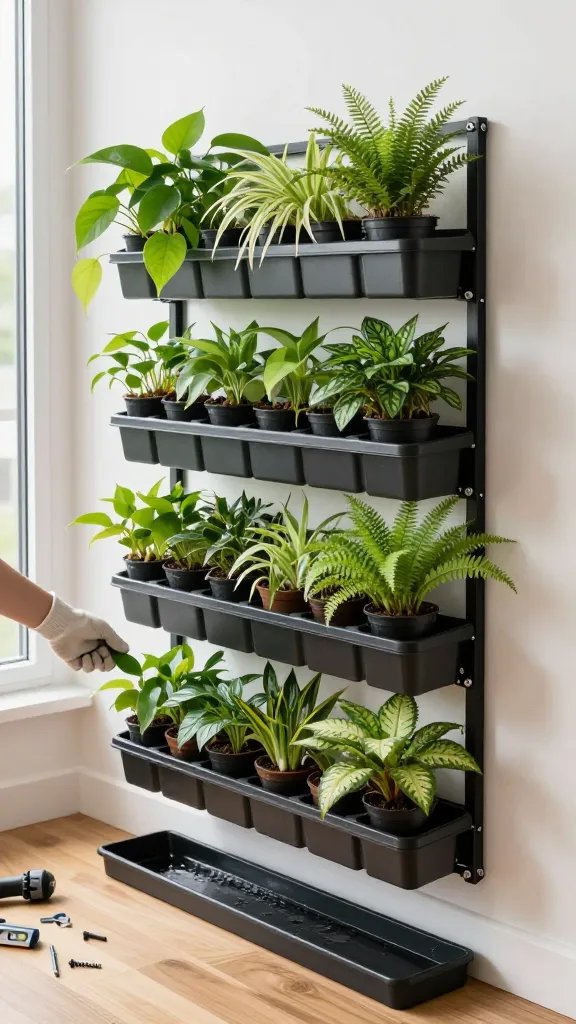
Modular trays give each plant a small pot or cell that snaps into a frame. They’re forgiving because you use standard potting mix and can lift out a struggling plant without disturbing the rest.
Why They Work
- Real soil volume keeps roots hydrated for 5–10 days between waterings
- Trays collect runoff so your floor and wall stay clean
- You can swap plants seasonally without undoing the whole wall
How To Set It Up With Basic Tools
- Mount the frame to studs with wall anchors rated for the system’s full weight (check the box; as a rule of thumb, plan for 20–30 kg per square meter when wet)
- Fill each cell with a quality potting mix plus a handful of perlite for drainage
- Run a basic drip line along the top row and let excess trickle down; set a simple plug-in timer to 3–5 minutes every 2–3 days in summer, twice weekly in winter
Best Plants For Trays
- Trailing greens: Pothos, Heartleaf Philodendron, Tradescantia
- Compact fillers: Fittonia, Peperomia, Baby’s tears
- Herbs near a bright window: Parsley, Mint, Chives (avoid woody rosemary on small trays)
Action today: If you want the easiest start, choose a tray kit with removable pots and an included drip line — it’s the lowest-effort path to a full, tidy wall.
4. Hydroponic Walls: Fast Growth, Faster Failures Without A Simple Routine
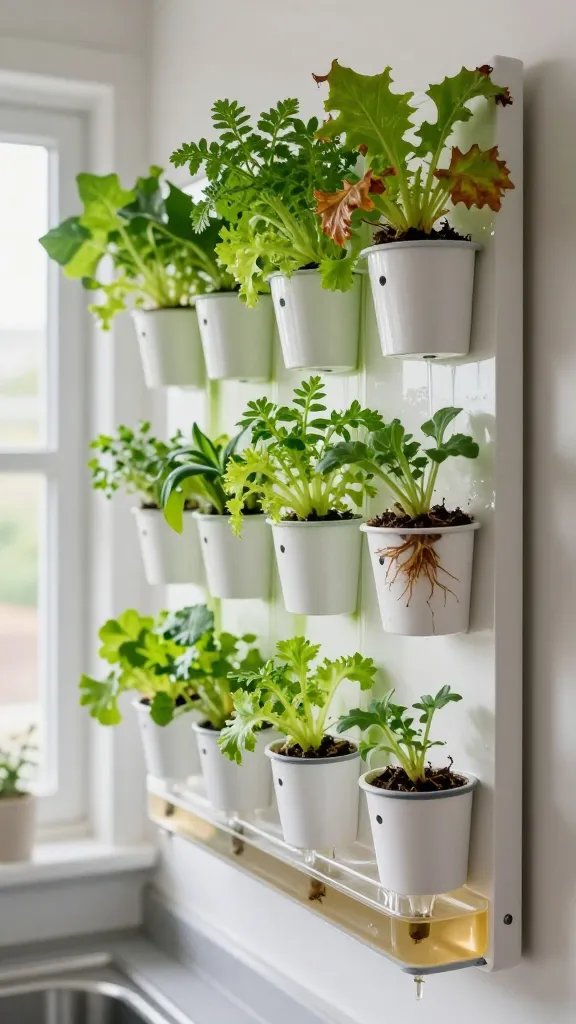
Hydroponic walls grow plants in water-fed channels or cups without soil. Growth is fast, but neglect for even a week leads to wilting, algae, and mineral crust that clogs emitters.
Signs To Watch For
- Green film (algae) inside clear tubing or on wet surfaces
- Leaves crisping at the edges while roots look brown rather than white
- Water smells sour or looks tea-colored from decaying roots
How To Run Hydro At Home With No Meters
- Use pre-mixed hydroponic nutrients at the label’s lowest dose; mix with tap water that tastes clean, not salty
- Change the reservoir every 2 weeks; scrub with a bottle brush and a little dish soap, rinse thoroughly
- Shield the reservoir and tubes from light using an opaque bin or black tape to prevent algae
- Pick plants that show stress early and recover well: lettuce, basil, mint
What To Use Instead (If You Want “Set And Forget”)
- Choose a modular tray with a drip kit; hydro needs a steady routine and a quick clean every two weeks
Takeaway: Commit to a 15-minute, every-other-week reservoir change — that single habit keeps hydro walls clean and productive.
5. Water Delivery: Gravity Plays Favorites And Creates Dead Zones
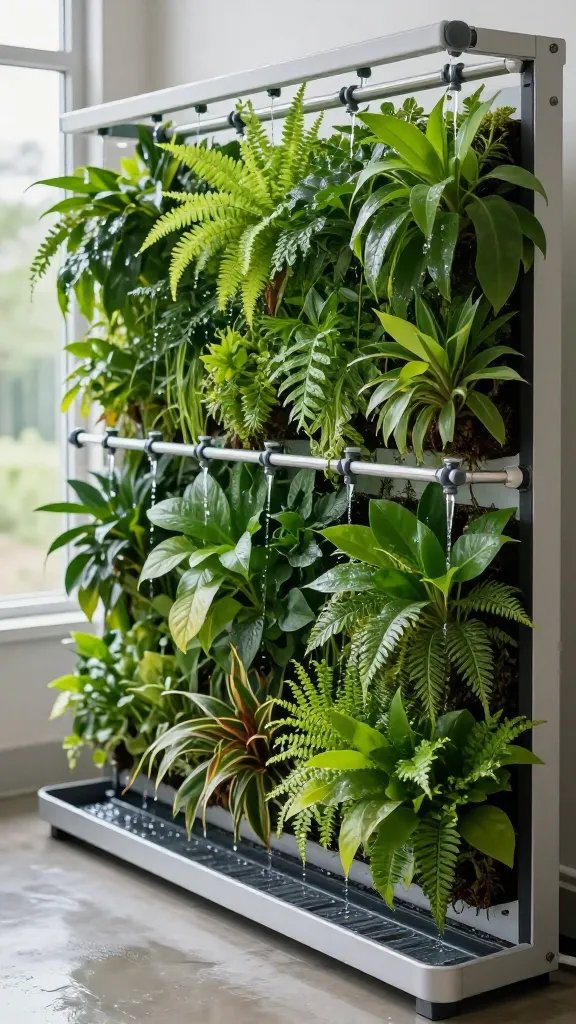
Any vertical wall suffers when water pools at the bottom and skips the top. Dry top rows turn crispy, while bottom rows rot and attract fungus gnats.
Fix Uneven Watering With Simple Parts
- Install a top feed line that runs the full width; use drip tees so each column receives the same start
- Add a mid-level cross line if upper rows still dry faster than lower rows
- Place a catch tray or gutter at the base to prevent floor damage and allow you to measure runoff
- Time watering for short, frequent cycles (3–5 minutes) rather than long soaks that overwhelm the bottom
Signs Your Watering Is Uneven
- Crisp tips and faded color on top-row plants
- Yellowing or mushy stems at the bottom row
- Dry strips or wet stripes when you press the felt or soil
Action today: Run a test: water for 3 minutes, then press the top and bottom rows — if the top feels dry and the bottom soggy, add a cross line halfway down and reduce each cycle by 1–2 minutes.
6. Light And Plant Choice: Wrong Species In The Wrong Spot Waste Months
Most living walls fail from light mismatch, not gear. Shade plants burn near sunny glass, and herbs sulk in dim hallways, leaving patchy gaps that never fill.
Match Light To Species Without Special Meters
- Bright indirect light near a window (no hot midday sun): Pothos, Philodendron, Ferns, Peperomia
- Direct morning sun 2–3 hours: Herbs like Basil, Mint, Parsley, Lettuce
- Low light hallways: ZZ and Snake plant won’t thrive in walls; instead, use low-light tolerant pothos and accept slower growth
If Your Room Is Dim
- Add a simple LED shop light on a 10–12 hour timer, mounted 20–30 cm from the foliage
- Choose green-leaf varieties rather than variegated forms, which need more light
Takeaway: Before buying anything, stand at your wall location at noon — if you can read a book easily without turning on lights, you have enough for most tropical foliage; if not, plan for an LED bar.
Frequently Asked Questions
Will a living wall damage my rental wall?
Not if you plan for moisture and weight. Mount the frame into studs or use heavy-duty wall anchors, and add a catch tray or gutter at the base. Space felt panels off the wall with rubber pads for airflow. Line the back with a thin plastic sheet if you’re cautious, but keep airflow gaps at the top and bottom.
How do I prevent fungus gnats in vertical systems?
Let the top 1–2 cm of soil dry before the next watering and avoid standing water in trays. Cover exposed soil with a thin layer of aquarium gravel to stop egg-laying. Use yellow sticky traps tucked behind foliage and water with a biological control (Bti) once weekly for a month if they appear.
Can I grow herbs indoors on a living wall year-round?
Yes, with strong light and steady watering. Place the wall within a meter of a bright window or add an LED shop light on a 12-hour timer. Choose compact herbs like basil, chives, and mint, and replant every 3–4 months as they tire. Avoid woody herbs like rosemary unless you have strong sun.
How often should I water a modular tray wall?
Start with 2–3 short waterings per week in summer and once or twice weekly in winter. Check by pressing the soil in a middle cell; water when the top feels dry but not dusty. Expect to adjust based on indoor heat and plant density. It’s better to water briefly and more often than to flood and create runoff.
Do I need fertilizer in a living wall?
Yes, but lightly. Use half-strength liquid houseplant fertilizer once a month for soil-based walls and every two weeks for hydroponic systems. Flush with plain water once a month to prevent salt buildup. For edible walls, pick a balanced, food-safe liquid feed from the garden centre and follow the label’s lowest dose.
What’s the easiest system for a first project?
A modular tray with removable pots and a simple drip line gives you the most forgiveness. You use normal potting mix, can swap plants anytime, and spills are contained. Felt and pockets demand stricter watering habits, and hydro needs a cleaning routine. Start with trays, then experiment once you know your room’s light and your schedule.
Conclusion
You don’t need specialist tools to build a lush wall — you need the right system for your light, watering habits, and patience. Pick one approach today, mount it securely, and run a one-week watering and light test before fully planting. Once the basics work, you can scale from a single tray to a full wall with confidence.