Your kitchen already holds the cutest herb pots—you just haven’t flipped them yet. We’re talking quirky, affordable, and ridiculously satisfying DIYs that turn clutter into countertop stars. Fresh basil in a teacup? Mint in a colander? Yes, please. Grab a screwdriver, a few herbs, and let’s play plant Tetris with your “junk.”
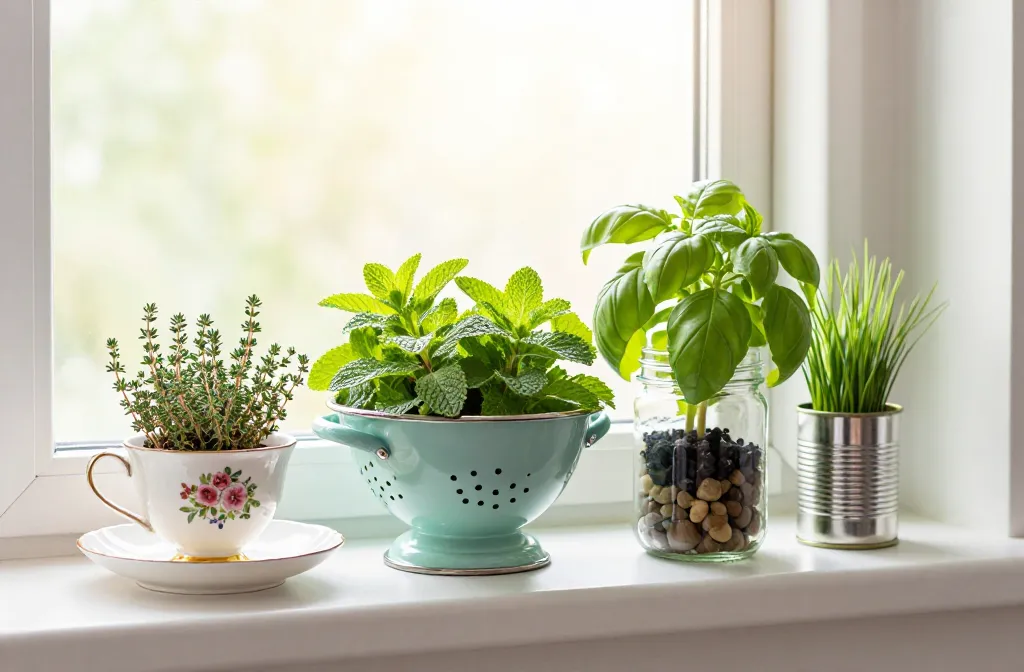
1. Vintage Teacups With Major Charm
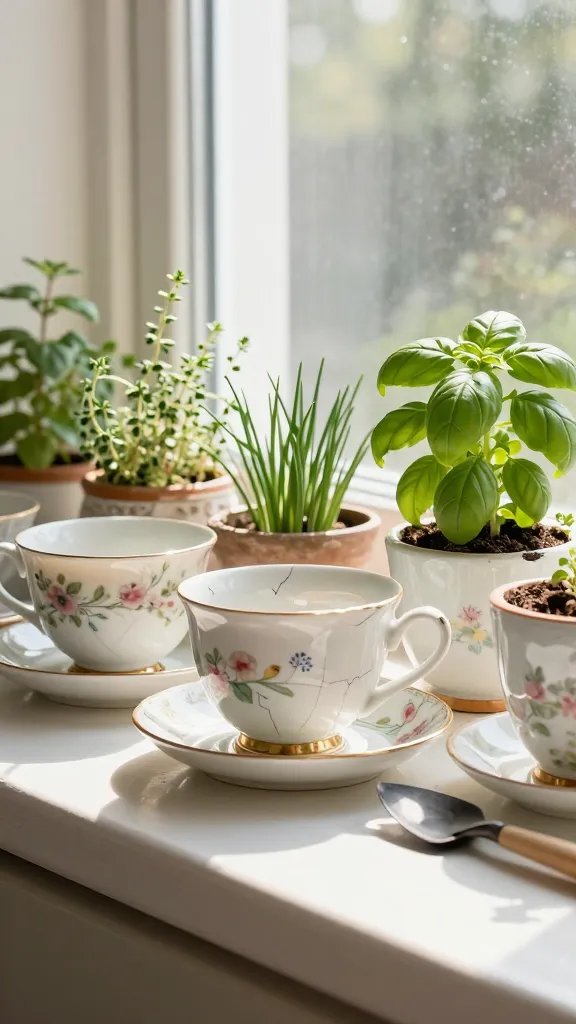
Teacups give herbs a boutique vibe without the boutique price. Their petite size fits windowsills perfectly, and the patterns? Instant mood boost. If your teacup chipped, even better—character for days.
Quick Setup:
- Drill a small drainage hole in the base (or add a layer of pebbles if the cup is too delicate).
- Use a light potting mix and plant compact herbs like thyme, chives, or micro basil.
- Place saucers underneath to catch drips and make it look intentional.
Want extra credit? Add a tiny plant label clipped to the rim. Teacups shine when you want a cute, giftable herb moment that still feels grown-up.
2. Mason Jars That Actually Work (With a Twist)
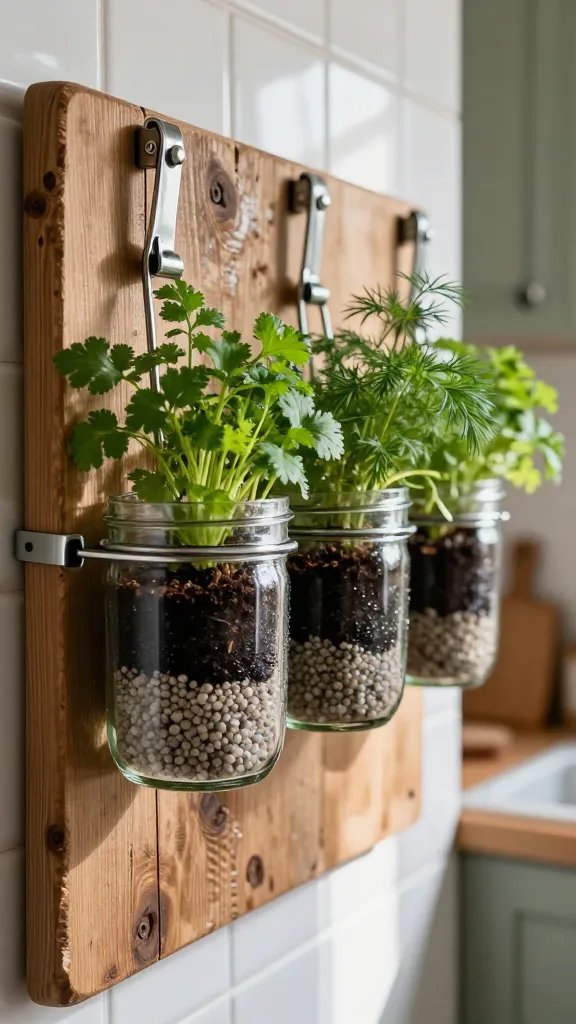
Mason jars show up in every DIY list for a reason—they’re sturdy, see-through, and everywhere. But herbs hate soggy roots, and jars trap water. Easy fix: create a faux-drainage setup and keep your plants happy.
How To Make Them Herb-Friendly:
- Add 1–2 inches of aquarium gravel or pebbles to the bottom.
- Layer a strip of activated charcoal to keep things fresh (optional but smart).
- Top with potting mix and pop in parsley, cilantro, or dill.
Mount jars on a reclaimed board with hose clamps for a vertical herb garden. It saves counter space and looks like you planned your life, FYI.
3. Old Colanders That Basically Drain Themselves

Colanders might be the perfect herb pot—built-in drainage, roomy, and adorable. Metal ones give industrial vibes, while enamel ones scream farmhouse chic. Either way, your basil will finally stop sulking.
Tips For Winning:
- Line with a coffee filter or burlap to hold soil while letting water drain.
- Use a rich potting mix and plant water-sensitive herbs like basil or oregano.
- Set the colander on a shallow tray to catch drips—or hang it for a whimsical touch.
This setup thrives near a sunny window. It’s low-fuss, high-drainage, and looks like you run a cozy café in your spare time.
4. Tin Cans That Clean Up Nicely
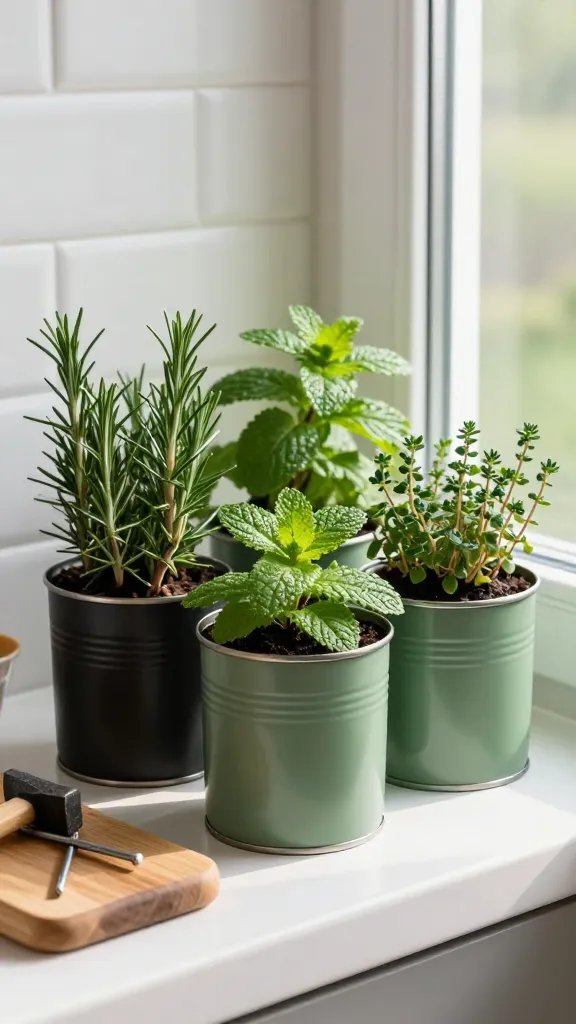
Those soup and tomato cans you always toss? Herb gold. The cylindrical shape fits anywhere, and the labels give you an excuse to design something cute. Or go minimalist with brushed metal—both win.
Make It Safe And Stylish:
- Remove labels, sand sharp edges, and punch 2–3 drainage holes with a nail and hammer.
- Drill holes before painting if you want a color pop (try matte black or sage green).
- Plant hardy herbs like rosemary or mint (mint can get wild—give it its own can).
Group 3–5 cans for a mini “herb bar” on your counter. It’s inexpensive, customizable, and seriously satisfying.
5. Loaf Pans That Double As Mini Planter Boxes
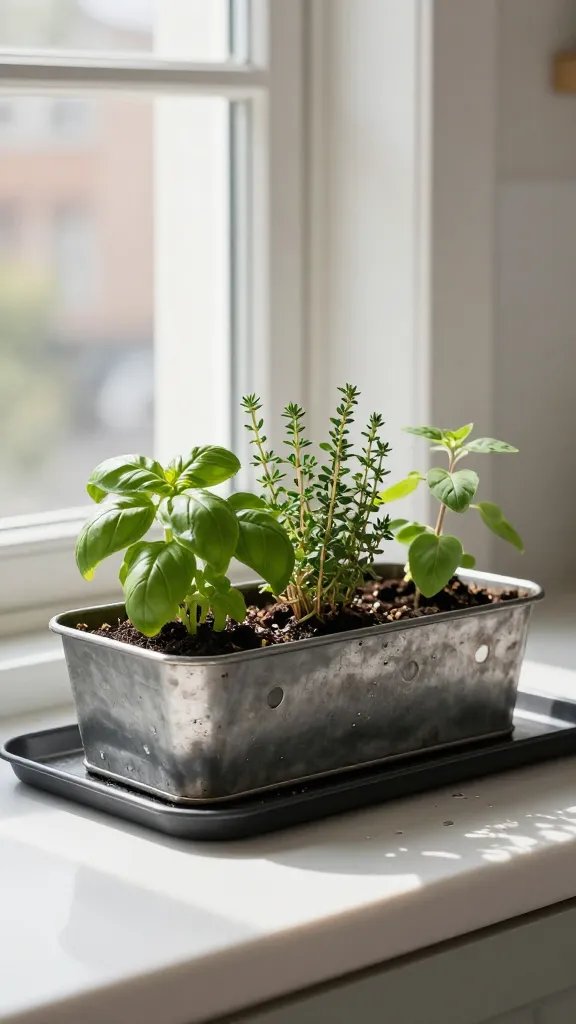
Bread pans can be the long, sleek window boxes of your dreams. They fit snugly on ledges and can host several small herbs in a row. Plus, the patina on older pans looks effortlessly cool.
Assembly Notes:
- Drill 4–6 small drainage holes along the bottom.
- Add a thin gravel layer, then potting mix.
- Plant a trio: basil, thyme, and oregano for an easy Italian lineup.
Slide the whole thing onto a narrow tray to catch extra water. Great for tight spaces where you want a clean, linear look—IMO, it’s the most “grown-up” of the bunch.
6. Enamel Mixing Bowls With Retro Energy
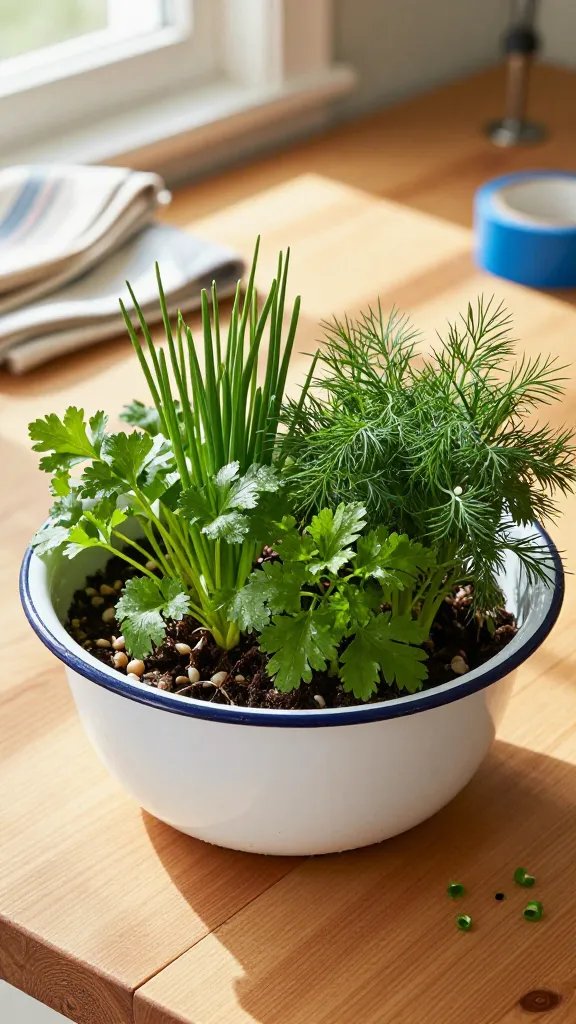
Those sturdy enamel bowls your grandma used? They’re practically indestructible and look stunning with fresh greens. The wide mouth gives herbs room to breathe and bush out.
Best Practices:
- Drill drainage holes (add painter’s tape on the drilling spot for a cleaner cut).
- Fill with airy potting mix and plant a mixed herb medley: chives, flat-leaf parsley, and dill.
- Top-dress with small pebbles for a finished, magazine-worthy look.
Use this when you want a centerpiece that smells amazing. It’s ideal for kitchen islands or coffee tables during parties—snip-as-you-chat energy.
7. Ceramic Pitchers That Pour On The Personality
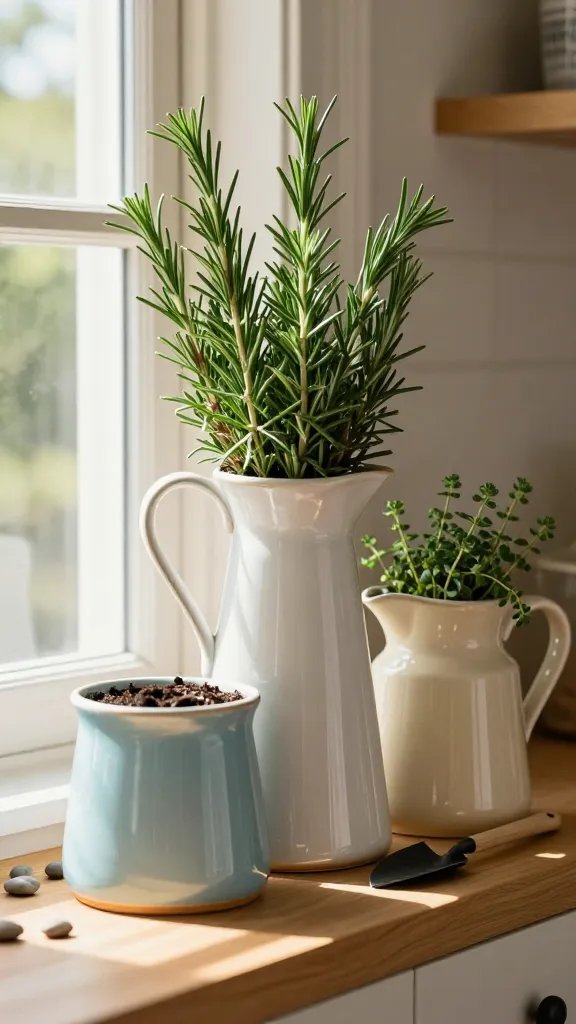
Pitchers bring height and elegance to your herb setup. They make a statement on a shelf and look playful with trailing or upright herbs. Bonus: handles make moving them for sunlight a breeze.
Setup Shortcut:
- If drilling ceramic feels risky, keep soil in a nursery pot and drop it inside the pitcher.
- Place pebbles at the bottom as a water reservoir and to elevate the plastic pot.
- Choose upright herbs like rosemary or savory for a sculptural look.
Pitchers shine when you want an instant focal point without committing to drilling. They’re also renter-friendly and swap-friendly—change herbs with the seasons, no stress.
General Care Tips So Your Herb Pots Don’t Flop
- Light: Most herbs want 6+ hours of bright light. South or west windows win. Grow light if needed.
- Water: Stick a finger in the soil—water when the top inch feels dry. No guessing, no drama.
- Soil: Use a high-quality potting mix, not garden soil. Your herbs will thank you.
- Feeding: Lightly fertilize every 3–4 weeks with a diluted liquid fertilizer.
- Harvesting: Snip often to keep plants bushy. Don’t take more than a third at a time.
Ready to turn “junk” into joyous, leafy goodness? These seven ideas make your kitchen look curated, not cluttered—and deliver fresh flavor any night of the week. Start with one item, see how fast it snowballs, and soon your windowsill will look like a tiny, delicious jungle. Trust me, you’ll never look at a colander the same way again.