Short season, shady balcony, big garden dreams? You’ve got this. Northern balconies can crush it with the right plants, smart layouts, and a few low-key tricks. I’ll show you how to stretch your season, harvest more, and make that tiny space feel like a mini greenhouse. Ready to turn your balcony into a secret produce factory?
1. Map Your Microclimate Like a Detective
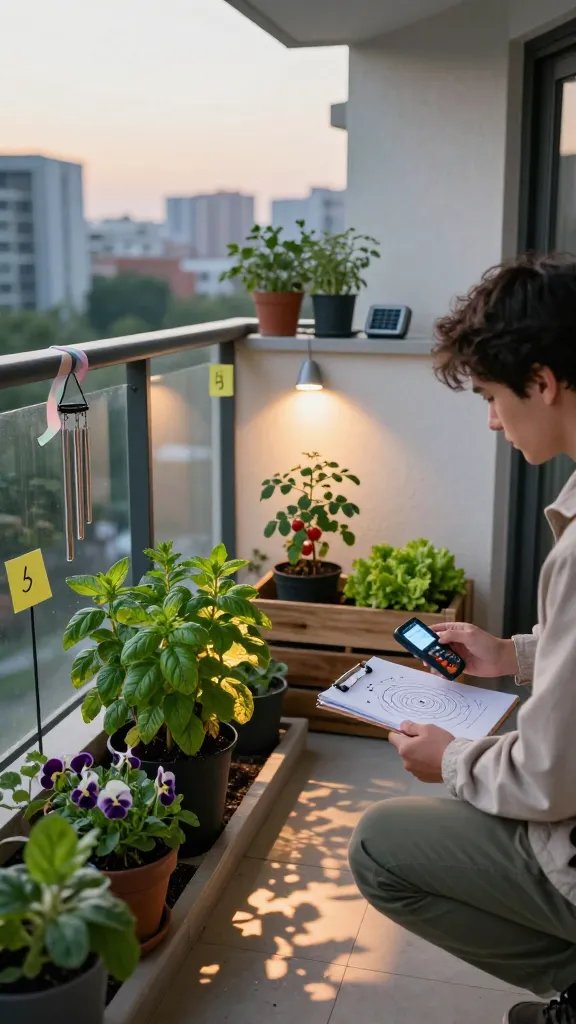
Your balcony isn’t just “north-facing.” It’s a mosaic of tiny climates—warm corners, windy spots, shady pockets. When you map those zones, you pick the right plants and stop killing sun-lovers by accident.
Spend one weekend observing: where does light linger? Where does the wind slap your basil? That intel sets you up for a longer season and fewer heartbreaks.
Quick Checklist:
- Light Audit: Track where you get 2, 4, and 6 hours of light. Northern balconies often clock bright shade or dappled light—perfect for greens and herbs.
- Wind Check: Tape a ribbon to the railing. Watch it for a day. Constant flap = windbreak needed.
- Heat Zones: Touch walls and floor at midday. Warm concrete = season extender. Use it.
- Splash Zone: Note where rain actually reaches. Many balconies stay bone-dry.
With this map, you’ll plant shade-tolerant crops where they thrive and reserve any brighter pocket for fruiting plants. More survival, more salad.
Tips:
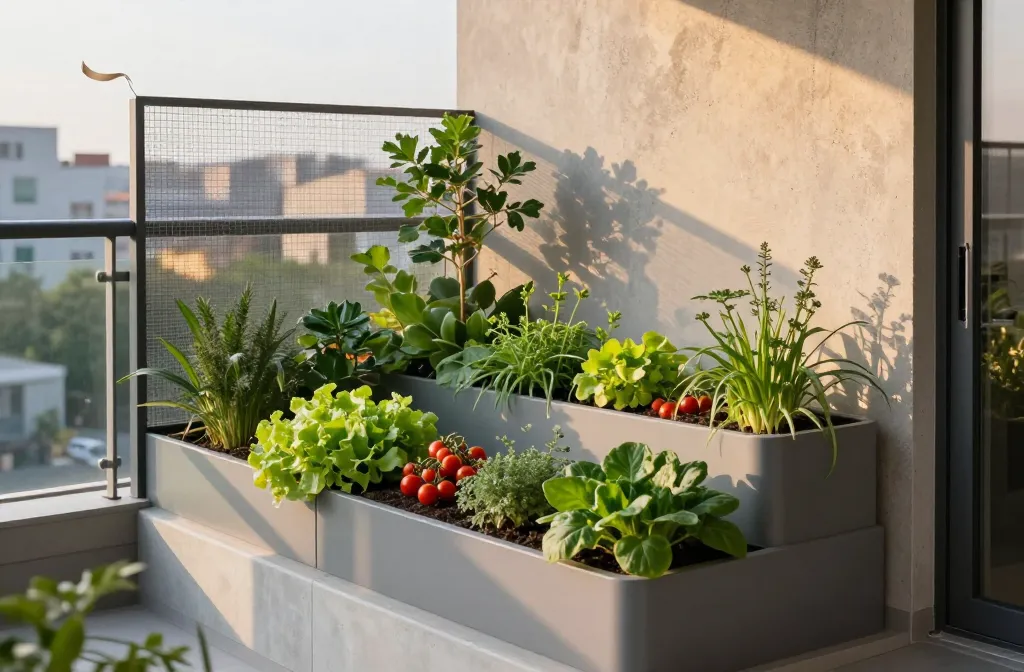
- Use light-colored containers along hot walls to prevent root bake.
- Install a clear wind panel (acrylic or polycarbonate) on the windiest side to calm drafts.
- Set up a drip tray under containers in the dry zone to catch and reuse water.
Result? A balcony that works with your climate, not against it—plus fewer crispy leaves and sad seedlings.
2. Choose Shade-Savvy Crops That Actually Produce
Fruiting divas (tomatoes, peppers) want full sun. Northern balconies rarely deliver that. So stack the deck with crops that love cool temps and partial shade—then sprinkle in a few compact sun-seekers where light is strongest.
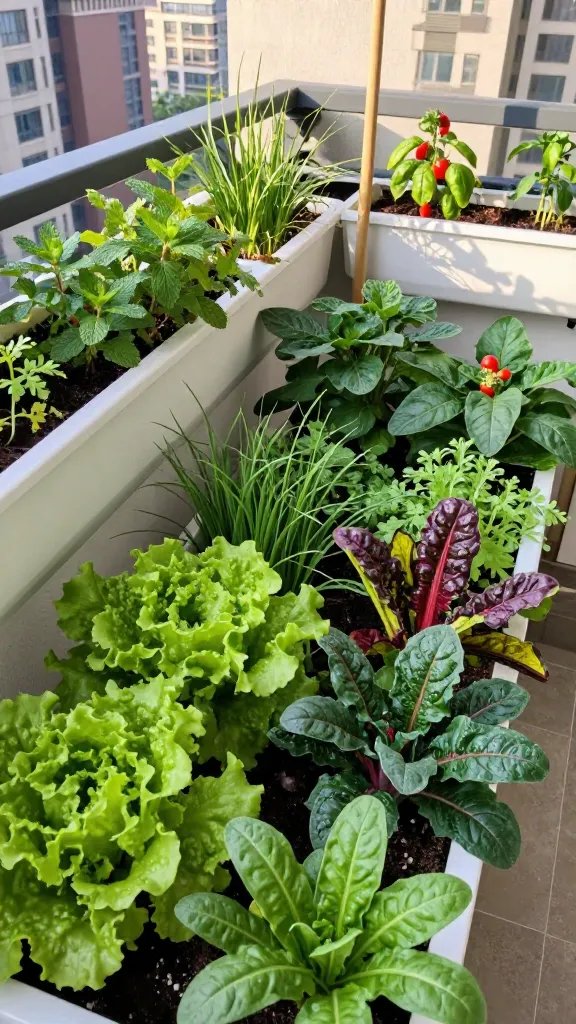
Think cut-and-come-again greens, herbs, and quick harvests. You’ll eat earlier, longer, and more often.
All-Star Plants for North-Facing Balconies:
- Leafy Greens: Lettuce mixes, spinach, arugula, mizuna, tatsoi, kale (dwarf), Swiss chard.
- Herbs: Mint, chives, cilantro, parsley, dill, lemon balm, shiso. Basil needs warmth—give it your brightest, coziest corner.
- Roots: Radishes (speed demons), baby beets, baby carrots (choose “Paris Market” or “Thumbelina”).
- Brassicas: Pak choi, komatsuna, spring cabbage (compact varieties), broccoli micro-sprouts.
- Fruiting Wildcards: Alpine strawberries, compact peas, bush beans (in the brightest spot).
Planting Rhythm (for maximum season):
- Early Spring: Radish, spinach, arugula, peas.
- Late Spring to Summer: Lettuce succession, herbs, chard, dwarf kale.
- Late Summer to Fall: More greens, cilantro, radish, pak choi; tuck in garlic cloves for next spring harvest.
FYI: Successions beat single plantings. Sow small amounts every 2–3 weeks so you always have something to harvest.
When you match the plant list to your light reality, you stop forcing tomatoes to do CrossFit and start harvesting bowls of gorgeous greens.
Container Essentials:
- Depth: 6–8 inches for greens; 10–12 inches for roots; 12–14 inches for peas/beans.
- Soilless Mix: Use a high-quality potting mix with added compost for moisture and nutrients.
- Drainage: Always. Add mesh over holes to prevent soil loss.
Smart plant choices mean less fuss, more food, and a season that starts earlier and ends later. Win-win.
3. Build Vertical Warmth And Light With Reflectors And Shelves
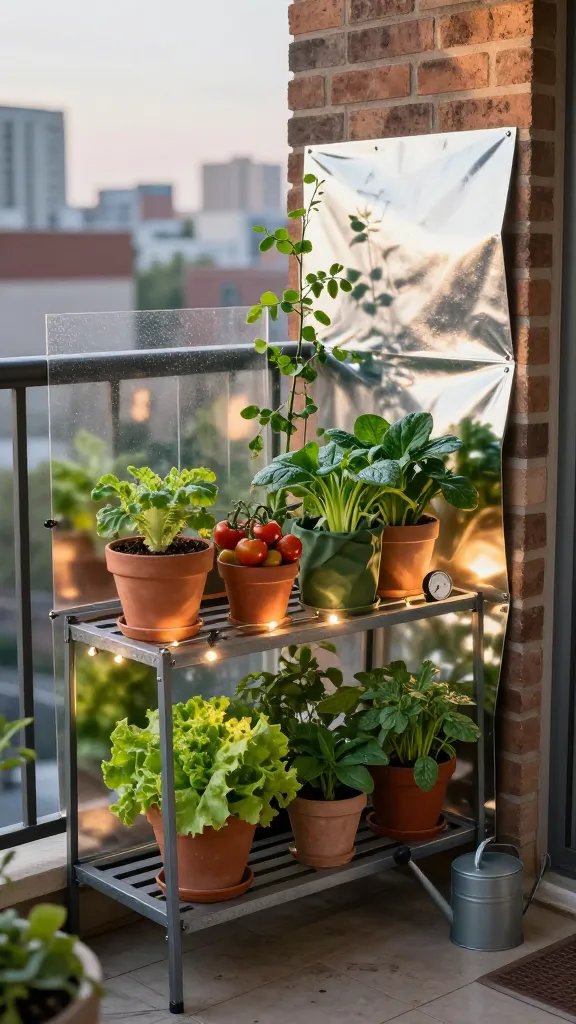
When horizontal space and sunlight are limited, go vertical. Shelves, trellises, and reflective surfaces stretch your sunlight and keep plants warmer for longer. It’s like giving your balcony a closet makeover—more tiers, more storage, more glow.
We’re not making a disco; we’re aiming for gentle bounce light and wind protection that helps plants photosynthesize longer each day.
How To Set It Up:
- Tiered Shelving: Use powder-coated metal or sealed wood. Put shade-tolerant plants on lower tiers, sun-hungry ones at the top/front.
- Reflective Backdrop: Install white corrugated plastic or light-reflective mylar behind plants to bounce light deeper. White looks cleaner than foil, IMO.
- Trellis For Climbers: Peas and beans climb vertical netting or a narrow trellis. Place near the brightest edge, not blocking everything behind.
- Thermal Mass: Dark water jugs tucked behind pots store daytime warmth and release it at night, which softens temperature swings.
Bonus: Micro-Greenhouse Corners
- Wrap a clear poly panel around one shelving unit to create a wind-buffered nook.
- Add vent gaps at top and bottom so plants don’t overheat on sunny days.
- Slide panels off in peak summer; pop them back in late summer to extend fall greens.
This setup uses light smarter and buys you precious degrees at night. Translation: faster growth and a longer harvest window.
Safety And Aesthetics:
- Anchor tall pieces with brackets or sandbags so nothing flies off in a storm.
- Choose cohesive finishes (all black or all white) so the garden looks intentional, not chaotic.
Vertical, reflective, and wind-smart design turns a dim balcony into a steady producer—without hogging your hangout space.
4. Master Water, Soil, And Feeding For Cool-Weather Speed
Cool temps slow growth, so you need to optimize the basics. Great soil, consistent watering, and gentle feeding keep plants cruising even when the sun acts shy. Think of this as your balcony’s performance tune-up.
Dial these in and you’ll see sturdier leaves, fewer pests, and harvests that actually taste like something.
Soil & Containers
- Mix: 60–70% high-quality potting mix, 20–30% sifted compost, a handful of perlite for drainage.
- Moisture Control: Top-dress with coco coir or fine bark mulch to reduce evaporation.
- Fabric Pots: Use 5–10 gallon grow bags for deep-rooted crops; they breathe and prevent waterlogging.
Watering Routine
- Morning Watering: Hydrate early so leaves dry fast and roots drink all day.
- Check By Weight: Lift pots. Light = water. Heavy = hold. Simple and reliable.
- Self-Watering Trays: Set shallow trays with capillary mats under groups of pots to even out moisture.
Feeding Strategy
- Slow And Steady: Mix organic slow-release fertilizer into soil at planting.
- Biweekly Boost: Use diluted liquid seaweed or fish emulsion for leafy growth (half strength is plenty).
- pH Check: If leaves look yellow and sad, test pH. Slightly acidic (6.0–6.8) suits most crops.
Pest & Disease Prevention
- Airflow: Don’t pack plants shoulder-to-shoulder. Leave space to reduce mildew.
- Neem Or Soap: Keep a mild neem or insecticidal soap on hand for aphids and whiteflies.
- Clean Tools: Wipe pruners and trays with diluted alcohol between uses. Yes, really.
These basics keep your balcony ecosystem stable, which means less drama and more reliable growth—especially in cooler shoulder seasons.
Harvesting For Regrowth
- Pick outer leaves first on lettuce, kale, and chard so plants keep producing.
- Snip herbs above a leaf node to encourage branching.
- Stagger sowings every 2–3 weeks for consistent harvests.
Get the fundamentals right and everything else becomes easier, faster, and tastier. Seriously.
5. Stretch Spring And Fall With Low-Tech Season Extenders

Want an extra 4–8 weeks of harvest on a northern balcony? Use a few simple extenders to cheat the weather. You don’t need a full greenhouse—just clever layers that trap heat and block wind.
Start earlier in spring, glide through chilly nights, and keep salads coming well into sweater weather.
Easy Extenders That Work On Balconies
- Frost Cloth (Row Cover): Drape over hoops or a simple frame. It boosts temps a few degrees and still breathes.
- Pop-Up Cloche Domes: Great for single pots. Vent during sunny days to avoid cooking your plants.
- Clear Storage Totes: Upside down over seed trays = instant mini-greenhouse. We love a good hack.
- Cold Frame Crate: Build a shallow wood box with a hinged clear lid (polycarbonate). Park it along a warm wall.
- Heat Sink Jugs: Paint a couple of water bottles black and tuck them near plants to store daytime heat.
Lighting (Optional But Powerful)
- LED Grow Bar: One 20–40W full-spectrum bar above a shelf extends “daylight” by 2–4 hours.
- Timer: Run lights morning or evening to reach 12–14 hours total during early spring/late fall.
- Placement: Keep 8–12 inches above canopy; raise as plants grow.
Timing Playbook
- Late Winter: Start hardy greens indoors, then move out under covers once nights hover above freezing.
- Early Spring: Transplant under frost cloth; ventilate at noon to prevent overheating.
- Late Summer: Start fall crops while days are warm so they size up before cold sets in.
- Autumn: Add covers, reduce watering, and harvest steadily; many greens sweeten after a light frost.
With low-tech covers and a small light, you turn a “too-short season” into a comfortably long one. Trust me, the first November salad hits different.
Ready to squeeze every leaf out of your northern balcony? You’ve got the blueprint. Start with your microclimate map, pick shade-loving champs, build vertical glow, dial your care routine, and throw on some low-tech covers when it gets nippy. Your future self will be munching homegrown greens while everyone else is Googling “best bagged salad.” Go plant it already!