I remember staring at my first empty glass jar, wondering how people created those magical miniature worlds I’d seen online.
Building your first terrarium is simple when you understand the basic layers, choose the right container, and select plants that thrive in enclosed environments.
A terrarium is a miniature ecosystem inside a glass container.
It brings nature indoors and needs very little maintenance.
Terrarium gardening is great for beginners because it is easy to start.
You don’t need gardening experience or expensive tools to create something beautiful.
With a few materials and some knowledge about plant selection and care, you can build a thriving ecosystem that adds life to any space.
This guide explains the difference between open and closed terrariums.
You’ll learn how to layer your terrarium, pick the best containers, and care for your plants with proper watering and lighting.
Key Takeaways
- Choose a container based on your plant type: high-humidity tropical plants or low-maintenance succulents.
- Layer your terrarium with drainage materials, activated charcoal, and the right soil.
- Select slow-growing plants that match your container’s humidity and give them indirect light.
Understanding Terrariums: The Basics
Terrariums use glass containers to house small plant ecosystems.
They create self-sustaining environments that need little care.
There are two main types: open and closed terrariums.
Each one works differently and suits different plants.
What Is a Terrarium?
A terrarium is a miniature ecosystem inside a glass container.
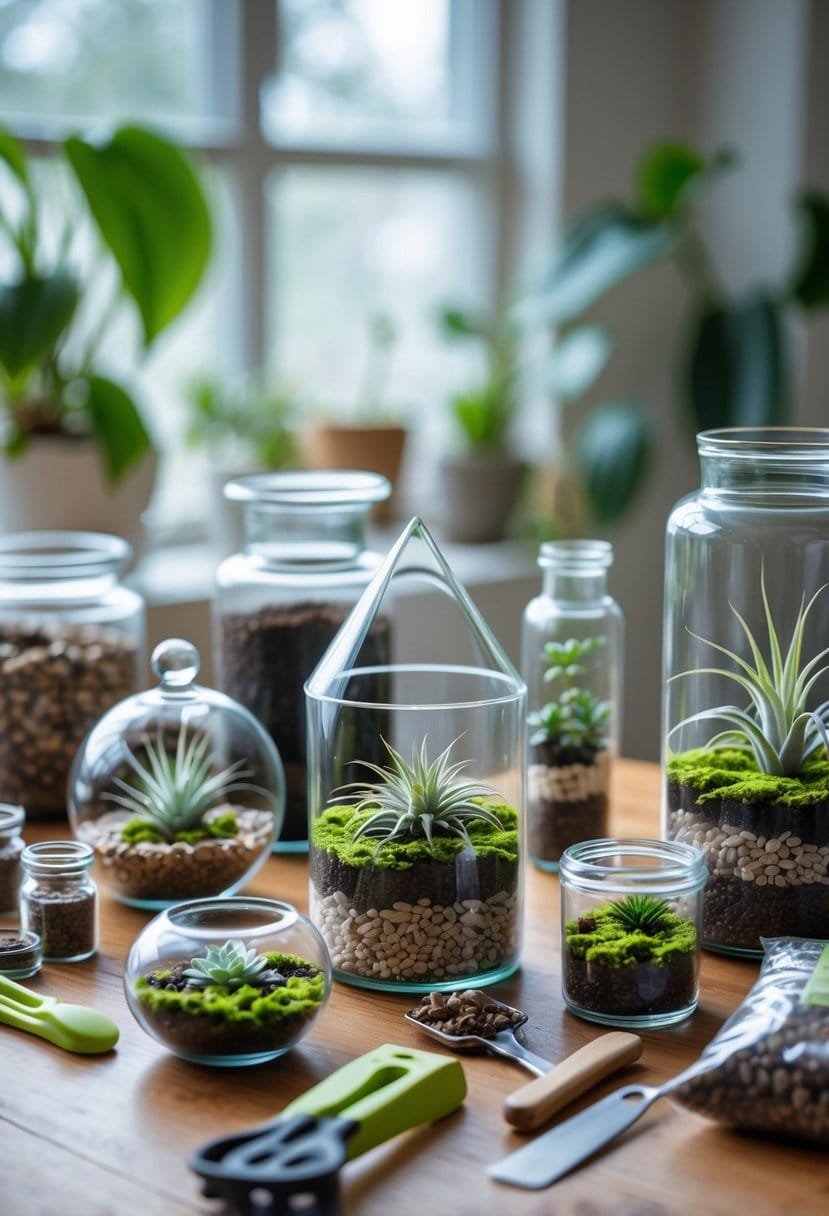
You can use fishbowls, mason jars, or geometric glass shapes.
In the 1800s, botanist Nathaniel Ward discovered that plants could thrive in sealed glass containers.
Modern terrariums use the same idea but offer more design and plant options.
Key Components:
- Glass container – lets in light and keeps humidity
- Drainage layer – keeps water from pooling
- Growing medium – special soil for terrarium plants
- Plants – species that do well in enclosed spaces
Glass lets in light and traps moisture, creating a microclimate that many plants love.
How Terrariums Work as Miniature Ecosystems
Terrariums act as self-contained ecosystems using a simple water cycle.
Plants release moisture, which condenses on the glass and drips back to the soil.
This cycle balances the environment so plants can thrive with little help.
The glass container keeps humidity in and lets in light.
The Water Cycle Process:
- Plants take up water from the soil.
- Moisture evaporates from leaves.
- Water vapor condenses on glass.
- Condensation drips back to soil.
- The cycle repeats.
The enclosed space also protects plants from temperature changes and drafts.
This stability helps sensitive plants grow better indoors.
Open vs. Closed Terrariums
Open and closed terrariums have different humidity levels and suit different plants.
Each style creates its own growing conditions.
Open Terrariums:
- No lid or cover
- Lower humidity
- Good air flow
- Best for succulents and cacti
- Need more frequent watering
Closed Terrariums:
- Sealed with a lid or cover
- High humidity
- Limited air exchange
- Great for tropical plants and mosses
- Need less watering
| Feature | Open Terrarium | Closed Terrarium |
|---|---|---|
| Humidity | Low to moderate | High |
| Watering | Weekly | Monthly or less |
| Best Plants | Succulents, air plants | Ferns, mosses, tropical plants |
| Maintenance | Moderate | Low |
Open terrariums are easy to care for and work well for beginners.
Closed terrariums need less attention once set up.
Benefits of Creating a Terrarium
Terrariums offer many benefits for both new and experienced gardeners.
They allow you to enjoy plants indoors, no matter your space or experience.
Practical Benefits:
- Low maintenance – needs little daily care
- Space efficient – fits on desks, shelves, or windowsills
- Year-round gardening – not affected by seasons
- Cost effective – small investment for long-term enjoyment
Personal Benefits:
- Stress relief – caring for plants can reduce anxiety
- Creative outlet – design layouts and pick plants
- Educational value – learn about plant care and ecosystems
- Air purification – plants help clean indoor air
Terrariums also make great gifts and conversation pieces.
They bring nature indoors, even in apartments or harsh climates.
The controlled environment helps you grow plants that might struggle elsewhere.
Choosing the Perfect Terrarium Container
Your container choice affects your terrarium’s success and look.
Glass containers are best because they let in light and show off the layers inside.
Types of Glass Containers
Start with a clear glass container for your first terrarium.
Mason jars are great for beginners because they’re easy to find and use.
Popular Container Options:
- Mason jars – Wide opening for easy planting
- Apothecary jars – Classic look with tight lids
- Fishbowls – Round shape for good viewing
- Large vases – Plenty of space for creativity
Mason jars are my top pick for first-time builders.
Their wide openings make adding plants and decorations simple.
Apothecary jars offer a vintage look and create a good sealed environment.
Fishbowls work well for open terrariums and offer great visibility.
Container Size and Shape Considerations
Pick containers as large as your space allows.
Bigger containers are actually easier to use than small ones.
Size Requirements:
- At least 4 inches wide
- At least 6 inches tall
- Wide enough for 2–3 small plants
Leave one-third of the container as free space above your plants.
This gives good air flow and prevents crowding.
Containers with wide openings are easier to work with than bottles with narrow necks.
You can place plants and decorations more easily.
Round and square containers offer the most usable space.
Avoid containers with narrow bases since they don’t hold enough soil.
Cleaning and Preparing Your Container
Wash your terrarium container with warm soapy water before starting.
Any residue or fingerprints will show through the glass.
Cleaning Steps:
- Wash with dish soap and warm water.
- Rinse well with clean water.
- Dry with a lint-free cloth.
- Check for chips or cracks.
Pay attention to the bottom inside where you’ll put your drainage layer.
Soap residue can harm your plants over time.
Check for small cracks or chips before you begin.
Even tiny damage can cause problems later.
If you use a recycled jar, remove all labels and sticky residue.
White vinegar helps dissolve sticky spots without leaving chemicals.
Essential Materials and Tools for Beginners
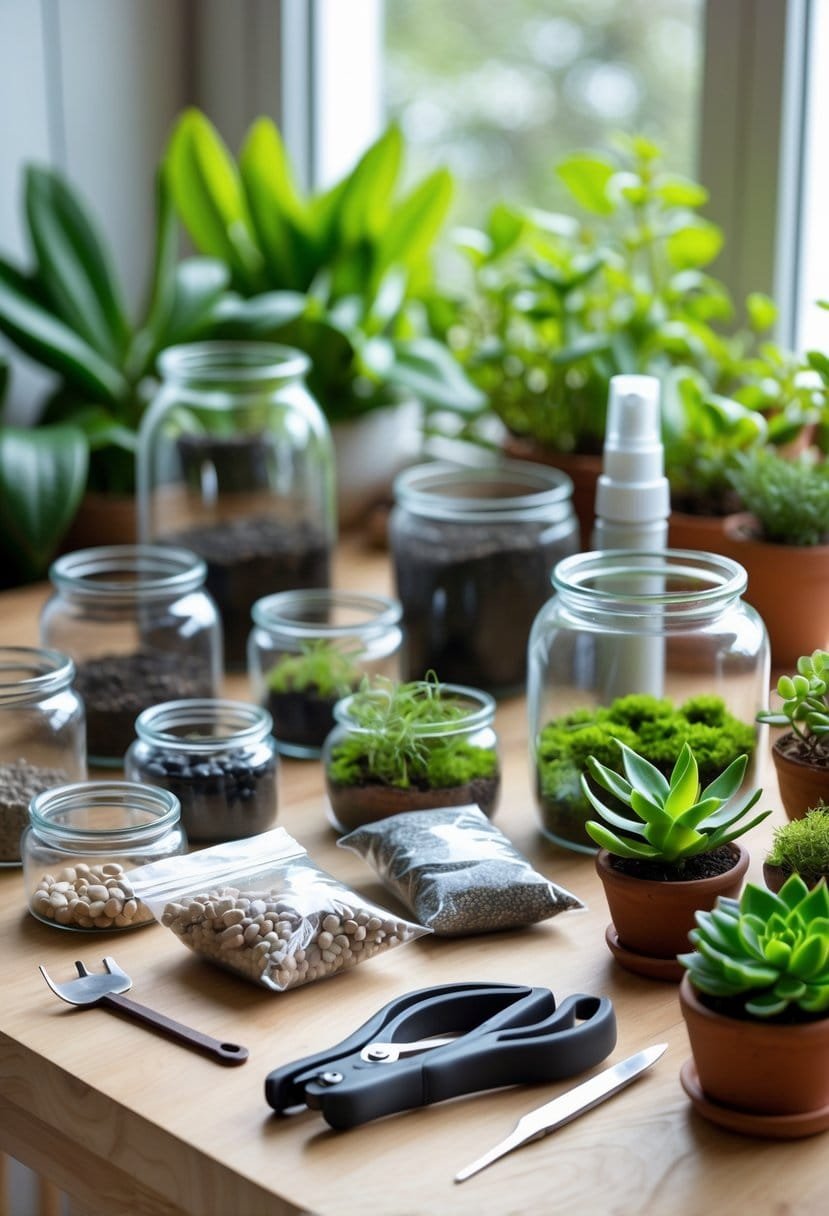
To build your first terrarium, gather specific materials and layer them in the right order.
Each part helps your miniature garden thrive.
Drainage Layer Components
Start your terrarium with a drainage layer.
Use pebbles or small stones as your main drainage material.
They let excess water collect below the soil and keep roots from sitting in water.
Pea gravel works well because it is uniform and drains easily.
The pieces are small enough for good coverage but large enough so soil doesn’t wash down.
LECA (Lightweight Expanded Clay Aggregate) is also a great choice.
These clay balls are light, pH-neutral, and last a long time.
They also provide good air for roots.
| Material | Size | Best For |
|---|---|---|
| Pea gravel | 2–8mm | All terrarium types |
| Small stones | 5–10mm | Large containers |
| LECA | 4–16mm | Humid environments |
Make your drainage layer 1–2 inches deep, depending on your container.
Rinse all materials before use to remove dust.
Activated Charcoal and Its Role
Add a thin layer of activated charcoal above the drainage layer.
This acts as a natural filter and keeps your terrarium balanced.
Activated charcoal absorbs toxins, odors, and chemicals that may build up in closed terrariums.
Use horticultural-grade charcoal, not the kind for aquariums or grilling.
Spread a thin layer about 1/4 to 1/2 inch thick over the drainage.
The charcoal doesn’t need to cover every inch.
Small gaps are fine.
This layer helps prevent bacteria and keeps your terrarium fresh, especially in closed terrariums.
Selecting the Right Potting Soil and Substrates
The soil layer gives your plants nutrients and holds them in place.
Regular potting soil often holds too much water for terrariums, so I make custom mixes.
Terrarium soil should drain well but keep some moisture.
Mix standard potting soil with coco coir and orchid bark for better drainage and air flow.
My simple terrarium soil mix:
- 50% potting soil
- 25% coco coir
- 25% orchid bark or perlite
You can add worm castings for extra nutrients.
Replace up to 20% of the potting soil with worm castings.
They release nutrients slowly and are safe for delicate plants.
Make your soil layer 2–4 inches deep for most plants.
Succulents need less soil, while ferns and mosses like deeper layers.
Decorative Hardscape and Accessories
Decorative elements turn your terrarium into a miniature landscape. Hardscape materials like stones, wood, and moss add visual interest and create natural focal points.
Driftwood brings texture and height to your design. Choose pieces that fit your container and leave space for plant growth.
Soak driftwood for 24 hours before adding it to remove tannins. This helps keep the water clean.
Small decorative stones can create pathways or highlight certain areas. Use different colors and textures to add depth.
Decorative elements should enhance your plants. Stick to natural materials that stay stable and safe in a humid environment.
Once your plants settle in, add small figurines or miniature accessories. These finishing touches give your terrarium a personal touch.
Selecting the Best Terrarium Plants
Closed terrariums work best with humidity-loving tropical plants like fittonia and ferns. Open terrariums suit drought-tolerant succulents and air plants.
Start with beginner-friendly species like moss, pilea, and ficus pumila. Save more challenging plants like orchids for later.
Plant Choices for Closed Terrariums
Closed terrariums create humid, warm environments. These containers trap moisture and create a small water cycle.
Choose plants that thrive in high humidity and indirect light. Nerve plants (Fittonia) are great for beginners because they wilt when thirsty, making care simple.
Best closed terrarium plants:
- Ferns – Lemon button ferns and maidenhair ferns love humidity
- Moss varieties – Sheet moss, cushion moss, and sphagnum moss create lush carpets
- Ficus pumila – This creeping fig fills space quickly
- Pilea species – Both large and small varieties work well
- Tropical foliage – Peperomia, selaginella, and polka dot plants add color
These plants need constant moisture and warmth. Avoid cacti and desert plants in closed systems because they rot in high humidity.
Plant Choices for Open Terrariums
Open terrariums resemble miniature desert gardens. Use plants that handle dry air and bright light.
Succulents are ideal for open terrariums. They store water in their leaves and stems, making them perfect for dry conditions.
Top open terrarium plants:
- Cacti – Small varieties like barrel cacti and prickly pear
- Succulents – Echeveria, jade plants, and string of pearls
- Air plants (Tillandsia) – These need no soil and absorb moisture from the air
- Drought-tolerant herbs – Small rosemary or thyme plants add fragrance
Place these containers in bright, indirect sunlight. The open top lets moisture evaporate and prevents root rot.
Popular Beginner-Friendly Plant Species
Try these plants for your first terrarium project. They are forgiving and grow well in most conditions.
Foolproof starter plants:
| Plant Type | Why It Works | Care Level |
|---|---|---|
| Mood moss | Covers soil, very hardy | Easy |
| Baby tears | Spreads quickly, fills spaces | Easy |
| Small ferns | Classic look, loves humidity | Easy |
| Pilea depressa | Tiny leaves, grows anywhere | Easy |
Syngonium varieties offer bold colors and interesting leaf shapes while staying compact. These plants perform well in terrariums.
Wait to try orchids and carnivorous plants until you master basic care. These require specific conditions that can be hard for beginners.
Tips on Combining Plants for Harmony
Create balanced combinations by mixing different heights, textures, and growth patterns. This keeps any single plant from taking over.
Combination formula:
- One focal plant – A colorful fittonia or unique succulent as the centerpiece
- Ground cover – Moss or creeping plants at the base
- Vertical element – Small ferns or trailing plants for height
- Accent plants – Tiny specimens to fill gaps
Pick plants with similar water and light needs. Mixing tropical and desert plants causes care problems.
Leave space between plants for growth and air circulation. Overcrowding leads to light competition and fungal issues in humid terrariums.
Pair plants with complementary colors for visual appeal. For example, combine red fittonia with green moss or silver pilea with dark purple plants.
Step-by-Step Guide: How to Make a Terrarium
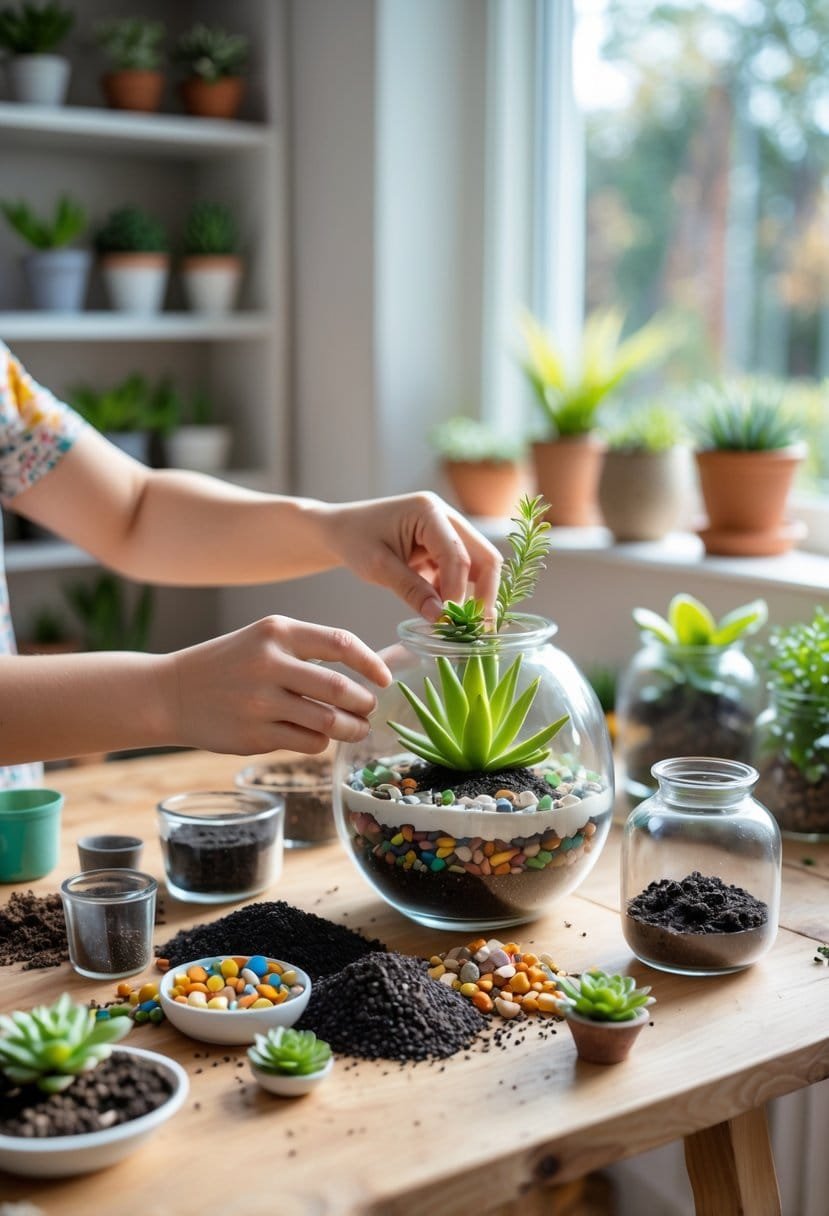
Building a terrarium involves three main steps. First, create drainage with gravel and soil layers. Next, position your plants. Finally, add decorative elements.
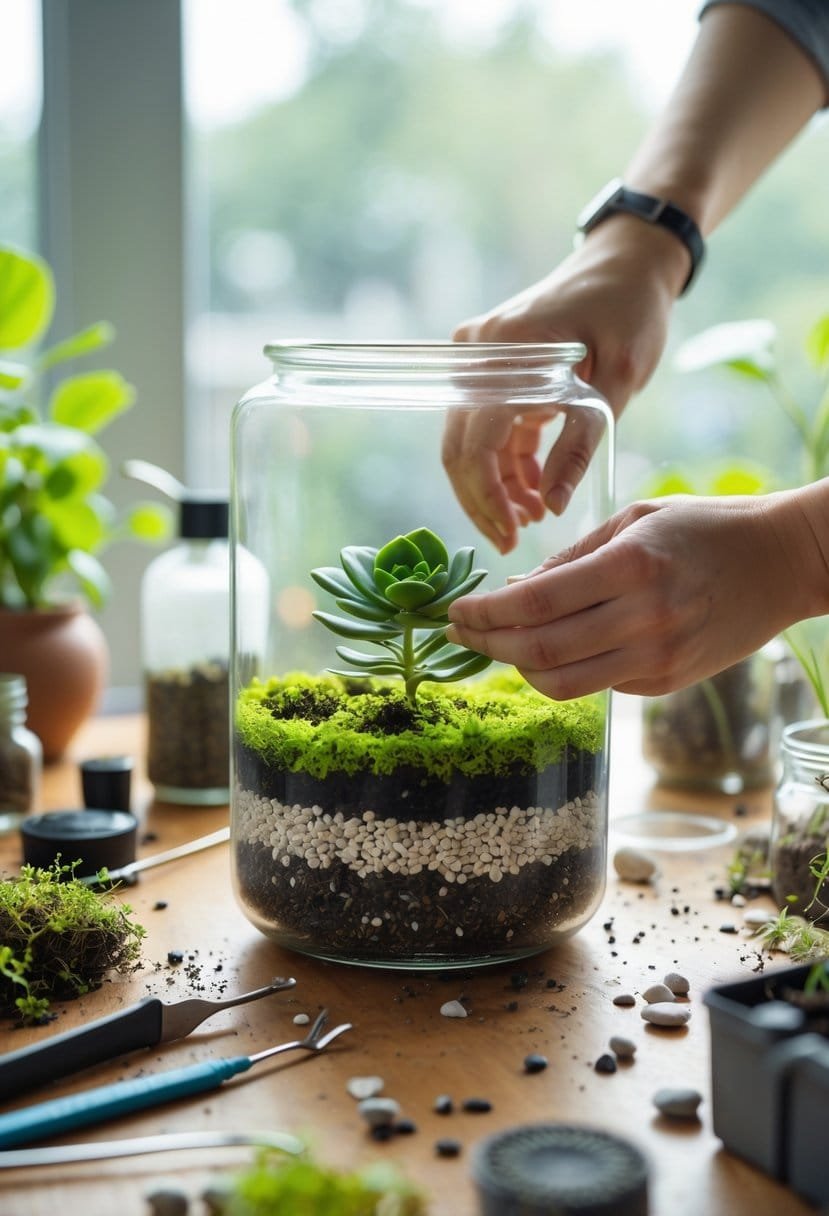
Assembling the Drainage and Soil Layers
Begin with a drainage layer to keep water from pooling at the bottom. This step helps prevent root rot.
Add 1-2 inches of small gravel to the bottom of your container. Use pea gravel or aquarium stones and spread them evenly.
Sprinkle half an inch of activated charcoal over the gravel. This absorbs odors and toxins and helps prevent mold.
Add 2-4 inches of potting mix, depending on your plant sizes. Use peat moss mixed with perlite for tropical plants. For succulents, use cactus soil with extra sand.
Slope the soil slightly toward the back. This adds depth and makes planting easier.
Arranging Plants and Moss
Place the largest plant first, usually in the back corner. This plant becomes the focal point.
Dig a small hole with a spoon and gently remove the plant from its pot. Loosen the roots and brush off extra soil to help the plant settle in.
Leave space between each plant for growth. Small plants need 1-2 inches apart, and larger plants need 3-4 inches.
Use long tweezers for precise placement. Chopsticks work well for tamping soil around roots.
Add moss last. Press sheet moss gently around the plant bases to cover bare soil and create a natural look.
Mist the moss lightly with a spray bottle.
Adding Decorative Finishing Touches
Decorative elements add personality to your terrarium. Choose items that fit the scale and are safe for plants.
Small rocks and pebbles create pathways or accent areas. Place them around plants but avoid touching stems.
Use driftwood for natural texture. Pick pieces smaller than your palm and make sure they are clean and dry to prevent mold.
Avoid plastic decorations in closed terrariums. Instead, use natural materials like shells, crystals, or small branches.
Clean soil off leaves with a soft paintbrush. Wipe the glass walls with a damp cloth to remove fingerprints and smudges.
Mist everything lightly one last time. The soil should feel damp, not soggy.
Lighting and Placement for Your Terrarium’s Success
Proper lighting is key for terrarium health. Most terrariums need bright, indirect light from east-facing windows. Direct sunlight can harm your plants.
Understanding Indirect Sunlight
Indirect sunlight is bright light that doesn’t shine directly on your plants. It is filtered or diffused before reaching your terrarium.
Direct sunlight creates a greenhouse effect inside the container. The glass amplifies heat and light, which can scorch delicate plants.
Signs of too much direct light:
- Brown, crispy leaf edges
- Wilting plants even with moist soil
- No condensation on the glass
- Soil dries out quickly
Place your terrarium near east-facing windows for the best results. These windows provide gentle morning sun and bright, indirect light during the day.
North-facing windows work well too. They give consistent indirect light without harsh rays.
If you only have south or west-facing windows, set your terrarium several feet from the glass. The light should be bright but not hot.
Ideal Locations in Your Home
Your terrarium needs 6-8 hours of bright, indirect light each day. Choose spots with good light and stable temperatures.
Best locations:
- 2-3 feet from east-facing windows
- Directly in front of north-facing windows
- Well-lit rooms with ambient light
- Away from heating vents
Avoid these spots:
- Direct sunlight from any window
- Dark corners or basements
- Near heat sources like radiators
- Bathroom windowsills (humidity changes too much)
Check locations by holding your hand 12 inches above the spot. If you feel warmth from sunlight, the area gets too much direct light.
Keep room temperature between 65-75°F. Avoid places with temperature swings of more than 10 degrees.
If you need artificial light, use LED grow lights. Place them 12-18 inches above your terrarium and run them 8-10 hours a day.
Avoiding Common Lighting Mistakes
Many beginners put terrariums in sunny windows. This can harm most terrarium plants.
Common lighting errors:
- Placing terrariums in south-facing windows
- Moving them around to get more sun
- Ignoring temperature changes from lighting
- Using the wrong artificial lights
South-facing windows get full sun during the hottest part of the day, which can overheat your plants.
Keep your terrarium in one good spot. Plants need steady conditions to thrive.
If you use artificial lights, avoid regular household bulbs. They get too hot and lack the right light spectrum. Use fluorescent or LED grow lights instead.
Warning signs of lighting problems:
- Plants stretching toward light (not enough light)
- Leaves turning yellow or brown (too much light)
- No condensation on glass (too hot and dry)
- Excess condensation that never clears (poor air circulation from overheating)
Terrarium Maintenance and Long-Term Care
Proper care helps your terrarium thrive. Focus on watering, plant management, and humidity control.
Watering Tips for Beginners
Check your terrarium’s moisture before watering. Look at the soil through the glass; it should appear slightly damp, not soggy.
Signs your terrarium needs water:
- Soil looks light brown or dry
- Plants look wilted
- No condensation on glass walls
Overwatering causes root rot and kills plants faster than drought.
Water slowly using a spray bottle or small watering can. Add water drop by drop until the soil darkens. Stop if you see water pooling at the bottom.
Watering schedule:
- Check moisture weekly
- Water only when soil feels dry
- Use distilled water to avoid mineral buildup
Closed terrariums create their own water cycle. Once balanced, you may only need to water every few weeks or months.
Pruning and Plant Health
I trim my terrarium plants regularly to maintain their shape and prevent overcrowding. Overgrown plants block light from reaching smaller plants below.
When to prune:
Plants touch the terrarium walls
Leaves turn yellow or brown
Growth blocks other plants
Stems reach the container top
I use small scissors or tweezers to cut stems cleanly. I remove dead leaves right away to prevent mold.
Plant health warning signs:
Brown or black spots on leaves
Musty smells
White fuzzy growth (mold)
Yellowing leaves
I remove diseased plants quickly to protect healthy ones. Dead plant matter can cause mold blooms that spread in your terrarium.
Replace removed plants with similar-sized species. I choose slow-growing varieties that fit the space.
Managing Condensation and Humidity
I watch condensation levels to check my terrarium’s humidity. Light fogging during warm parts of the day shows healthy moisture.
Ideal condensation patterns:
Light mist on glass in morning
Some clear areas stay visible
No heavy water droplets
If I see too much condensation, I crack the lid open for a few hours to let humidity escape.
Fixing humidity problems:
| Problem | Solution |
|---|---|
| No condensation | Add a small amount of water |
| Heavy droplets | Open lid for 2-4 hours |
| Constant fogging | Remove lid overnight |
I aim for 60-80% humidity inside my terrarium. Tropical plants do well in this range without fungal issues.
If humidity stays too high, I add activated charcoal to absorb extra moisture. This stops bacteria and unpleasant smells.
Troubleshooting Common Problems
Most terrarium problems come from too much moisture, which leads to mold and bugs.
Preventing Mold and Rot
Mold looks like fuzzy white, green, or black growth on soil or plants. It grows in wet conditions with poor airflow.
I remove mold right away by scraping it off with a spoon or tweezers. I wipe glass walls with a damp cloth to clear spores.
If I see mold, I water less often. I open the lid for 2-3 hours daily to improve airflow and help moisture evaporate.
Root rot shows up as:
Black or mushy roots
Yellowing leaves
Foul smell from soil
I remove affected plants completely. I replace soggy soil with fresh, dry potting mix.
I wait 3-4 days before watering again. I add a thin layer of activated charcoal under the soil to absorb moisture and stop bacteria.
Pest Management: Springtails and More
Small jumping insects in your terrarium are likely springtails. These tiny bugs help by eating dead plant matter and mold.
Springtails are helpful and do not harm living plants. I keep them unless there are too many.
Other common pests:
Fungus gnats (small flying insects)
Aphids (tiny green or black bugs on leaves)
Spider mites (fine webs on plants)
I remove harmful pests by wiping leaves with a damp cloth. I use tweezers to pick off larger insects.
For severe infestations, I remove affected plants and clean the terrarium with diluted rubbing alcohol before adding new plants.
To reduce pest problems, I avoid overwatering and remove dead plant material quickly.
Refreshing Soil and Components
Terrarium soil compacts and loses nutrients after 6-12 months. Plants may grow slowly or have yellow leaves when soil needs refreshing.
I replace soil once per year. I remove all plants carefully and rinse their roots with lukewarm water.
I add fresh activated charcoal and drainage layers. I mix new potting soil with perlite for better drainage.
I trim plants regularly to prevent overcrowding. I cut back overgrown stems and remove dead leaves weekly.
I replace moss or stones if they get moldy or discolored. I clean glass walls monthly with vinegar solution to remove mineral deposits.
Signs your terrarium needs refreshing:
Cloudy or smelly water
Slow plant growth
Persistent mold problems
Soil pulling away from glass walls
Most terrarium components last 12-18 months with proper care.
Frequently Asked Questions
Starting your first terrarium brings up many questions about materials, plants, and care. Here are answers to common concerns about containers, drainage, plant choices, and maintenance.
What materials are needed to create a basic terrarium for a beginner?
I recommend starting with a clear glass container at least 6 inches wide. You will need gravel for drainage, activated charcoal, and proper terrarium soil as foundation layers.
For tools, use long tweezers or chopsticks for planting. A small spoon helps move soil. A spray bottle works best for gentle watering.
The drainage layer should be 1-2 inches of pea gravel or small stones. Add half an inch of activated charcoal on top to prevent odors and mold.
Your soil layer needs to be 2-4 inches deep, depending on plant roots. Use a light, well-draining potting mix.
I keep a small brush handy to clean soil off leaves and glass. This keeps your terrarium neat and prevents algae.
Can you provide step-by-step instructions on how to make a closed terrarium?
I clean my glass container with soap and water. I rinse it well and let it dry.
I spread gravel evenly across the bottom for drainage. I pour the activated charcoal layer next. I add a thin layer of moss if I want to stop soil from filtering down.
I add potting mix for the soil layer and slope it gently for interest. I make small holes for each plant.
I remove plants from their pots and loosen the roots. I lower each plant into its hole with tweezers and firm the soil with chopsticks.
I mist the soil and plants lightly with a spray bottle. I do not soak the soil.
I add decorative elements like rocks or figurines. I place the lid on the container. The closed environment creates its own water cycle through condensation.
What are the best plants to choose for a beginner’s terrarium?
I recommend hardy plants that stay small and grow slowly. Ferns do well in closed terrariums because they love humidity.
Fittonia plants have colored veins and thrive in terrarium conditions. They stay compact and add interest. Peperomia varieties are also easy for beginners.
For open terrariums, I suggest small succulents like Haworthia or Echeveria. They tolerate lower humidity and need less water.
Mosses create a lush carpet and are easy for beginners. Sheet moss and cushion moss both work well in closed systems.
Avoid fast-growing or large plants. Skip flowering plants, as they need more light than most terrariums provide.
I choose plants with similar water and light needs. Mixing tropical plants with succulents causes care problems.
What animals are suitable for inclusion in a beginner’s terrarium, and how can their needs be met?
I do not recommend adding animals to your first terrarium. Live animals need specific temperature, humidity, and food that are hard to manage.
Plant-only terrariums are much easier for beginners. They do not need feeding schedules or animal waste cleanup.
If you want movement, add small decorative elements instead. Colorful stones or mini figurines add interest without extra care.
Some experienced terrarium makers add springtails or isopods to help break down organic matter. These tiny creatures help with decomposition but need research to maintain.
I suggest learning plant care first before adding any living creatures. A thriving plant ecosystem is rewarding for most beginners.
How do you properly maintain and care for an open terrarium?
Open terrariums need more frequent watering because water evaporates freely. I check soil moisture weekly by inserting a chopstick into the soil.
Water when the top inch of soil feels dry. Pour water slowly around the plants, not directly on leaves. Stop when you see water pooling at the bottom.
I place open terrariums near bright, indirect light. East or north-facing windows work best. Avoid direct sunlight, which can overheat and damage plants.
Trim dead or yellowing leaves right away with small scissors. This prevents mold and keeps your terrarium healthy.
Remove fallen debris regularly. Dust the glass weekly with a soft cloth to keep it clear.
Check for pests monthly by looking at plant leaves closely. Remove any insects you find with tweezers.
What are the differences between making a terrarium in a jar versus other containers?
Jars have narrow openings, so planting becomes more challenging. I use a funnel to add gravel, charcoal, and soil through the small opening.
Long tools help with jar terrariums. I make my own by taping tweezers to chopsticks for extra reach.
Specialized bottle terrarium tools are also available.
Plant selection is more limited in jars. Large root systems do not fit through the opening, so I choose smaller plants or easy-to-root cuttings.
Wide-mouth containers like fishbowls allow easier access for planting and maintenance. You can use regular tools to position plants exactly where you want them.
Jars create a more enclosed environment, even when open. The narrow opening reduces air circulation compared to wide containers.
I find jar terrariums harder to clean and maintain. Removing dead leaves or rearranging plants is difficult through the small opening.