How to Create a Stunning Fittonia Terrarium (Simple Step-by-Step Guide)
Fittonias, also known as nerve plants, make for beautiful terrarium specimens. Their vibrantly patterned leaves add life and color to any enclosed glass container. If you’ve been looking for an easy way to craft a living work of art, Creating a Fittonia Terrarium is a fun weekend project.
In this straightforward, step-by-step guide, you’ll learn everything you need to know about making a Fittonia terrarium. From choosing the right container and materials to selecting compatible plants and proper care, you’ll have all the expert tips for DIY success. Follow along as we transform basic supplies into a stunning indoor garden sure to brighten up any space. Ready to make a Fittonia terrarium? Let’s get started!
The beauty of Fittonia in a closed terrarium
Native to the tropical rainforests of South America, Fittonias are absolutely perfect for enclosed terrarium environments. Their short stature and brightly colored leaves thrive in the stable conditions provided by an air-tight glass container. The striking patterns and venation of Fittonia foliage add beauty and visual interest, making them one of the most popular terrarium plants.
In their natural habitat, these nerve plants receive filtered light, consistent moisture, and humid conditions. A closed terrarium easily replicates this environment, allowing the Fittonia to flourish. Their vivid red, pink, white, or silver-accented leaves stand out against the lush green background of companion plants. The high humidity also enhances color vibrancy.
Fittonias are relatively low maintenance, making them ideal for beginning terrarium gardeners. Their trailing growth habit lends well to cascading over the edges of the container or filling in spaces between other plants. No terrarium feels complete without the inclusion of at least one Fittonia variety. Their vibrancy brings energy and life to the entire arrangement.
Key Takeaways
Constructing your own Fittonia terrarium is a rewarding DIY project with the following key takeaways:
- Select a proper glass container with adequate volume and a wide base.
- Build a layered foundation of drainage material, activated charcoal, and airy substrate.
- Choose young, vibrant Fittonia specimens as centerpiece plants. Mix colors for added diversity.
- Complement Fittonias with lush greenery like ferns, nerve plants, and moss.
- Plant using micro-tip pruners and tweezers for intricate placement work.
- Maintain ideal light, humidity and moisture levels mimicking the Fittonia’s natural habitat.
- Provide routine care like pruning, wiping glass, fertilizing, and refreshing charcoal.
- Monitor conditions daily and make adjustments quickly to prevent decline.
With the right materials and a bit of practice, you can create a thriving living art piece with a Fittonia terrarium. This low-maintenance indoor garden will bring natural beauty to any space.
Terrarium Materials
Selecting the right materials is crucial to creating an ideal growing environment for your Fittonia terrarium. From the container and substrate to drainage layers and decorative touches, every component should be carefully considered. Since most beginners are creating a Fittonia Terrarium for the first time, the items below would be useful.
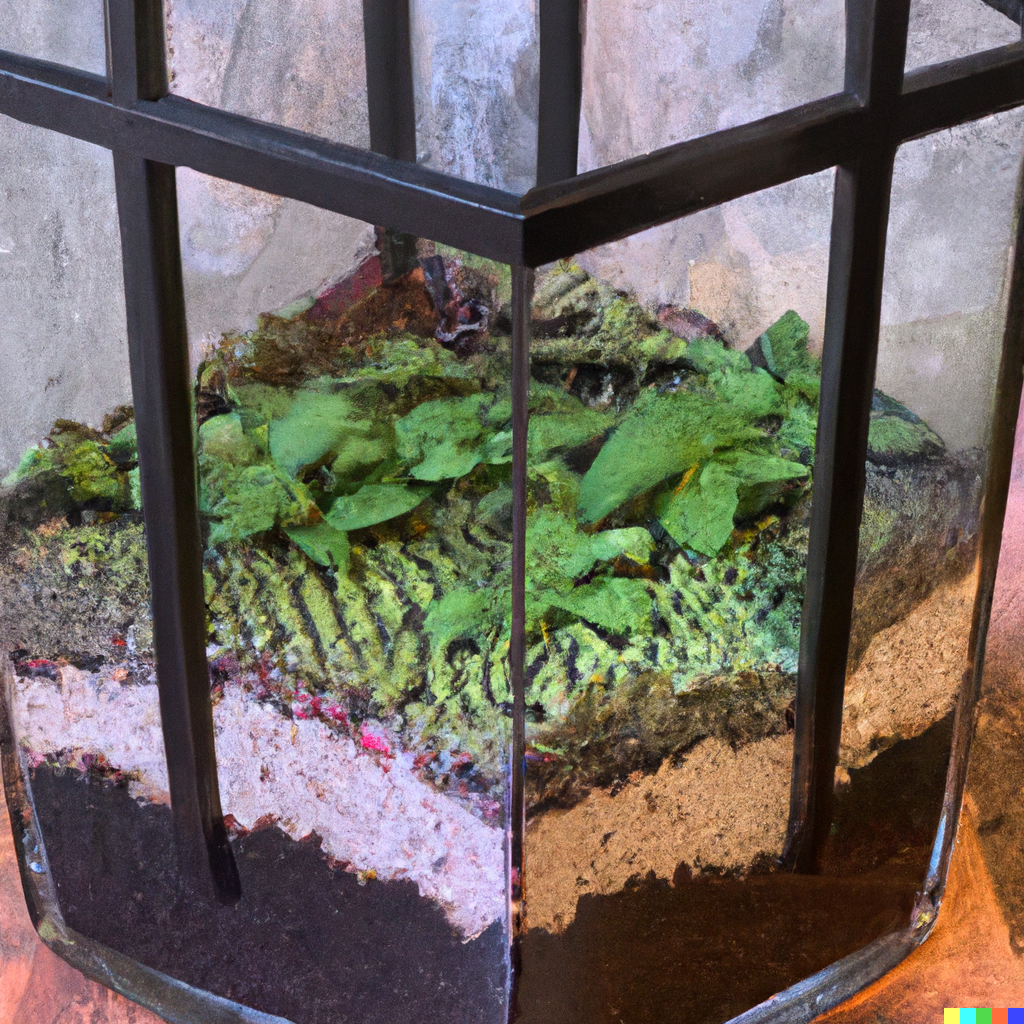
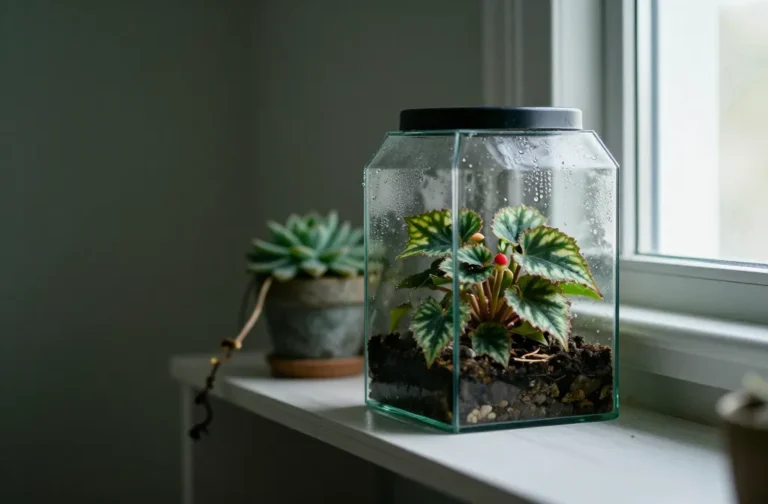
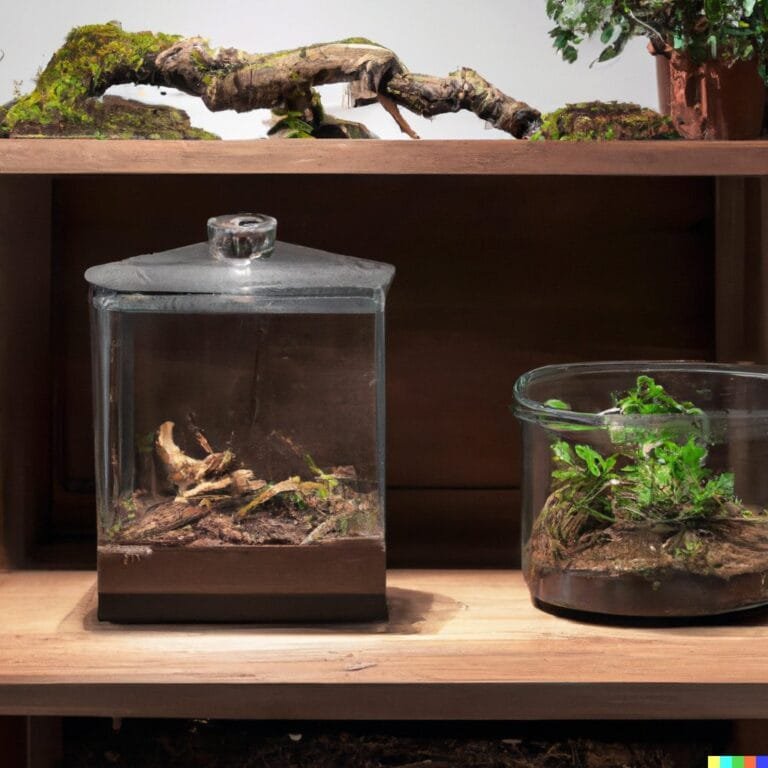
The Container
The container is the foundation that houses the entire terrarium ecosystem. Glass is the traditional and most common choice for enclosed terrariums. Glass allows for unobstructed visibility and does not degrade over time. Look for a glass container approximately 1-5 gallons in volume, depending on the scale you desire. Larger volumes provide more space for additional plants. Smaller containers around 1 gallon are well-suited for desk or countertop placement.
When selecting glass, opt for clear non-distorted varieties to prevent warping of visibility. Recycled glass food jars or antique apothecary jars make excellent found container options. For more stability, choose a jar or vessel with a wide base rather than a narrow top-heavy shape. Glass bowls also work well for open-style terrariums. Just be sure to select a thick, durable glass to prevent cracking.
For beginners, glass terrarium kits take the guesswork out of material selection. Many come complete with the glass container, drainage layer, substrate mix, and decorative accessories included. Some also incorporate LED growth lights. While pricier, kits provide balanced ready-made foundations ideal for first-time builders.
Substrate
The substrate refers to the soil medium within the terrarium. This provides the structure for root establishment and nutrients for plant growth. The ideal substrate for Fittonias will be lightweight, airy, and able to retain moisture. Select a substrate depth between 2-3 inches to accommodate the relatively shallow Fittonia root system.
Popular substrate options include mixes containing peat moss, coco coir, compost, horticultural charcoal, bark chips, or vermiculite. Pre-mixed blends specifically for terrariums are also readily available. Look for organic, all-natural ingredients and avoid chemical-laden synthetic mixes. The substrate should provide a slightly acidic pH between 5.5-6.5 preferred by Fittonias.
Beyond nutrition, the substrate must provide moisture retention. Quick-draining mixes can dry out too rapidly in the relatively small environment of a terrarium. Look for coconut coir or sphagnum peat-based mixes which retain water well. Always avoid heavy, dense substrates like standard potting soil.
Drainage Layer
Proper drainage is key to preventing soggy soil and root rot within the confined space of a terrarium. To improve drainage, first add a 1-inch layer of gravel, pebbles, LECA clay balls, or even raw unglazed clay pot shards. This creates airflow pockets and channels excess moisture out of the substrate.
River rocks, pea gravel, marble chips, and volcanic rock all make excellent drainage materials. Just be sure to disinfect rocks collected from outdoor areas before bringing them into your terrarium. The porous clay LECA balls work well to improve drainage too. Size the materials small enough not to displace and shift around the top substrate layer.
Hardscape
Decorative hardscape elements help enhance the aesthetic appeal of your terrarium design. Sand, marble, stones, driftwood, and figurines can all make attractive additions. When sourcing hardscape materials, always verify they are safe for enclosed terrarium environments. Any rocks or minerals should be completely inert without the chance of leaching chemicals.
Natural collected items like dried branches, seed pods, shells, and stones should be thoroughly sanitized before incorporation. Opt for hardscape materials that are relatively small in scale, fitting proportionally with the container size. Aim for minimal simple touches to complement, not overwhelm, the plant composition.
Fittonia Terrarium Plants
When you create a Fittonia Terrarium, there are a few items to consider. In addition to the Fittonia itself, incorporating compatible companion plants will elevate your terrarium design. Selecting the right supporting cast of greenery will add biodiversity, textural contrast, and visual interest. Let’s look at complimentary terrarium plant options.
Fittonia
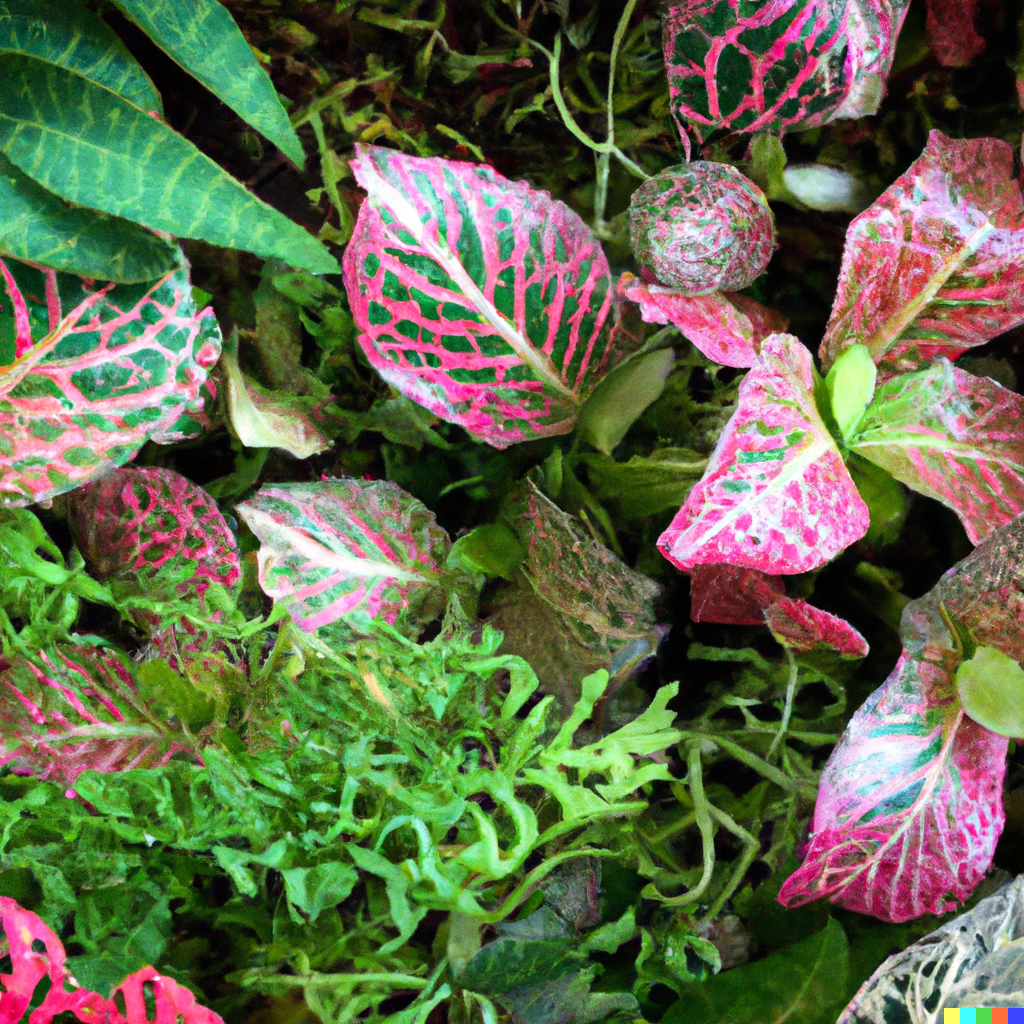
Of course, the star of the show is the Fittonia itself. The most commonly found varieties include Fittonia albivenis (nerve plant) and Fittonia verschaffeltii (mosaic plant). Both feature striking colorfully veined foliage.
When selecting Fittonias for your terrarium, look for young, healthy specimens with vibrant undamaged leaves around 4-8 inches in size. Larger plants can be carefully divided into smaller starts. Seek out actively growing plants without dried or wilting leaves. Established potted Fittonias with developed root systems help ease the transition into the terrarium environment.
Aim for a total of 2-4 individual Fittonia plants based on the size of your container. This allows adequate room for growth without overcrowding. A mix of both nerve plant and mosaic plant varieties combines different leaf shapes and color patterns for added diversity.
Colours
One of the appeals of Fittonia is the range of vibrant leaf colors and patterns. The most common are:
- Red-veined – Deep green leaves with crimson venation
- Pink-veined – Emerald leaves with pink veining
- Silver-veined – Sea green leaves with silver accents
- White-veined – Dark green with distinct white veins
Mixing a combination of different Fittonia color varieties together in one terrarium makes for a striking composition. Contrasting their shades against each other helps highlight the unique leaf patterns.
When purchasing, inspect the plants up close to verify the advertised leaf coloration. Some can fade or change depending on light conditions. Seek out the most vibrant hues possible for maximum impact.
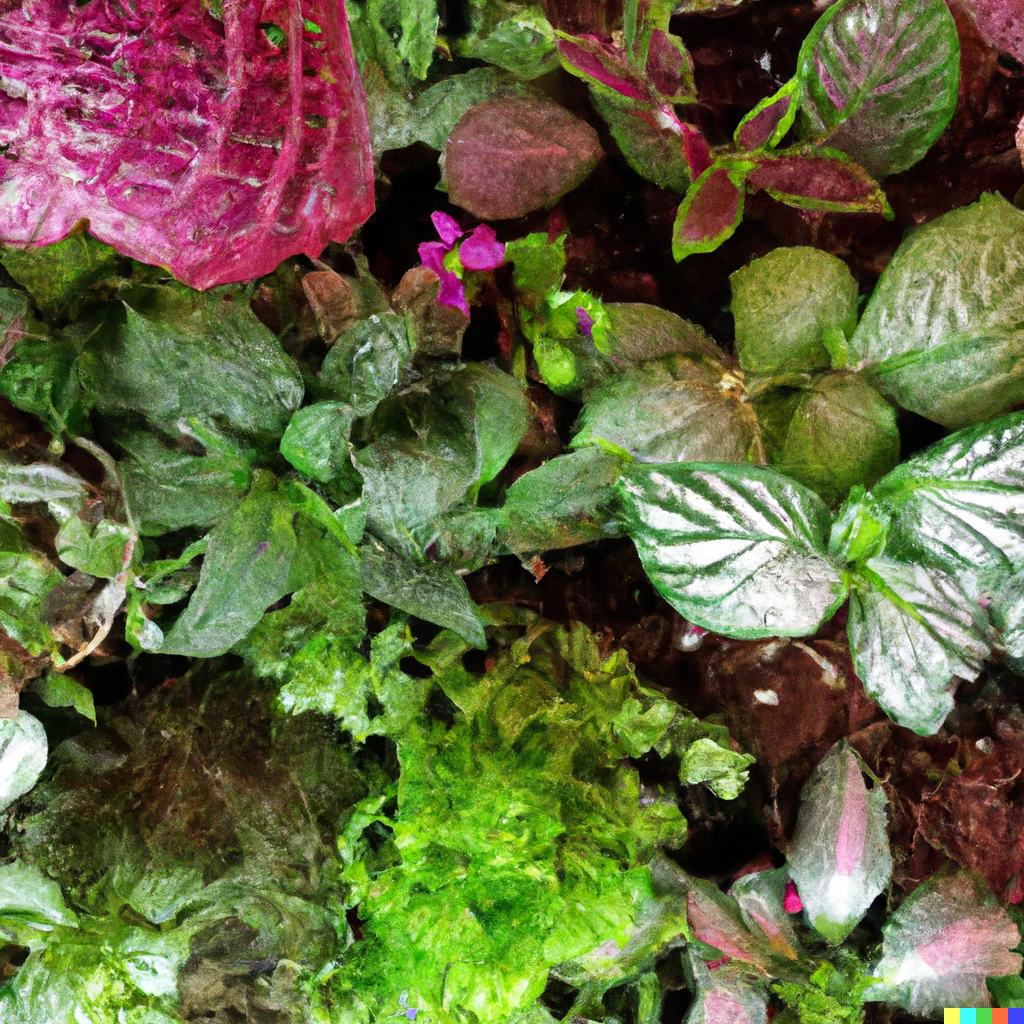
Companion Plants
Fill out the landscape with companion plants that complement the Fittonia’s colors and textures. Good terrarium choices include:
- Ferns – Small tender fern varieties like rabbit’s foot or maidenhair. Lacy textures contrast the Fittonia leaves.
- Nerve plants – Mixing in other nerve plant varieties adds more color diversity.
- Mosses – Cushion or mood moss fills space and softens edges.
- Low groundcovers – Lysimachia, baby’s tears, and Irish moss create lush carpets around the Fittonia.
- Accent plants – Trailing ivies, small bromeliads, or flowering plants like African violets.
Choose companion plants with similar light, watering, and humidity needs as the Fittonia. Plant for a balanced composition, allowing each plant to stand out and complement the overall design.
Other Items
While plants and hardscapes provide a visible composition, a few additional accessories play a crucial role in establishing a healthy enclosed environment. Choosing the right supplementary materials makes maintaining ideal terrarium conditions much easier.
Activated Charcoal
Activated charcoal is a must-have for any closed terrarium. The porous charcoal has an extremely high surface area which effectively absorbs impurities and toxins from the stale air and water inside the enclosed container. This helps purify the internal environment and prevent the buildup of mold, fungi, and bacteria.
Place a layer of activated charcoal pellets or powder on top of the drainage layer before adding substrate. Use approximately 1 teaspoon of charcoal per gallon of terrarium size. A 250 ml bottle of activated charcoal powder will usually suffice for most beginner terrariums.
Over time, the absorbing capacity of the charcoal will become saturated. Plan to replace the activated charcoal layer every 4-6 months. During routine maintenance, carefully scoop out the old charcoal and replenish it with a fresh layer. This maintenance is crucial to maintaining clean purified air.
When shopping, look for 100% pure activated coconut shell charcoal in pellet or powder form. Avoid charcoal briquettes or lower-grade varieties. Seek out brands specifically marketed for horticultural and terrarium use for the highest quality filtration.
Sphagnum Moss
Sphagnum moss acts as a living liner adhered to the inside glass walls of a terrarium. This aids humidity, provides naturalistic camouflage, and gives plants added support. Sheet moss and mood moss also work well.
Before installation, soak strips of sphagnum moss in water until completely saturated. Squeeze out any excess before gently pressing the moss firmly into place along the perimeter. Mist with water occasionally to allow the moss to adhere.
Choose pliable live moss over dried moss varieties that become rigid and crack off the glass. Opt for flattened New Zealand sphagnum moss commonly sold for this specific purpose. Avoid clumpy chunky sphagnum better suited to open planters.
The moss will continue growing inside the humid terrarium. Trim back excess growth during routine maintenance pruning. Add water misting when needed to keep the perimeter moss thriving.
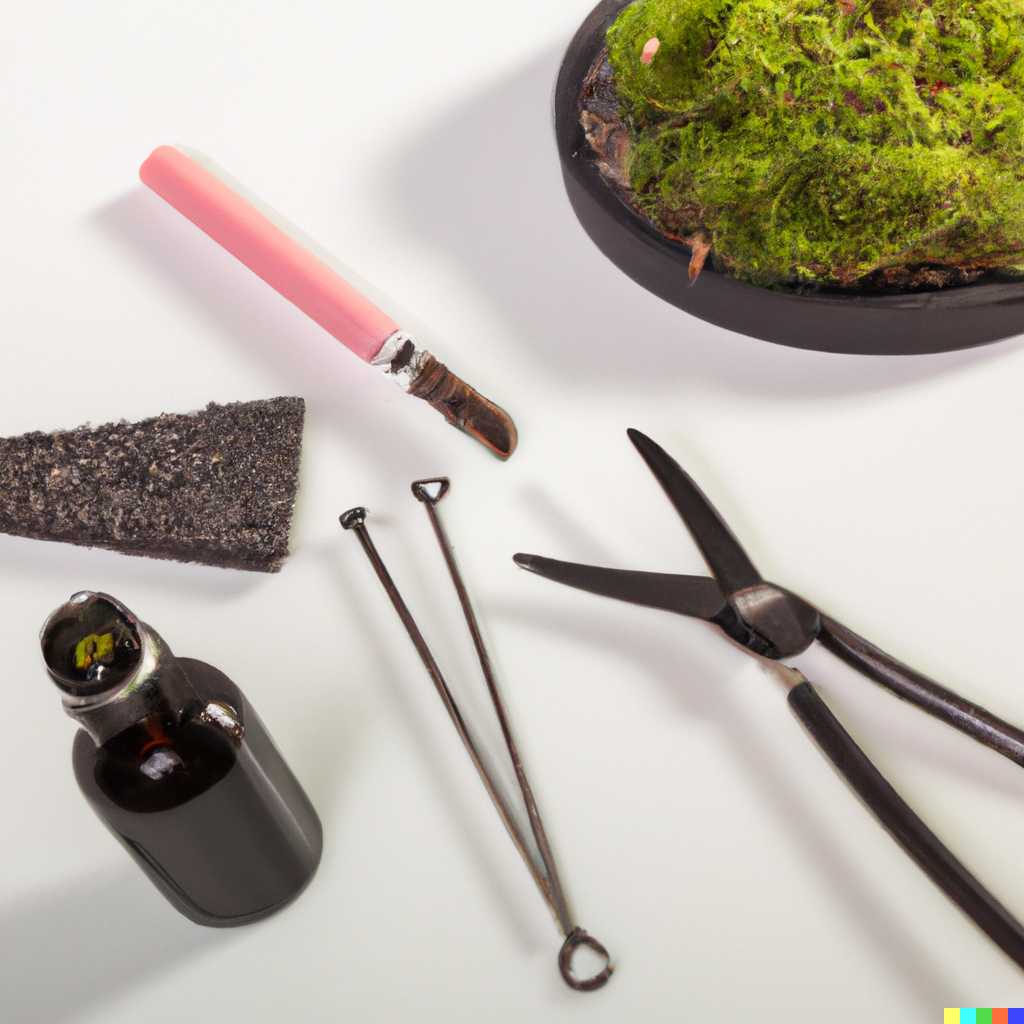
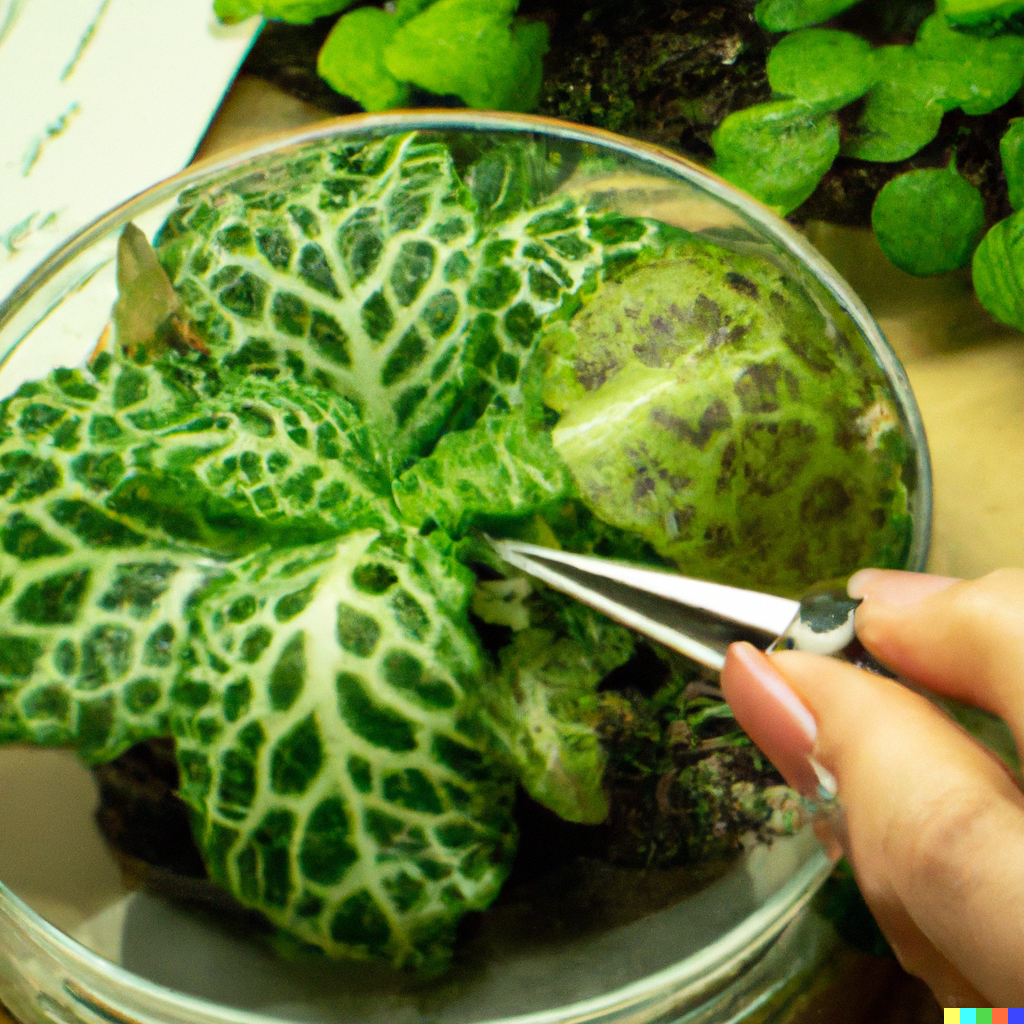
Hand Pruners & Tweezers
Planting and maintaining a terrarium requires dexterity and precision when accessing the enclosed space. Specialty tools designed for detailed indoor gardening help make care much easier.
Invest in a pair of high-quality micro-tip hand pruners. Look for ergonomic pruners with curved blades capable of making clean cuts in very tight quarters. Avoid large clumsy pruners impossible to maneuver inside a terrarium.
Long, straight stainless steel tweezers allow for intricate plant placement and positioning. The slender precision tips help when dealing with small plants, seeds, cuttings, or moss implantation.
Reserve your terrarium tools only for use inside your terrariums to prevent cross-contamination. Routinely sterilize with alcohol or antibacterial soap after each use.
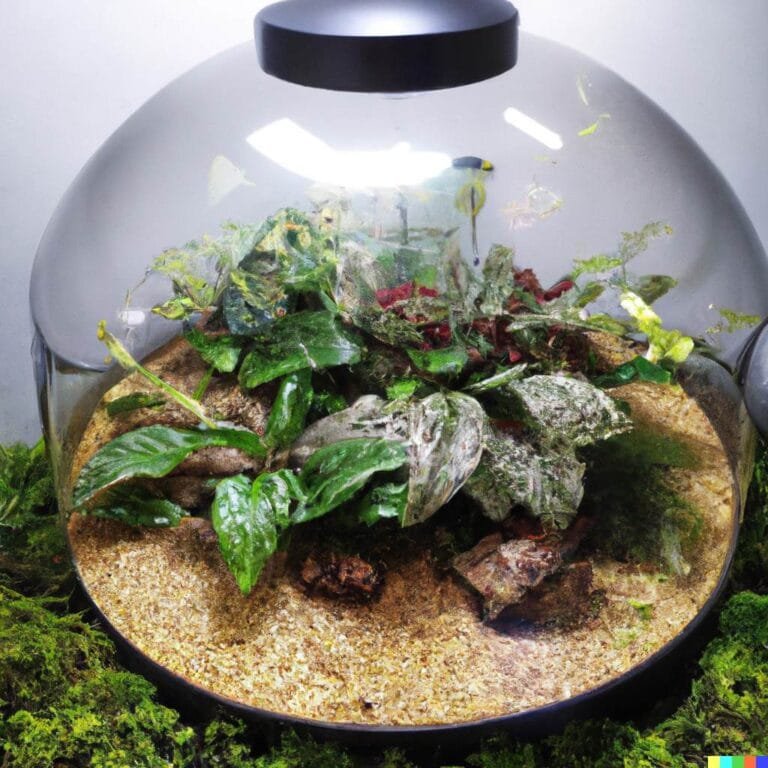
Building a Fittonia Terrarium
Now that you have all the components, it’s time to put them together and build your Fittonia terrarium. Follow these key steps carefully to construct the proper foundation and environment:
The Foundation
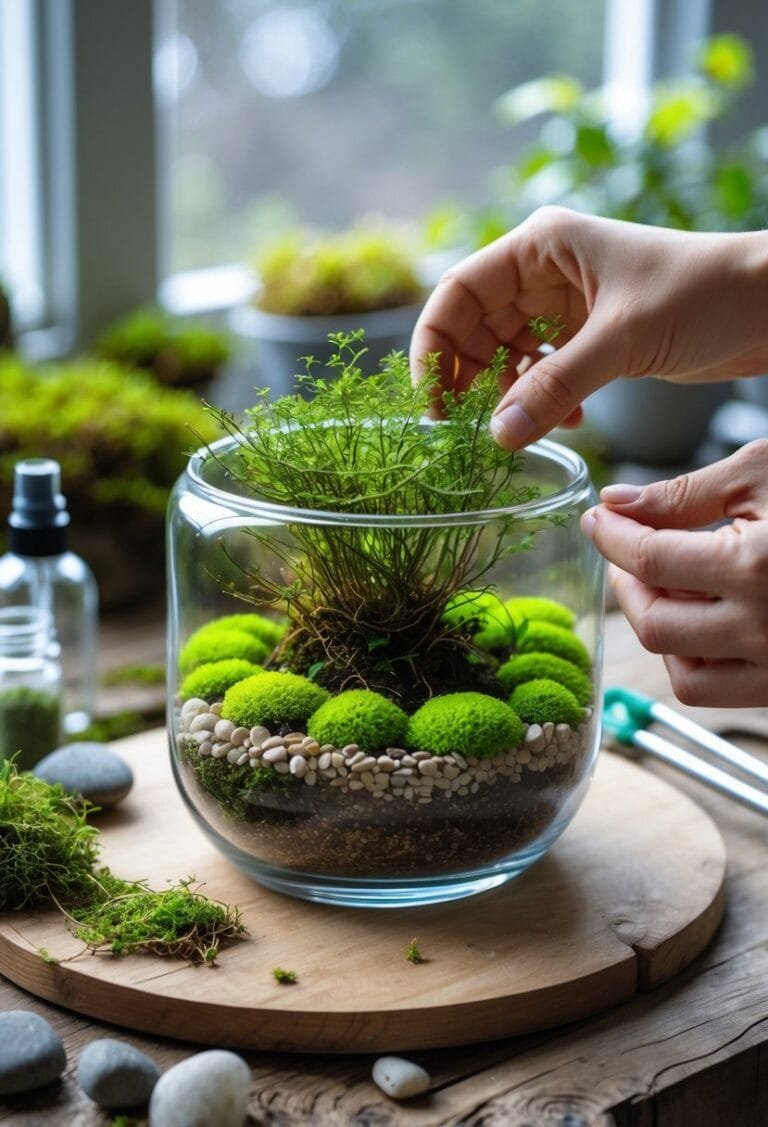
To create a Fittonia Terrarium, start by adding the drainage layer of pebbles, gravel, or LECA balls 1-inch deep at the bottom of the container. This layer should be pressed down firmly to prevent shifting when adding the substrate.
Next, add a thin layer of activated charcoal pellets or powder on top of the drainage material to help filter the internal environment. Use 1 teaspoon per gallon of container size.
The substrate is added next. Pour the terrarium soil mix on top of the charcoal to a depth of 2-3 inches. Mound the substrate to create contour and gently slope up the sides.
Finally, line the interior glass walls with soaked sphagnum moss. Press the moss firmly into place or use aquarium-safe silicone to adhere. This helps boost humidity.
Planting the Fittonia
Once the foundation is prepped, it’s time to add the Fittonia centerpieces and companion plants. Have all your plant choices pre-selected and ready to insert.
Using the micro-tip pruners and long tweezers, plant the Fittonias approximately 2 inches apart to allow some space between their leaves. Nestle them into the substrate with the rhizome and roots fully buried.
Fan out the leaves and arrange the Fittonias at different heights and locations. Plant companions like ferns, nerve plants, and moss around the Fittonia.
Leave 1-2 inches between all plants for airflow and sprinkle more substrate around the roots to secure everything. Mist gently after planting to settle the soil.
Adding the Moss
To finish off the plant composition, tuck pieces of mood or cushion moss into any visible gaps. Use the tweezers to precisely place the moss between plants and the hardscape.
This helps blend elements together cohesively. The moss also aids humidity levels and brings a lush, earthy look reminiscent of a natural rainforest floor.
Give it a Good Watering
After assembly, thoroughly water your completed terrarium until water drains from the bottom. This will settle and consolidate the substrate while saturating the drainage layer.
Leave the glass top off for the first few days to allow excess moisture to evaporate. Once the environment stabilizes, put the top on securely to seal in the humidity.
Fittonia Terrarium Care
Creating a Fittonia Terrarium is just the first step. Caring for your completed Fittonia terrarium requires paying close attention to conditions and routine maintenance. Replicating the warm, humid, indirect light environment of their natural habitat keeps Fittonias thriving.
Conditions
Maintaining ideal environmental conditions is crucial for the health of the Fittonia. Key factors include lighting, humidity, moisture, and temperature as outlined below.
Light
Fittonias prefer bright indirect light, avoiding direct sun which scorches leaves. Place in east or west-facing windows where they receive gentle morning/evening light. North-facing windows also work well.
Supplement with grow lights if needed, keeping lights 6+ inches above the terrarium. Use LED plant bulbs or full spectrum grow lights on 12-14 hour daily cycles. Monitor for bleached or faded leaves indicating too much light intensity.
Moisture & Humidity
Ideal humidity levels are 60-80%. Monitor humidity daily and mist with distilled water when needed. Avoid water collecting on leaves to prevent rot. Ensure the drainage layer does not become waterlogged.
The substrate should remain evenly moist but not soggy. Careful watering just enough to saturate the substrate is better than heavy overwatering. Remove any pooled water to maintain air circulation.
Watering
Water when the top 1 inch of the substrate becomes dry. Use distilled or rainwater only. Tap water contains salts, chlorine, and fluoride harmful to the sensitive Fittonia.
Water thoroughly until it drains from the bottom. Then discard any excess from the drainage tray promptly. Never allow sitting water beneath the terrarium.
Maintenance
While terrariums are relatively low maintenance, some periodic care is essential to keep plants thriving. Pruning removes dead growth that can rot and spread disease. Wiping interior glass helps maximize light for photosynthesis. Activated charcoal refreshing filters the stagnant air. Fertilizing provides nutrients in the confined root space. Propagating and transplanting prevent overcrowding. Consistent maintenance makes sustaining a healthy mini-ecosystem much simpler.
- Wipe glass regularly with a damp cloth to improve light penetration.
- Inspect leaves weekly. Prune any dead/damaged foliage.
- Trim back moss/plants impeding airflow or light.
- Refresh the activated charcoal layer every 4-6 months.
- Fertilize monthly with a 1/4-strength houseplant blend.
- Propagate & divide Fittonia when overcrowded. Transplant babies into a new terrarium.
For a Cool Video:
Conclusion
Fittonias are the perfect plant choice for crafting stunning enclosed terrariums. Their brightly patterned foliage and trailing growth habit thrive in the warm, humid environment of a glass container garden. By following this beginner-friendly guide, you now have all the knowledge needed to choose the right materials, plants, and accessories to create a thriving Fittonia terrarium.
The simple layered construction establishes ideal conditions mimicking the Fittonia’s native rainforest habitat. Proper lighting, humidity, moisture, and drainage keep plants healthy with minimal maintenance required. Routine care like pruning and wiping down glass prevents decline. Your living art piece will provide natural beauty and a relaxing indoor oasis.
The satisfaction of nurturing mini ecosystems is extremely rewarding. And the process of designing a terrarium allows endless creativity. Experiment with hardscape designs, plant arrangements, and complementary greenery until you find a combination that brings your vision to life. The possibilities are only limited by your imagination.
So explore the vibrant world of Fittonias and get creative with your own custom closed terrarium. You’ll enjoy the stress-relieving benefits of gardening, even in small indoor spaces. Just be sure to share photos of your beautiful finished terrarium and the helpful creatures it attracts!
4 Comments
Comments are closed.