I recently found an old fishbowl in my garage. Instead of letting it gather dust, I transformed it into something beautiful and useful.
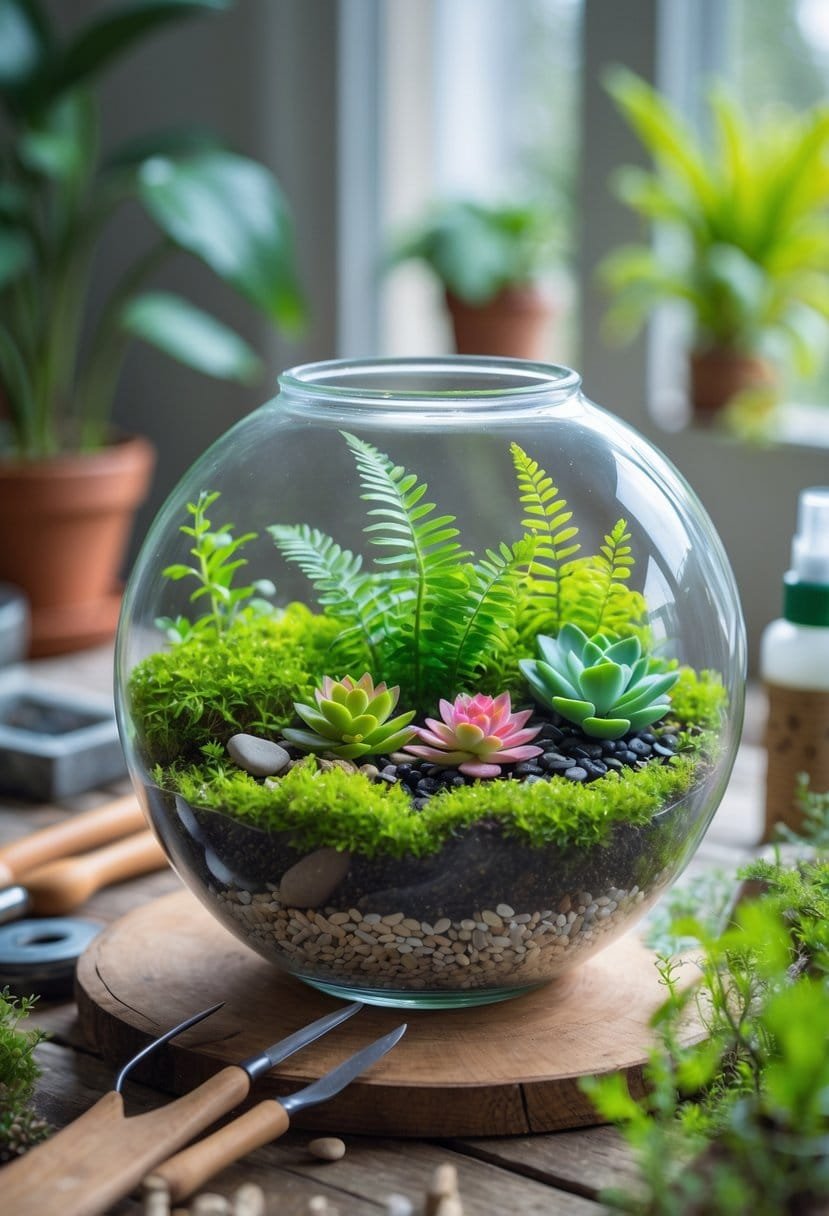
You can easily turn an old fishbowl into a stunning terrarium. Add layers of gravel, charcoal, soil, and plants to create a self-contained mini ecosystem. This simple project brings new life to unused glassware and adds a touch of nature indoors.
Building a terrarium takes more than just placing plants in a bowl. Fishbowls work well because their clear glass and small openings help control the environment inside.
The key is to layer materials properly, pick the right plants, and balance moisture and light.
Key Takeaways
- Layer gravel, charcoal, soil, and moss to build a healthy terrarium foundation.
- Choose low-maintenance plants with similar needs.
- Place your terrarium in bright, indirect light and mist it regularly.
Assessing Your Old Fishbowl for Terrarium Conversion
Start by checking if your container is suitable and in good condition. Look at the size, inspect for damage, and get it ready for planting.
Choosing Between Fishbowl and Aquarium
I like using aquariums for terrariums because they offer more space and easier plant arrangement. Fishbowls usually hold 1-2 gallons, while aquariums provide 10-20 gallons.
Fishbowls have curved glass that can distort the view. This makes it harder to see your plants from different angles.
Rectangular aquariums give flat viewing surfaces. I can arrange plants in layers without distortion.
Size Comparison:
- Fishbowl: 1-2 gallons, round
- Small aquarium: 5-10 gallons, rectangular
- Medium aquarium: 10-20 gallons, rectangular
Fishbowls are still great for small succulent displays or single-plant terrariums.
Inspecting for Cracks and Leaks
I check every inch of glass for cracks before starting. Even small cracks can grow and cause problems.
I hold the bowl up to bright light to spot tiny fractures. Cracks show up as thin lines that reflect light differently.
Inspection checklist:
- Check corners and edges
- Look for chips on the rim
- Examine the bottom for cracks
- Test joints where glass panels meet
Water damage isn’t a big issue for terrariums, but cracks can worsen with the weight of soil. I avoid containers with visible damage.
Small rim chips are fine if the bowl stays strong. I sand rough edges with fine sandpaper to avoid cuts.
Cleaning and Preparing the Fishbowl
I clean the bowl with warm soapy water to remove residue. Old fish waste and algae can harm plants and cause odors.
I scrub the inside with a soft brush and mild dish soap. I avoid harsh chemicals or bleach because they can harm plants.
Cleaning steps:
- Remove decorations and gravel
- Scrub with soapy water
- Rinse several times
- Let it dry completely
I focus on corners where debris collects. Old algae looks like green or brown stains.
After cleaning, I let the bowl air dry for 24 hours. Any leftover moisture can cause mold when I add soil and plants.
I check the clean container one more time for missed spots or damage before moving on.
Selecting the Right Materials and Tools
A good fishbowl terrarium starts with the right materials for drainage, filtration, and looks. Each layer has a job, and decorative elements make your terrarium unique.
Essential Layers: Gravel, Charcoal, and Soil
I use aquarium gravel for drainage![]() . This bottom layer stops water from pooling around roots.
. This bottom layer stops water from pooling around roots.
Gravel Requirements:
- Size: 1/4 to 1/2 inch pieces
- Depth: 1-2 inches
- Type: Clean aquarium gravel or river rocks
Next, I add a thin layer of activated charcoal. This helps filter air and water in the bowl. About 1/4 inch is enough.
Potting soil goes on top. I use well-draining potting mix for most plants and cactus soil for succulents.
Small plants need 2-3 inches of soil. Larger plants need 4-5 inches.
Choosing Stones, Pebbles, and Decorative Items
I pick decorations that fit the bowl’s shape and match the plants. Stones and pebbles![]() help with drainage and add style.
help with drainage and add style.
Functional Decorative Options:
- River stones: Good for pathways and ground cover
- Colored pebbles: Add color and help drainage
- Driftwood: Adds texture and interest
I avoid anything that might rot or change the soil’s pH. I don’t use metal decorations because they can rust.
Size matters. I pick items that fit well inside the bowl. Small figurines or crystals work in tight spaces.
I use decorations to highlight the plants, not to overpower them.
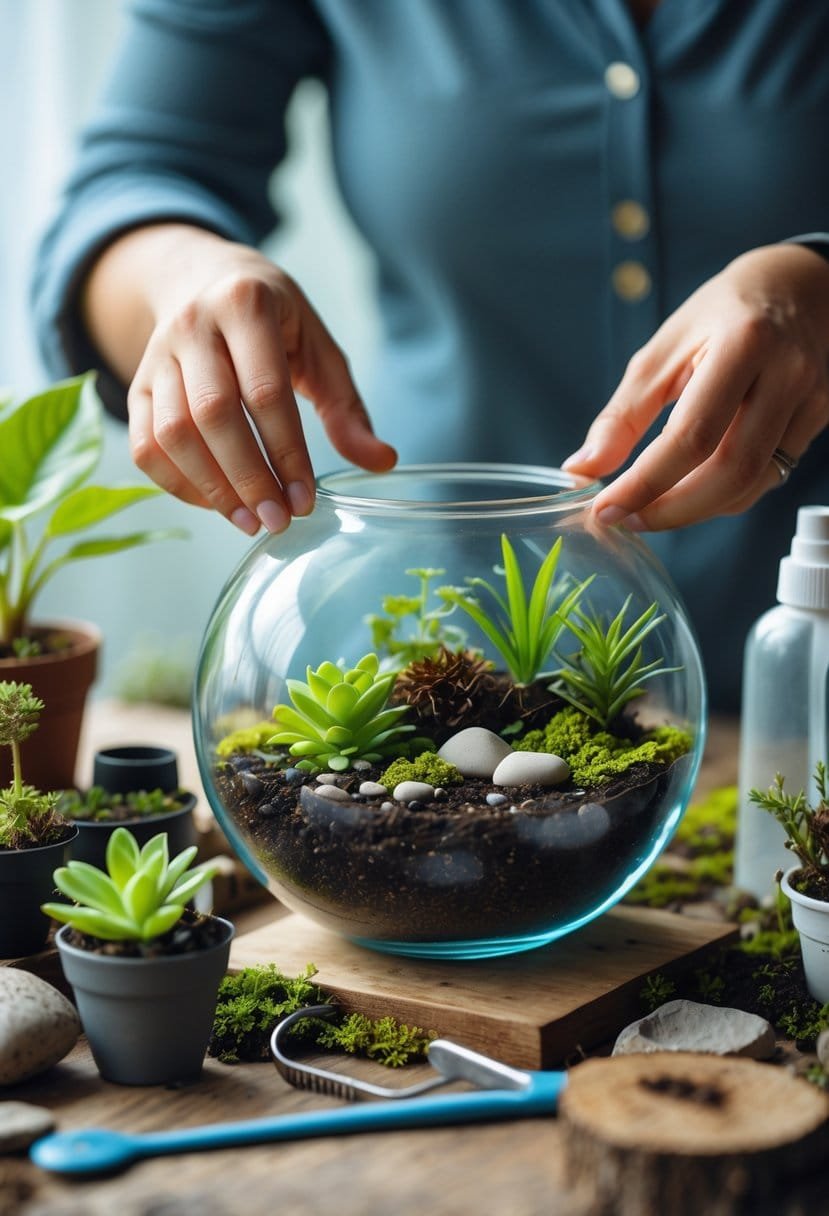
Building the Foundation: Layering Your Fishbowl Terrarium
I build my fishbowl terrarium![]() with four layers. Each layer helps create a healthy environment for plants.
with four layers. Each layer helps create a healthy environment for plants.
Creating Drainage with Gravel and Pebbles
I add a layer of gravel to the bottom. This keeps water away from plant roots and prevents root rot.
I use 1-2 inches of gravel, depending on bowl size. Aquarium gravel, pea gravel, or small river rocks work well.
The gravel lets extra water drain safely. I make sure the pieces fit through the bowl opening and allow water to flow.
I choose smooth stones to avoid scratching the bowl.
Adding Activated Charcoal for Purification
I put a thin layer of activated charcoal on top of the gravel. This keeps water clean and stops bacteria growth.
I use about 1/4 to 1/2 inch of charcoal. I find it at pet stores or garden centers.
Charcoal filters out odors and keeps the terrarium fresh. Without it, water can smell bad.
I spread the charcoal evenly but don’t press it down.
Blending Potting Soil and Perlite
I mix potting soil with perlite in a 3:1 ratio. This gives plants nutrients and helps with drainage.
Potting soil alone holds too much water. Perlite creates air pockets and stops soggy soil.
I add 2-3 inches of this mix on top of the charcoal. This gives roots room to grow.
I avoid garden soil because it’s heavy and may bring pests. Quality potting soil with perlite works best.
Moisture Management with Moss or Sphagnum
I finish with a layer of moss on top of the soil. Moss helps keep moisture in and gives a natural look.
Sphagnum moss holds water without getting soggy. Sheet moss or live moss also work well.
I place moss gently on the soil, leaving gaps for planting. Moss keeps the soil in place when I water.
This layer also stops soil from splashing onto leaves. I use a spray bottle![]() to water gently.
to water gently.
Selecting and Arranging Plants for Your Mini Ecosystem
Pick plants that fit your fishbowl’s size and lighting. The right mix of moisture-loving plants and good arrangement will help your terrarium thrive.
Best Plant Types for Fishbowl Terrariums
I start with small, humidity-loving plants that do well in closed spaces. Nerve plants, baby tears, and small ferns![]() are great choices because they stay small and like moisture.
are great choices because they stay small and like moisture.
Top Plant Choices:
- Nerve Plant (Fittonia): Colorful leaves with white or pink veins
- Baby Tears: Dense, lush ground cover
- Button Fern: Small with delicate fronds
- Small Begonias: Add flowers and color
Air plants are easy for beginners since they don’t need soil. I set them on decorative rocks or driftwood.
Avoid fast-growing plants like pothos in small bowls. They quickly outgrow the space and need a lot of trimming.
Arranging Live Plants for Visual Impact
I follow the “rule of thirds” when arranging live plants in my terrarium. I place the tallest plant about one-third from the back wall, not in the center.
My Arrangement Strategy:
- Background: I place the tallest plants (3-4 inches) against the back curve.
- Middle ground: I add medium plants (2-3 inches) for depth.
- Foreground: I use low-growing plants (1-2 inches) or moss.
I mix different leaf textures and colors to create visual interest. Smooth jade plant leaves contrast with feathery fern fronds.
I leave space between plants for air circulation. Crowded plants can develop fungal problems in humid environments.
I use odd numbers of plants (3 or 5) instead of even numbers. This creates a more natural, less formal appearance in my indoor garden.
Caring for Moss and Java Moss
Moss turns any terrarium into a lush mini ecosystem. I use sheet moss to cover soil and create natural-looking ground cover between plants.
Moss Care Essentials:
- Keep moss consistently moist but not waterlogged.
- Provide bright, indirect light.
- Mist lightly every 2-3 days.
- Remove brown or dead sections right away.
Java moss thrives in partially aquatic setups. I place it on wet rocks or in shallow water dishes within the terrarium.
I harvest moss from my yard after rain when it’s most vibrant. Store-bought moss needs a few days to adjust to terrarium conditions.
Warning: Outdoor moss may contain insects or diseases. I quarantine new moss for a week before adding it to established terrariums.
Choosing Between Succulents and Traditional Plants
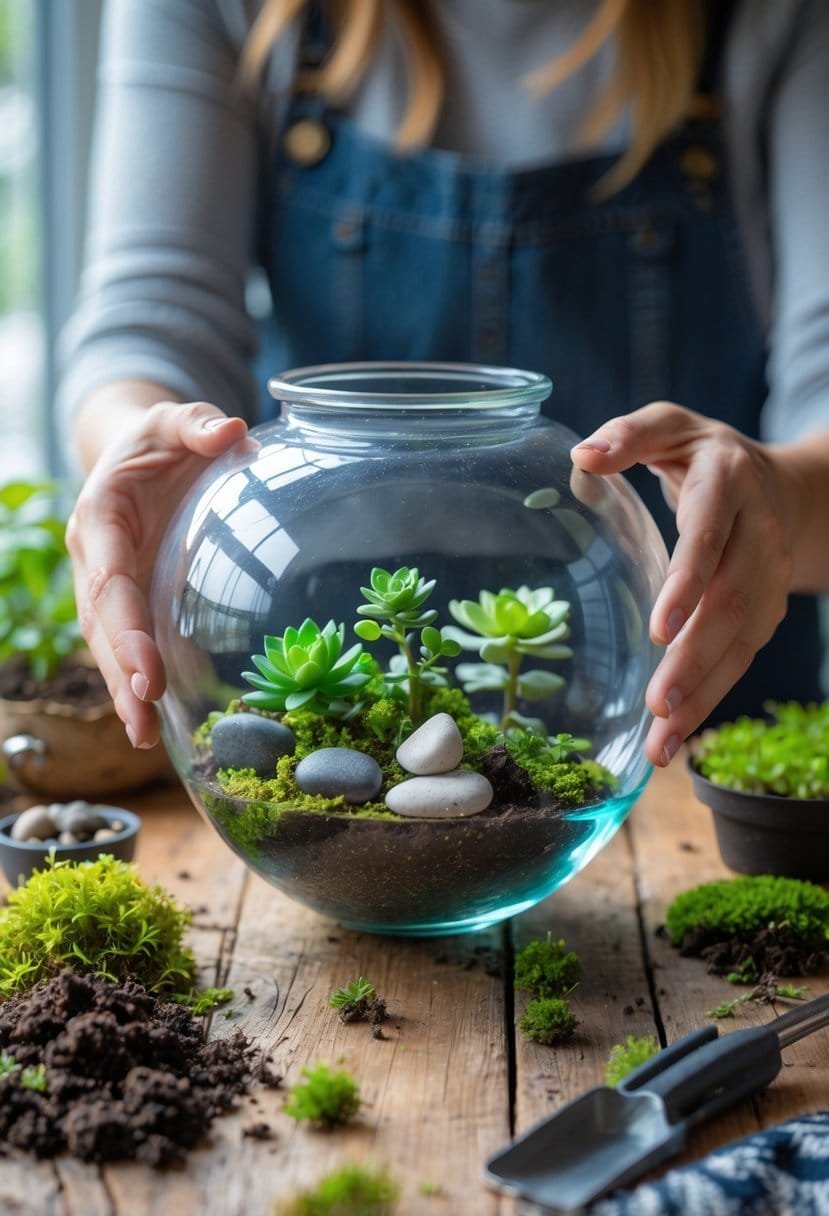
I choose between succulents and traditional plants based on my fishbowl’s design and my maintenance preferences. I use succulents for open terrariums and traditional plants for closed systems.
Succulent Terrarium Benefits:
- Low water requirements.
- Drought-tolerant if I forget to water.
- Interesting shapes and colors.
- Slower growth means less pruning.
Traditional Plant Benefits:
- Thrive in humid, closed environments.
- Create a lush, tropical appearance.
- More variety in leaf textures and colors.
- Better for true closed-system terrariums.
I never mix succulents with moisture-loving plants. Their water needs are different, and one group will always suffer.
For beginners, I recommend starting with traditional humidity-loving plants in closed fishbowl terrariums. These plants are more forgiving and create the classic terrarium look most people want.
Designing Your Terrarium for Style and Function
A well-designed terrarium balances visual appeal with proper growing conditions. I use strategic placement of decorative elements and thoughtful plant arrangements.
I create distinct zones that manage moisture while showcasing my plants in an attractive display.
Incorporating Decorative Items and Driftwood
I add decorative items after planting to avoid disturbing the soil layers. Small stones, crystals, and figurines work best in fishbowl terrariums because they fit the limited space.
Driftwood adds both style and function. I place smaller pieces to create natural-looking barriers between plant groups.
The wood helps absorb excess moisture and adds texture to my design. When I choose decorative elements, I pick items that match my plant colors.
Natural materials like river rocks or sea glass blend well with greenery. I avoid metal decorations since they can rust in humid conditions.
Ceramic pieces work if they are unglazed to prevent water pooling. I use items no larger than 2 inches to keep the scale right.
Too many decorative pieces create clutter and reduce growing space for plants.
Creating Slopes and Plant Groupings
I build gentle slopes with extra potting soil to create depth and visual interest. This technique makes my terrarium look more natural than flat planting.
Plant groupings work best when I follow the “thriller, filler, spiller” concept. I place one focal plant as the thriller, surround it with smaller filler plants, and add trailing varieties as spillers.
In fishbowl terrariums, I group plants with similar water and light needs together. This makes maintenance easier and prevents one plant from overwhelming the others.
I create three zones:
- Background: I use taller plants like small ferns.
- Midground: I add medium-height plants such as moss.
- Foreground: I place low-growing plants or decorative items.
I leave at least 1 inch between plants for growth and air circulation. Overcrowding can cause fungal problems and poor plant health.
Maintaining Humidity and Airflow
I monitor humidity by watching for condensation on the glass walls. Light misting is normal, but heavy condensation means too much moisture is trapped.
Airflow management depends on plant selection. I leave the top partially open for succulents and cacti, but cover it completely for tropical plants that need higher humidity.
I use a spray bottle for gentle misting instead of pouring water. This prevents soil and decorative items from shifting.
If I see too much condensation, I remove the cover for a few hours. This prevents mold growth while keeping the environment humid.
I check my terrarium daily for the first week. Then I adjust watering and ventilation based on plant response and condensation levels.
Lighting and Placement Tips for a Thriving Terrarium
Your converted fishbowl terrarium needs proper light to keep plants healthy and strong. The right spot and good lighting help your plants grow well.
Natural vs Artificial Light
Natural light works best for most terrarium plants. I place my fishbowl near a window that gets bright, indirect sunlight.
Direct sunlight can heat the glass and burn the plants. North-facing windows give steady, gentle light all day.
East-facing windows provide morning sun that stays cool. I avoid south and west windows unless I keep the terrarium a few feet back.
If my home doesn’t get enough natural light, I use artificial light. LED grow lights work well because they don’t create too much heat.
I use full-spectrum LED lights placed 12-18 inches above my terrarium. I run them for 12-14 hours daily to replace natural sunlight.
Positioning Your Terrarium Indoors
The best terrarium placement keeps plants healthy without causing problems. I set my fishbowl terrariums on stable surfaces away from heat sources.
I keep the terrarium away from heating vents, radiators, and fireplaces. These create hot spots that can harm plants.
I also avoid air conditioning vents that create cold drafts. I choose a spot with steady temperatures between 65-75°F.
Room temperature works for most terrarium plants. I avoid areas that get very hot or cold during the day.
I make sure the location has good air flow around the outside of the glass. This prevents moisture buildup and helps regulate the temperature inside the fishbowl.
Care and Maintenance of Your DIY Fishbowl Terrarium
Your DIY terrarium needs proper moisture balance, regular plant care, and careful monitoring. These steps will keep your fishbowl ecosystem healthy.
Watering and Moisture Control
I check my terrarium’s moisture by watching condensation on the glass. The right humidity creates light fogging during the warmest parts of the day.
Signs your terrarium needs water:
- No condensation on glass.
- Dry, dark soil.
- Wilting plants.
- Crispy leaf edges.
Signs of overwatering:
- Heavy water droplets always present.
- Saturated, soggy soil.
- Mold growth.
- Rotting plant matter.
I add small amounts of water at a time using a spray bottle. I always start with less water because overwatering is harder to fix than underwatering.
If I overwater, I open the lid and let extra moisture evaporate. The soil should feel slightly damp, never soaking wet.
I use distilled or filtered water to prevent mineral buildup on the glass. This keeps the view clear and prevents white residue.
Pruning and Plant Health
I trim my plants regularly to keep the right scale and prevent overcrowding. Large plants can block light from reaching others below.
When I prune:
- Plants touch the container lid.
- Leaves press against the glass.
- Growth blocks light to other plants.
- Fast-growing plants take over.
I remove dead or yellowing leaves right away. Rotting plant matter can cause mold that spreads quickly in the closed environment.
For root pruning, I carefully lift plants and trim excess roots to slow growth. This works for plants that outgrow their space.
I clean the glass monthly with a lint-free cloth and purified water. Clean glass allows more light for healthy plant growth.
Long-Term Upkeep and Troubleshooting
I place my terrarium in bright, indirect light away from direct sun. Direct sun can overheat the space and scorch plants.
Common problems and solutions:
| Problem | Solution |
|---|---|
| White fuzzy mold | Increase airflow, remove with cotton swab |
| Brown, mushy plants | Reduce watering, improve drainage |
| Slow growth | Move to brighter location |
| Foggy glass constantly | Open lid to reduce humidity |
I add springtails to control mold naturally. These tiny insects eat decaying matter and help keep the terrarium balanced.
My DIY terrarium usually needs major maintenance once or twice a year. This includes replanting overgrown specimens and refreshing the substrate.
I replace plants that struggle or die. Some plants just don’t adapt well to the enclosed environment.
Creative Ideas and Advanced Variations
You can turn your fish bowl terrarium into themed displays that match your home’s style. Larger aquariums offer more space for creative projects, and good display techniques help showcase your terrarium as a stunning centerpiece.
Themed Terrariums and Miniature Landscapes
I create themed displays that tell a story within my fish bowl terrarium. Desert themes work well with succulents, colored sand, and small decorative rocks in layers.
For a forest theme, I use moss, small ferns, and tiny figurines to create a woodland scene. Beach themes include white sand, shells, and air plants that don’t need soil.
Popular theme combinations:
- Fairy garden: Miniature houses, tiny bridges, small flowering plants.
- Zen garden: Smooth stones, sand patterns, single statement plant.
- Tropical paradise: Bright green plants, colored pebbles, humidity-loving species.
I place taller elements toward the back and shorter ones in front to create depth. Small LED lights hidden in the substrate add magical effects at night.
I match decorative elements to my room’s colors for a cohesive look.
Converting Other Old Aquariums and Fish Tanks
Converting larger aquariums into terrariums gives me more creative space than fish bowls. I use the same basic principles but have more options.
Rectangular fish tanks work well for layered landscapes. I create different zones in the same container—wet areas for moisture-loving plants and drier spots for succulents.
Tank size considerations:
- 10-gallon tanks: Great for multiple plant varieties.
- 20-gallon tanks: Room for small trees and complex layouts.
- Larger tanks: Space for walking paths and multiple levels.
I use old fish tank equipment in creative ways. Former filter areas become spots for water features, and old air pumps can create misting systems for tropical plants.
The extra height in fish tanks lets me plant small trees and make vertical gardens with trailing plants.
Showcasing Your Finished Terrarium
I place my finished fish bowl terrarium where it gets bright, indirect light throughout the day.
Kitchen counters, coffee tables, and bathroom vanities work well for smaller bowls.
Proper lighting makes the display look much better.
I put mine near north-facing windows or use LED grow lights if the space is dark.
Display tips I follow:
- I rotate the bowl weekly so all sides get equal light.
- I keep it away from heating vents and direct sunlight.
- I use a decorative plate or stand underneath for protection.
I photograph my fish bowl terrarium![]() from different angles to document plant growth.
from different angles to document plant growth.
The curved glass creates visual effects that change throughout the day.
For special occasions, I group multiple terrariums together.
Different sized bowls create dynamic displays on dining tables or mantels.
Regular maintenance keeps the display looking fresh.
I remove dead leaves promptly and trim overgrown plants to maintain the shape.
Frequently Asked Questions
I need specific materials, plant choices, and layering techniques to convert a fishbowl into a terrarium.
Proper humidity control and watering schedules are important for plant health, and the location affects light and temperature.
What materials are needed to transform a fishbowl into a terrarium?
I use a glass fishbowl as the main container.
Pet stores sell acrylic versions, but I prefer glass ones from homeware stores for better looks.
For the base layers, I use gravel or small pebbles for drainage.
Leca, aquarium gravel, or decorative pebbles work well![]() for this.
for this.
I put activated charcoal between the drainage layer and soil to filter the air and prevent odors.
Terrarium soil mix works better than regular potting soil.
I can buy pre-mixed bags or make my own blend that drains well.
Small plants, moss, and decorative elements like stones or driftwood complete the setup.
I also use a spray bottle for watering.
Which plants are best suited for a fishbowl terrarium?
Small plants that thrive in humid conditions work best in fishbowl terrariums.
I pick plants that stay compact and grow slowly.
Ferns handle the humid environment well.
Small varieties like button ferns or maidenhair ferns fit perfectly in fishbowls.
Peperomia plants come in many varieties and stay small.
Their thick leaves handle moisture changes better than thin-leaved plants.
Fittonia, also called nerve plants, add colorful patterns.
These plants love humidity and stay low to the ground.
Pilea plants and various moss types create good ground cover![]() .
.
Cushion moss and thyme moss work especially well.
Small tropical plants like baby tears or small orchids can work if I keep them pruned.
I avoid fast-growing plants that will quickly outgrow the space.
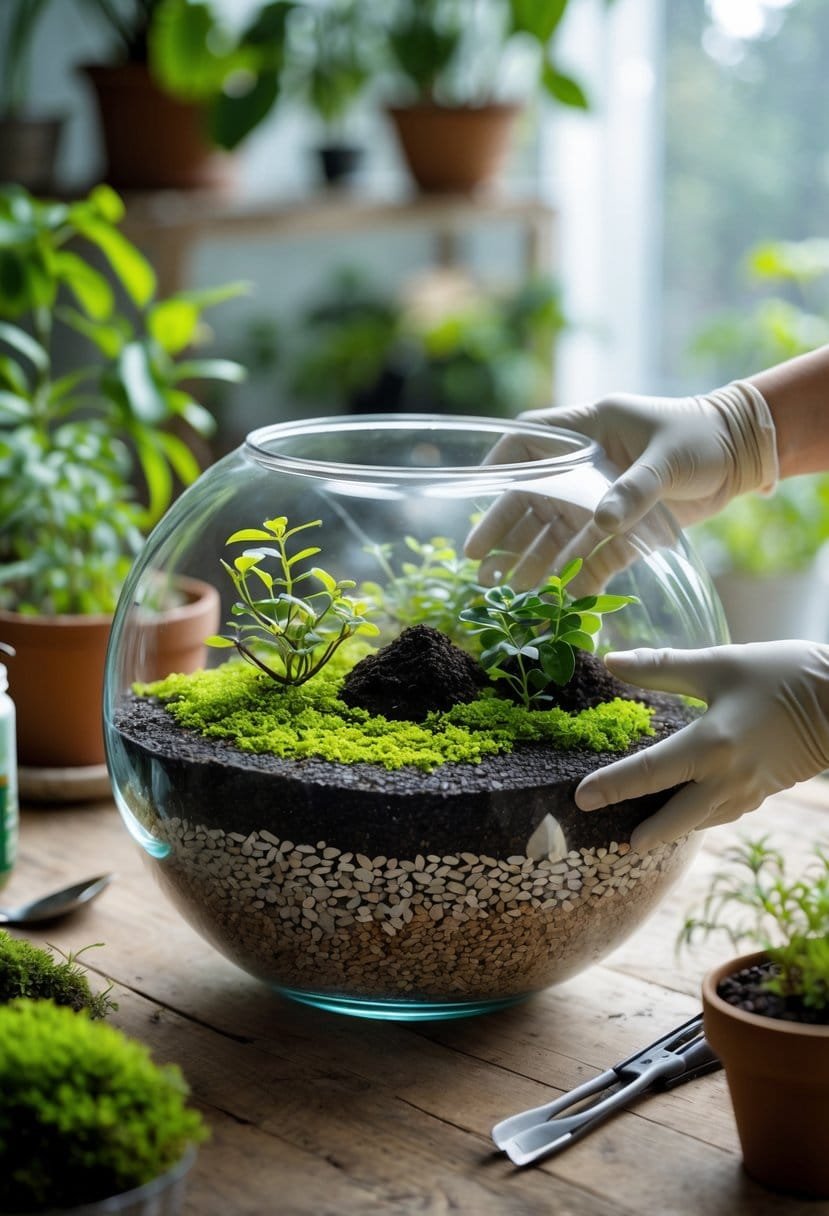
How should the layers be arranged when creating a terrarium out of a fishbowl?
I start with a drainage layer of gravel or pebbles about one inch deep![]() .
.
This prevents water from sitting around plant roots.
The charcoal layer goes next, covering the drainage stones.
I use a thin layer of activated charcoal pieces, not powder.
I add terrarium soil mix on top, creating a layer about 2-3 inches deep.
This gives plant roots enough space to grow.
I slope the soil higher toward the back of the bowl.
This creates visual depth and gives taller plants more root space.
Before planting, I lightly spray the soil with water.
Dry soil makes planting difficult and can damage delicate roots.
I plant larger specimens first, then smaller plants, and finish with moss.
This prevents me from accidentally crushing smaller plants while working.
What is the proper way to maintain humidity levels in a fishbowl terrarium?
Fishbowl terrariums need covers to keep proper humidity.
I use custom-cut acrylic sheets, cork lids, or even plastic wrap as temporary covers.
I watch for condensation on the glass walls.
Light condensation means good humidity levels, while heavy fogging means too much moisture.
If I see excessive condensation, I remove the cover for a few hours.
This lets extra moisture escape without harming the plants.
Dry glass walls mean I need to add humidity.
I spray the plants lightly with distilled water and replace the cover.
The humidity should stay between 50-80 percent for most terrarium plants.
I use a small hygrometer to check levels accurately.
Air circulation helps prevent mold growth.
I remove the cover briefly every few days to refresh the air inside.
How often should a fishbowl terrarium be watered?
Closed fishbowl terrariums need very little water.
I usually water them only once every 2-4 weeks, depending on the season.
I check the soil moisture by looking at the color and texture.
Dark, moist soil means no water is needed yet.
When the soil looks lighter and feels dry to touch, I add a few light sprays of water.
I never pour water directly into the terrarium.
I use distilled water to prevent mineral buildup on the glass.
Tap water can leave white spots and harm sensitive plants.
Winter terrariums need less water because plants grow slower.
Summer heat may require slightly more frequent watering.
I watch the plants for signs of overwatering like yellowing leaves or mold.
Too much water kills terrarium plants faster than too little.
Are there any special considerations for choosing a location to display a fishbowl terrarium?
Fishbowl terrariums need bright, indirect light. I keep them near windows but out of direct sunlight to prevent overheating.
Direct sun can create a greenhouse effect and harm the plants. The glass increases heat and light, which plants cannot handle.
I avoid placing terrariums near heating vents or air conditioning units. Sudden temperature changes can stress the plants and lower humidity.
Most terrarium plants do best in stable temperatures between 65-75°F. I keep terrariums away from drafty areas and heat sources.
The display surface should be sturdy and level. Uneven surfaces make glass fishbowls more likely to tip over.
I choose a placement with a good viewing angle. Eye-level spots show off the terrarium’s layers and plants best.