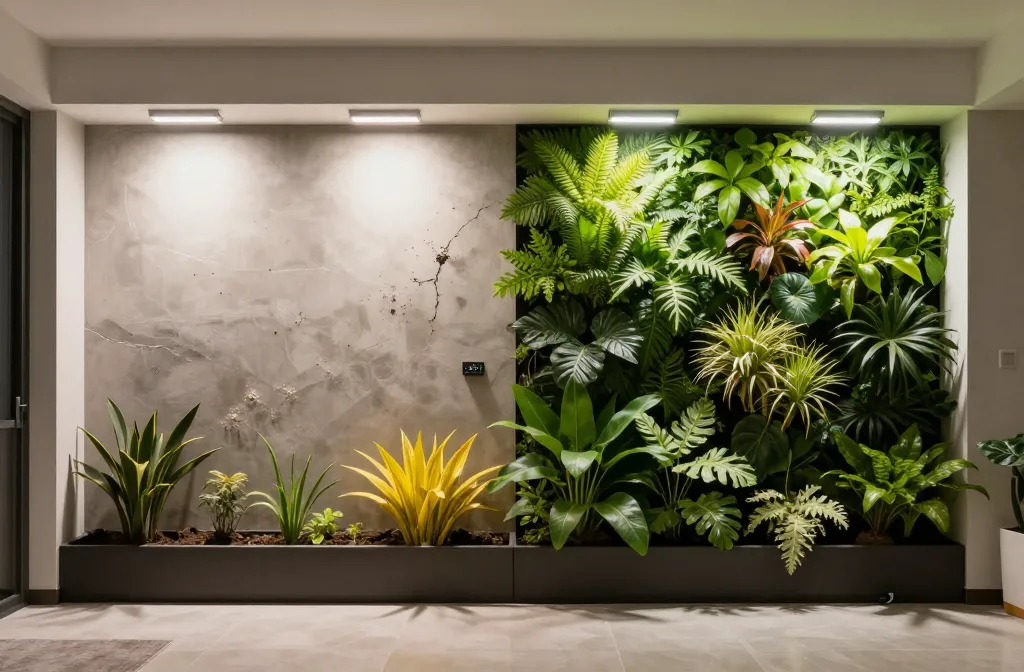
I’ve installed living walls in rentals and small homes where a few wrong choices turned a lush panel into a crispy, smelly eyesore in months. If you’ve tried to copy a glossy Instagram wall with houseplants and a pump, you’ve likely fought brown patches, fungus gnats, and leaks. I’ll show you the five failure points that take walls down fast and how to fix each with simple, store-bought solutions. You’ll finish with a wall that stays green, drip-free, and easy to maintain all year.
1. Underlighting: Plants Stretch, Then Crash By Month Nine
Most indoor walls die slowly from lack of light. Plants stretch toward a window, drop lower leaves, and run out of stored energy by the end of the first year.
Window light alone rarely hits the whole wall evenly. Top rows hog light while bottom pockets languish in shade and rot.
Signs To Watch For
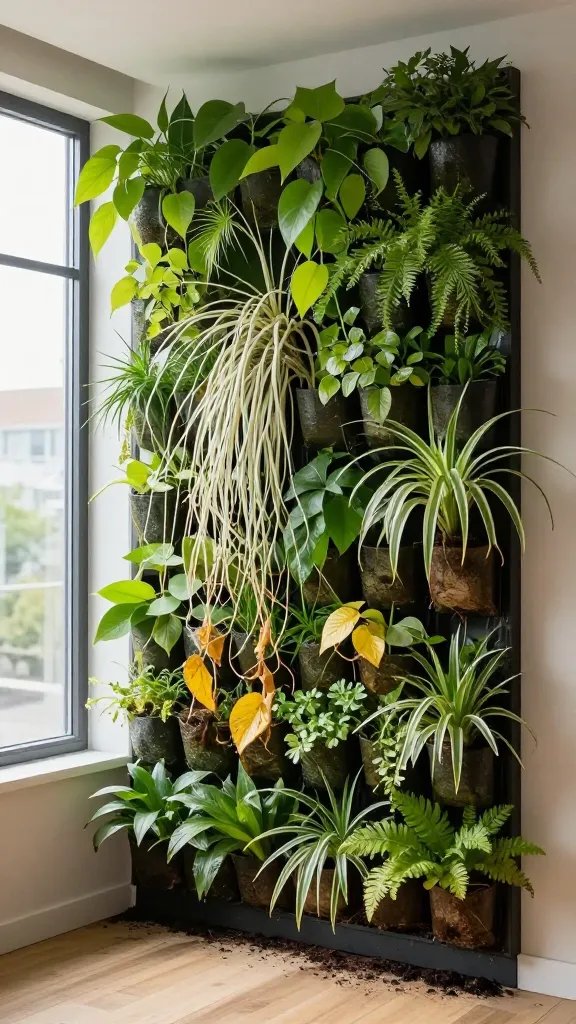
- Leggy, pale growth reaching sideways, especially on lower rows
- Lower leaves yellowing and dropping while tips keep growing
- Soil staying wet longer on shaded pockets
- Variegated plants reverting to solid green
How To Fix It
- Mount a pair of LED shop lights (4-foot, “daylight/6500K” on the box) 12–18 inches in front of the wall, angled slightly down.
- Run lights on a plug-in timer for 12–14 hours daily. Consistency beats weekend marathons.
- Place light-hungry plants (e.g., Pothos ‘Neon’, Philodendron hederaceum, Ferns) on the upper half where light is strongest; tuck tougher, shade-tolerant plants (ZZ cuttings won’t like walls; instead use Peperomia, Aglaonema) lower.
- Avoid hot spots: if leaf edges crisp directly under the fixture, raise the light 3–4 inches.
What To Use Instead
- Two daylight LED shop lights from a hardware store
- Simple mechanical or digital outlet timer
- Adhesive cable clips to route cords neatly
Action today: Stand 6 feet back at midday and check if the bottom third of your wall is visibly dim. If yes, install one daylight LED shop light and set a 12-hour timer before the end of the day.
2. Watering Like Pots: Soggy Roots, Algae, And Gnats
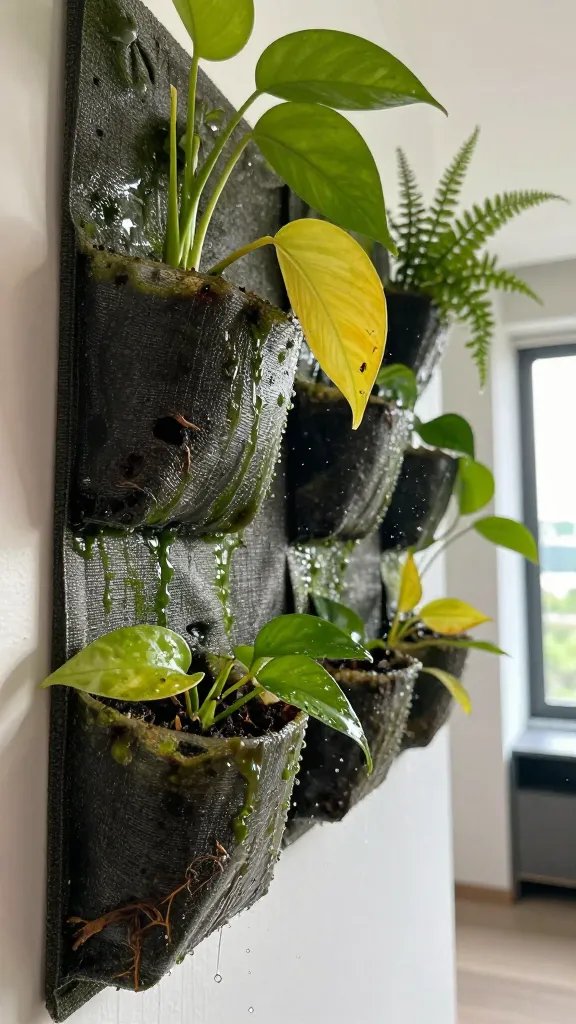
Walls fail when they’re watered as if each pocket were a normal pot. Excess water has nowhere to drain safely and lingers in fabric or foam, starving roots of air.
Within months, you get fungus gnats, green slime on media, and black, mushy roots. The smell follows soon after.
Signs To Watch For
- Soil surface looks slick or green between waterings
- Gnat clouds rise when you brush leaves
- Leaves yellow from the base upward while stems feel soft
- Water runs down the face of the wall instead of soaking in evenly
How To Fix It
- Add a drip line at the top using a basic drip kit from your garden centre. Set 1–2 emitters per column and run short watering cycles.
- If you hand-water, use a 1-litre watering can with a narrow spout. Water the top row only and let it trickle down for 1–2 minutes.
- Water less often: aim for media that feels like a wrung-out sponge, not squishy.
- Control gnats with yellow sticky traps tucked behind foliage and a light top-dress of horticultural sand on exposed media to keep the surface dry.
What To Use Instead
- Basic drip irrigation starter kit (tubing, small emitters, barbed connectors)
- Plug-in timer rated for outdoor/indoor use to run 1–2 minute cycles
- Yellow sticky traps and a bag of horticultural sand
Takeaway: Switch from soaking the whole wall to brief, top-fed watering that leaves the media airy and just damp.
3. Wrong Growing Media: Dense Potting Soil Suffocates Roots
Bagged potting soil alone stays heavy and wet in vertical pockets. Roots suffocate and rot, especially in the middle rows where airflow is weakest.
You’ll see plants that look fine for a few weeks, then collapse at the crown with black stems and sour-smelling media.
Signs To Watch For
- Water takes more than 10 seconds to disappear from the surface
- Media compacts and pulls away from the pocket edges
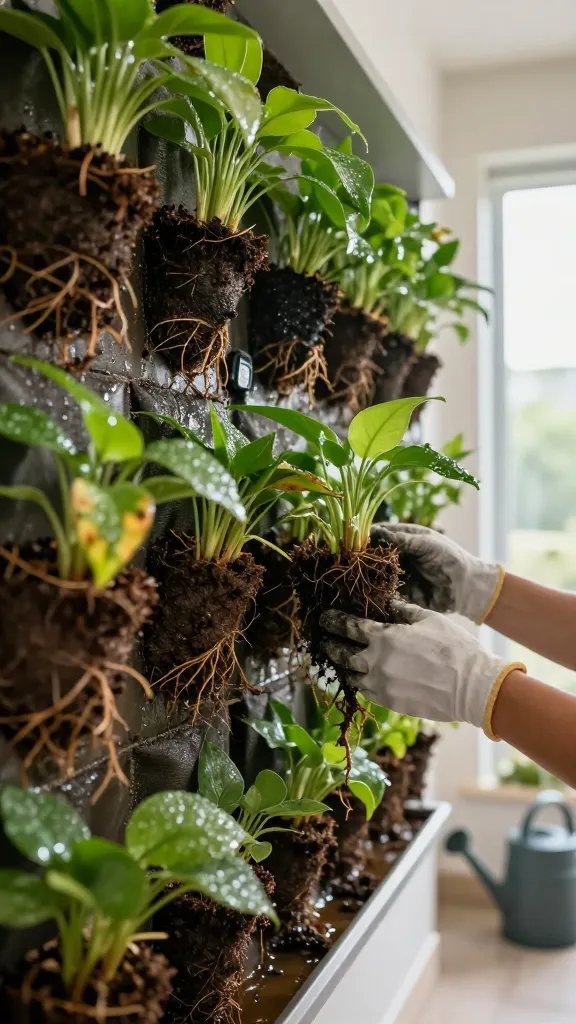
- Plants lift out with short, brown, brittle roots
How To Fix It
- Mix your own wall media: 2 parts good quality potting mix + 1 part perlite + 1 part fine orchid bark by volume. This keeps air pockets and quick drainage.
- For fabric pockets, add a thin layer of coconut coir mat or moss sheet right behind the fabric to spread water and prevent channeling.
- Backfill gently around root balls; don’t pack hard. You want bounce, not brick.
What To Use Instead
- Standard all-purpose potting mix from the garden centre
- Perlite and fine orchid bark (houseplant aisle)
- Coconut coir mat or preserved moss sheet
Action today: Pull one struggling plant and inspect the media. If it feels heavy and smeared, replant that pocket with the airy mix above.
4. No Overflow Management: Walls Leak, Stain, And Get Abandoned
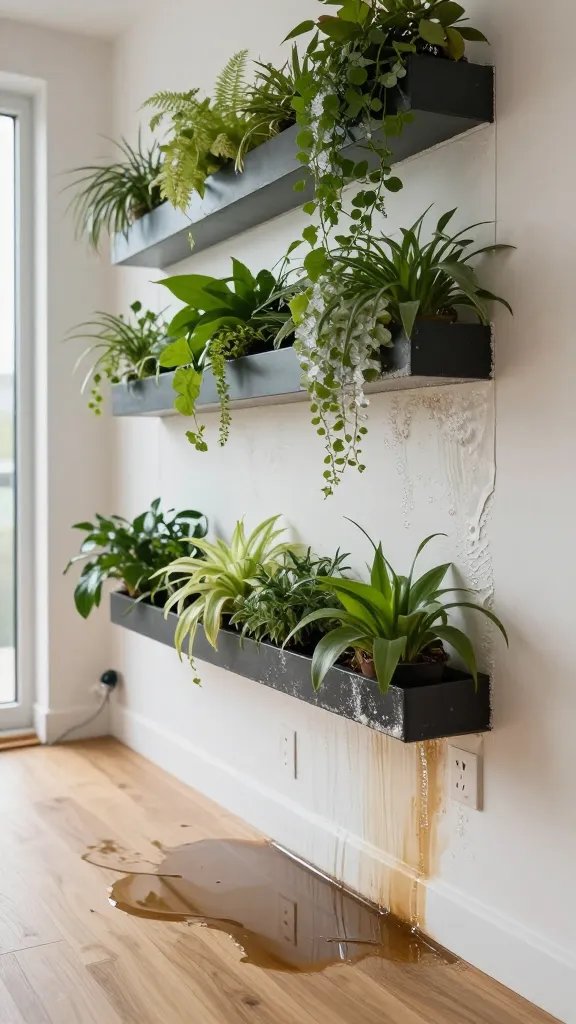
One spill on a rental wall can end the project. Without a planned overflow path, missed timers, enthusiastic guests, or a clogged emitter send water onto paint, floors, and outlets.
After a scare, most people stop watering as often, and the wall crashes from drought or salt buildup.
Signs To Watch For
- Water lines or tide marks beneath the lowest row
- Soft or peeling paint behind the wall
- Calcium crust on the face fabric from frequent overflows
How To Fix It
- Install a drip tray under the bottom row: a narrow plastic planter tray or vinyl gutter section with end caps, slightly tilted toward a corner.
- Place a small bucket or watering can under the outlet on watering days.
- Put the whole wall on felt furniture pads or a thin plastic sheet to protect baseboards.
- Set your timer to multiple short cycles (e.g., 2 minutes on, 10 minutes off, repeated twice) to prevent sudden surges.
What To Use Instead
- Vinyl gutter, two end caps, and gutter hangers from the hardware store
- Felt pads, painter’s plastic, or a boot tray
- Simple digital timer with multiple on/off events
Takeaway: Add a gutter-style drip tray with a slight tilt and catch can before your next watering.
5. Overcrowding And Random Plant Mixes: One Sick Plant Takes Down The Row
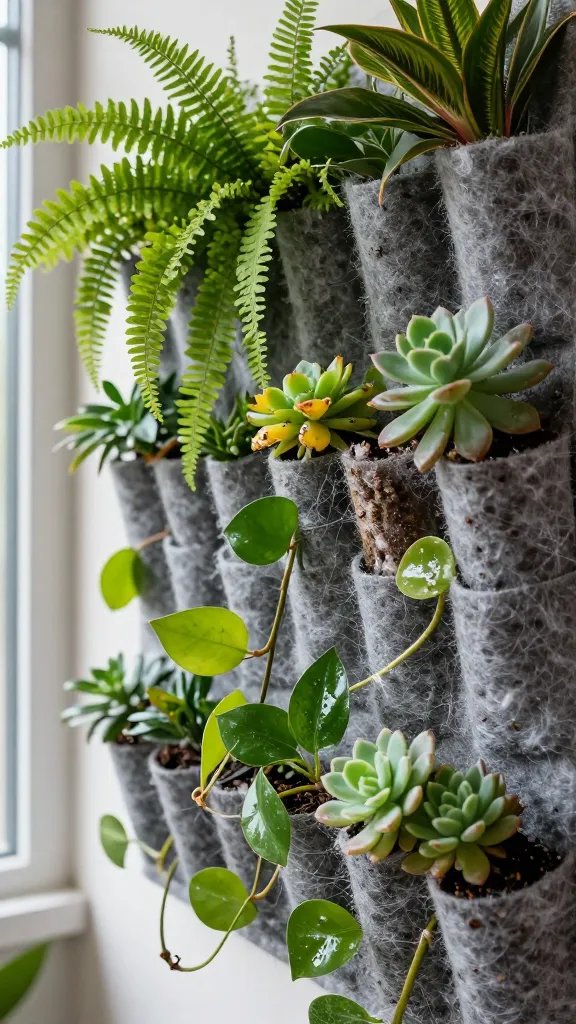
Stuffing pockets with mismatched species creates daily care chaos. Thirsty ferns sit beside drought-loving succulents; one always suffers.
Overcrowded pockets trap moisture and spread mealybugs, spider mites, and fungal spots from plant to plant faster than in pots.
Signs To Watch For
- Constantly wilted plant next to another that has yellow tips from overwatering
- Leaves pressing hard against each other with no airflow
- Repeated pest flare-ups traveling in a line across pockets
How To Fix It
- Group by water need and growth speed. Make “wet lanes” and “dry lanes.”
- Choose medium-water, forgiving plants for most walls: Pothos, Heartleaf Philodendron, Peperomia, Aglaonema, Ferns (Boston, Bird’s Nest), Spider Plant.
- Avoid succulents and ZZ plants on irrigated walls; they rot with frequent moisture.
- Plant one rooted cutting or 1 small nursery start per pocket; leave a thumb-width gap around stems for airflow.
- Quarantine new plants for 7 days on a separate shelf and inspect with a handheld magnifier or phone macro lens.
What To Use Instead
- A short list of 3–5 matching species repeated in a pattern
- Alcohol wipes and cotton swabs for spot-treating mealybugs
- Neem oil or insecticidal soap for weekly prevention during the first month
Action today: Remove any succulents or ZZ from irrigated sections and replace them with pothos or philodendron cuttings grouped in the same lane.
Frequently Asked Questions
How often should I water an indoor living wall without a pump?
Hand-water once the media feels like a wrung-out sponge has turned light and springy again, usually every 5–10 days in bright rooms and 10–14 days in dimmer rooms. Use a 1-litre watering can and pour only along the top row, letting water trickle down. Stop when the first drips enter your drip tray. Empty the tray within an hour.
Can I build a living wall in a low-light hallway?
Yes, but you must add lighting. Hang two daylight LED shop lights 12–18 inches from the wall and run them 12–14 hours daily on a timer. Choose shade-tolerant plants like pothos, heartleaf philodendron, aglaonema, and peperomia. Skip ferns if the hallway air is very dry; they’ll crisp without steady humidity.
What’s a simple, reliable way to fertilize a living wall?
Use a half-strength, all-purpose liquid fertilizer every 4 weeks during spring and summer, added to your watering can. In fall and winter, feed every 6–8 weeks. Rinse with plain water every third feeding to prevent salt crust. If leaf tips brown, you’ve fed too strong; flush with plain water once and resume at quarter strength.
How do I stop fungus gnats in the wall?
Let the top half-inch of media dry before the next watering and top-dress exposed pockets with a thin layer of horticultural sand. Hang yellow sticky traps behind foliage near the bottom third of the wall. Water in short cycles to avoid saturation, and remove any fallen leaves stuck in pockets that stay damp and feed larvae.
What if my wall smells sour or musty?
That’s trapped, anaerobic water. Pull one plant and check for black, mushy roots and heavy, muddy media. Replace the media with the airy mix (potting mix, perlite, fine bark), shorten watering times, and add a small desktop fan pointed across the wall on low to increase airflow for a week. Odor usually clears in a few days.
Do I need a pump and reservoir to make this work?
No. A small wall thrives with gravity-fed hand-watering or a basic drip line on a timer if you include a drip tray and short watering cycles. Pumps add convenience but also add leak risks and maintenance. Start simple, then upgrade once your plant grouping and light setup are stable.
Conclusion
You don’t need pro gear to keep a living wall healthy for years, but you do need the right light, media, water routine, overflow plan, and plant mix. Start with one fix today—add a shop light or a drip tray—and you’ll see steadier growth within a month. When you’re ready, expand with repeated plant groups and a simple timer so the wall practically runs itself.