I remember my first terrarium attempt. I had a beautiful glass container and a handful of plants, but no real plan.
The result was a soggy mess that died within weeks. I didn’t understand what materials I actually needed or how they worked together.
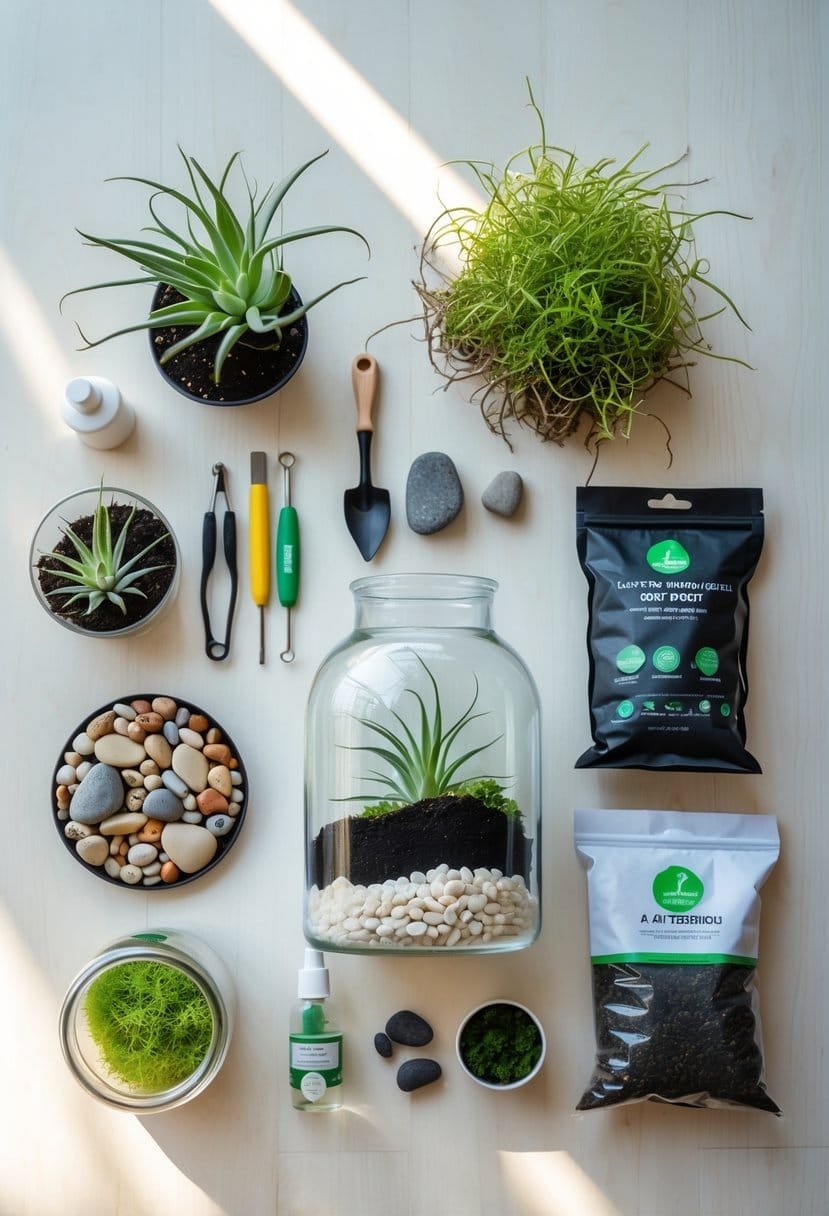
You need seven essential items to create a thriving terrarium: a glass container, drainage material, activated charcoal, mesh screen, proper soil, suitable plants, and basic tools. Each component serves a unique purpose in the miniature ecosystem you’re building.
My step-by-step terrarium guide will help you choose the right container size and select plants that thrive in humid environments. I’ll also show you how to create the proper foundation layers.
I’ll share how to avoid common mistakes like overwatering and choosing the wrong plant types.
Key Takeaways
- Successful terrariums need seven basic materials layered in a specific order to create a self-sustaining ecosystem.
- Container selection and plant choice determine if your terrarium will thrive or fail within the first few weeks.
- Proper layering with drainage, soil, and plants builds the foundation for long-term terrarium success.
Understanding Terrariums and How They Work
Terrariums recreate natural processes in glass containers and function as miniature ecosystems. Water cycles and plant interactions help maintain balance inside.
These systems rely on evaporation, condensation, and photosynthesis to create healthy environments for plants.
What Is a Terrarium?
A terrarium is a transparent container that houses plants in a controlled environment. I think of it as a miniature world where natural processes happen on a small scale.
These glass or plastic containers create specific conditions for plants to thrive. The clear walls allow light to enter while containing moisture and air inside.
Key Components:
- Container: Glass or clear plastic vessel
- Drainage layer: Gravel or small stones
- Soil: Appropriate growing medium
- Plants: Species suited to the environment
- Decorative elements: Rocks, moss, or figurines
The terrarium ecosystem mirrors natural processes found in forests and gardens. Plants photosynthesize, water evaporates, and nutrients cycle through the system.
Modern terrariums serve both decorative and educational purposes. They help people understand how ecosystems function while bringing nature indoors.
How the Terrarium Water Cycle Functions
The water cycle in a terrarium starts when water from the soil evaporates and rises to the container walls. When water vapor hits the cool glass surface, it condenses back into droplets.
These droplets roll down the walls and return to the soil below.
Water Cycle Steps:
- Evaporation: Soil moisture becomes water vapor
- Transpiration: Plants release water through leaves
- Condensation: Vapor forms droplets on glass walls
- Precipitation: Droplets fall back to soil
This process allows the same water molecules to cycle repeatedly through the system. Temperature changes drive this cycle.
Warmth from light causes evaporation. Cooler glass surfaces promote condensation.
Types of Terrariums: Closed vs. Open
Closed terrariums have lids or covers that seal the container completely. These create high-humidity environments perfect for tropical plants.
The sealed environment traps moisture and creates a stable ecosystem. Closed terrariums need less frequent watering because water stays within the system.
Open terrariums have no lid and allow air to flow freely. These work better for desert plants like succulents and cacti.
| Feature | Closed Terrarium | Open Terrarium |
|---|---|---|
| Humidity | High (80-90%) | Moderate (40-60%) |
| Watering | Monthly or less | Weekly |
| Plant Types | Ferns, mosses, tropical plants | Succulents, cacti, air plants |
| Maintenance | Lower | Higher |
Open terrariums need more frequent watering because moisture escapes into the room. They are less prone to mold and fungal problems.
I recommend closed systems for beginners because they are more forgiving with watering mistakes.
Origins and Evolution of the Terrarium
Dr. Nathaniel Bagshaw Ward invented the wardian case in 1829 and started the terrarium movement. Ward discovered this concept accidentally while studying moths in sealed glass containers.
He noticed that plants grew well in these enclosed environments. This discovery changed plant transportation and collecting during the Victorian era.
Victorian society used wardian cases for growing exotic plants indoors. These elaborate glass structures became status symbols in wealthy households.
Historical Timeline:
- 1829: Dr. Ward invents the wardian case
- 1840s-1880s: Victorian terrarium craze peaks
- 1960s: Modern terrarium revival begins
- 2000s: Contemporary terrarium popularity grows
Modern terrariums evolved from these early designs. Today’s versions are simpler and more accessible to everyday gardeners.
The basic principles remain the same. Plants still thrive in controlled glass environments using natural processes.
Selecting the Ideal Terrarium Container

Your container choice will determine your terrarium’s success and longevity. Glass containers offer the best clarity and durability.
Size and shape directly affect plant health and growth potential.
Choosing Between Glass and Plastic
I always recommend glass containers over plastic for terrariums. Glass provides superior clarity and won’t yellow or scratch over time.
Glass containers offer several advantages:
- Complete transparency for optimal light penetration
- No chemical leaching into your mini garden
- Easy to clean and maintain
- Attractive display piece
Glass terrariums are the most common type and what experts recommend for both practical and aesthetic reasons.
Plastic containers can work for temporary projects or children’s terrariums. However, plastic may leach toxic compounds into the terrarium environment over time.
While plastic chemicals might increase plant growth, they also create stress hormones in plants. This isn’t ideal for healthy, long-term terrariums.
Sizing and Shape Considerations
Size matters more than you might think. I recommend going as big as you can within your space constraints.
Key sizing guidelines:
- Give plants at least ⅓ of the container as free space above them
- Larger containers provide better air circulation
- More room allows for creative plant arrangements
Shape affects both function and aesthetics. Containers with uniform shapes like boxes or cylinders work best.
Narrow-based containers may not provide enough drainage or substrate space for plants to thrive.
The opening size determines how easy your terrarium will be to build. Wide openings make planting much simpler for beginners.
Tall containers need taller plants to fill the vertical space properly. Short, wide containers work perfectly for spreading, low-growing plants.
Specialty Containers and Wardian Cases
A wardian case represents the classic terrarium design with hinged glass panels and a structured frame. These containers offer excellent visibility from all angles.
Wardian cases provide superior access for maintenance and plant care compared to narrow-necked containers.
Popular specialty options include:
- Mason jars for small desktop terrariums
- Geometric terrariums with modern appeal
- Demijohns for unique curved shapes
- Converted fish tanks for large displays
Repurposed glass containers often work just as well as purpose-made terrarium containers. Large vases, old fish tanks, and even glass bowls can create stunning mini gardens.
Make sure your chosen container has adequate space, proper proportions, and either comes with a lid or can be easily covered for closed terrariums.
Essential Materials and Tools Checklist
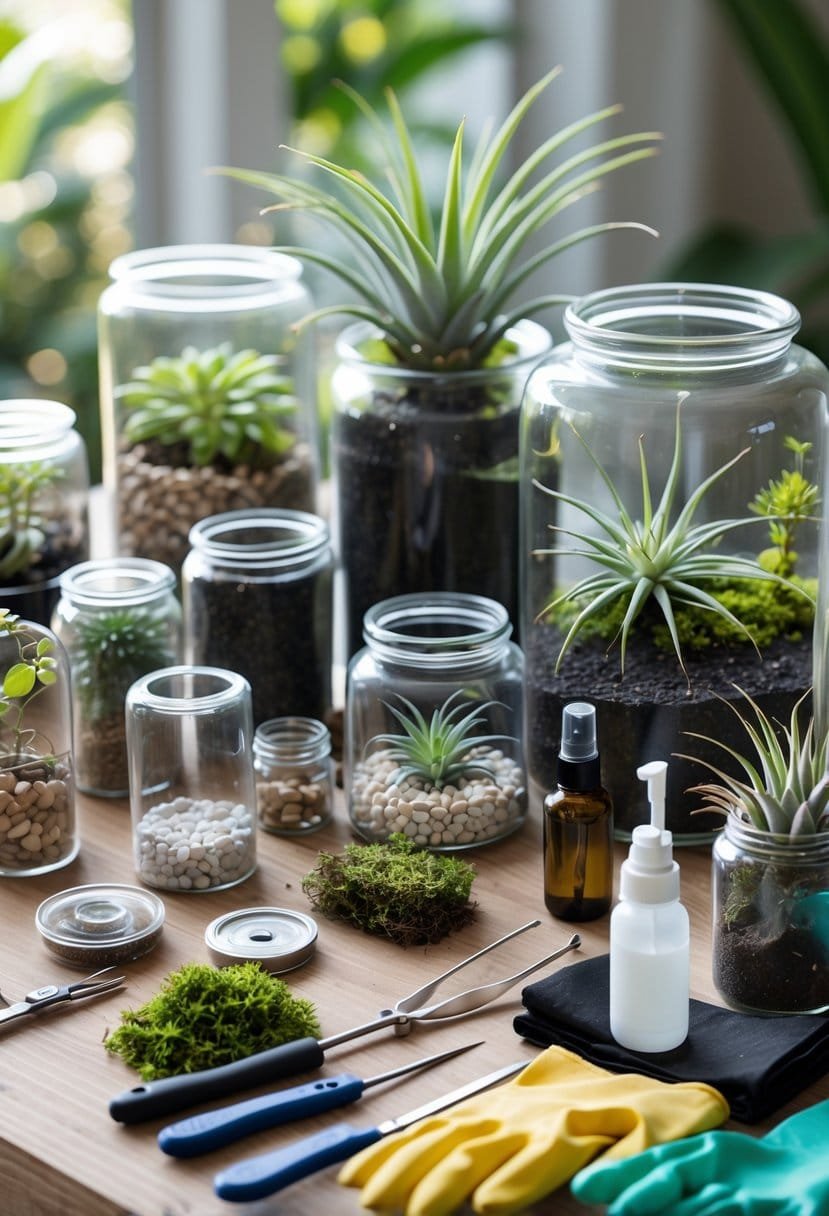
Building a terrarium requires specific tools for planting and maintenance. Basic cleaning supplies help you prepare your container.
Optional decorative elements enhance the final display. The right equipment makes the construction process smoother and helps create a healthier environment for your plants.
Terrarium Tools You Need
Start with long aquascaping tweezers as your primary planting tool. These help you place plants precisely and remove dead leaves without damaging other vegetation.
A spray bottle is essential for watering control. It distributes moisture evenly and prevents overwatering.
Core Tools:
- Long tweezers (12+ inches)
- Fine-tip spray bottle
- Small spoon or scoop
- Curved scissors
- Angled brush for cleaning
A digging tool helps move substrate and create planting holes. For most containers, a long spoon works perfectly.
Use curved scissors for trimming plants inside the container. The curved shape lets you work around other plants easily.
An angled brush removes dust from glass surfaces and plant leaves. This keeps your terrarium looking clean and allows proper light penetration.
Cleaning and Preparing Materials
Clean your glass container thoroughly before building. Use warm soapy water and rinse completely to remove any residue.
Rubbing alcohol works well for final sanitization. It evaporates quickly and eliminates harmful bacteria that could affect plant health.
Cleaning Supplies:
- Dish soap
- Microfiber cloths
- Rubbing alcohol
- Paper towels
- Soft-bristled brush
A soft-bristled brush reaches into corners and removes stubborn spots. Avoid abrasive materials that could scratch the glass.
Microfiber cloths dry the container without leaving lint. Keep several on hand during the building process.
Paper towels absorb excess water and clean up spills during construction. They’re especially useful when working with wet substrate.
Optional Accessories and Decor
Aquarium gravel creates an effective drainage layer at the bottom of your container. It prevents water from pooling around plant roots and provides some protection against overwatering.
Decorative stones, crystals, or shells add visual interest to your terrarium. Choose items that won’t leach chemicals into the water system.
Decorative Options:
- Colored stones
- Natural crystals
- Small figurines
- Decorative sand
- Miniature accessories
Small figurines create themed displays but should be made from non-toxic materials. Avoid painted items that might deteriorate in humid conditions.
Decorative sand adds texture and color contrast. Use it to create pathways or highlight specific areas within the terrarium.
Natural wood pieces work well as hardscape elements. Make sure they’re properly dried and won’t introduce harmful organisms to your enclosed ecosystem.
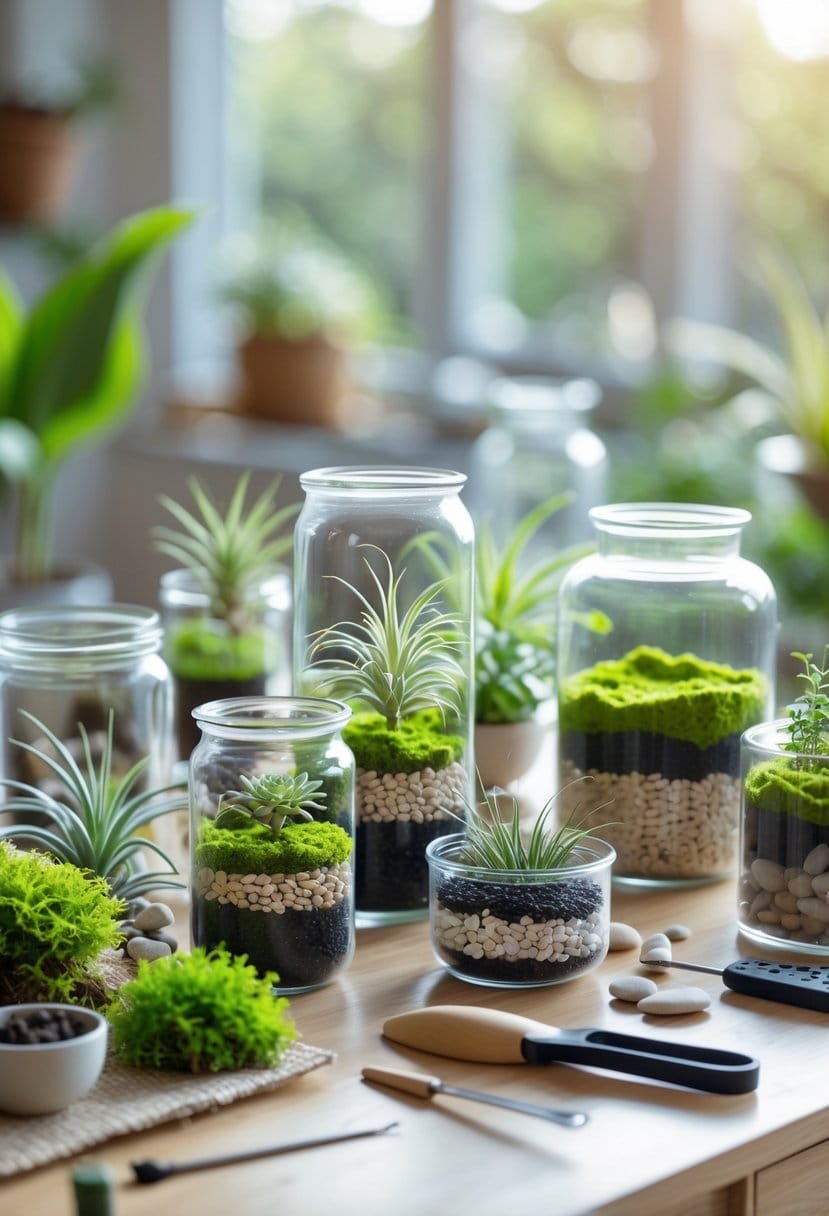
Building the Foundation: Layering Your Terrarium
Proper layering creates drainage, filters water, and provides the right growing medium. Each layer serves a specific purpose, from preventing root rot with drainage materials to supporting plant growth with quality substrates and structural elements.
The Drainage Layer and Why It Matters
I always start with a drainage layer because it keeps water from pooling around plant roots. This foundation layer creates a reservoir where extra water collects and slowly evaporates back into the terrarium’s water cycle.
Leca (lightweight expanded clay aggregate) is my top choice for drainage. It is lightweight, absorbs water well, and supports the layers above.
Aquarium gravel is another solid option. Choose pieces that are about the same size to keep drainage spaces consistent.
I recommend making this layer about 1-2 inches thick. This gives enough space for water collection without taking up too much room for your plants.
The drainage layer stops soil from becoming compacted over time. Without it, terrarium soil becomes waterlogged and dense, which kills most plants.
Using Activated Charcoal and Horticultural Charcoal
I place a thin charcoal layer directly on top of the drainage layer to filter water as it moves through. This step helps keep water clean and reduces odors.
Activated charcoal provides the best filtration. I use coconut-based activated charcoal because it removes impurities more effectively than regular charcoal.
Horticultural charcoal is another good choice. It is made for plant use and lasts longer than activated charcoal in terrariums.
I sprinkle just enough charcoal to create a light, even layer. Too much charcoal can block water flow between layers.
Choose chunky pieces instead of powder. Fine charcoal powder slips through barriers and mixes with other layers, making it less effective.
Choosing the Right Soil and Substrates
The soil layer is where your plants will grow, so I choose substrates that drain well but still hold some moisture. Regular potting soil is too heavy and holds too much water for most terrarium plants.
I prefer peat moss mixed with perlite and bark chips. This mix drains quickly but keeps enough moisture for plant roots.
For tropical plants, I use a chunky, well-draining mix:
- 40% peat moss
- 30% perlite
- 20% bark chips
- 10% coconut coir
The soil depth depends on your plant choices. Small plants need 2-3 inches, while larger plants need 4-6 inches of growing medium.
I slope the soil to create depth variation. This makes the terrarium look more natural and gives planting options at different levels.
Incorporating Moss Layers for Structure
I use moss layers as barriers between other layers and as living elements that add structure. Sphagnum moss works well as a barrier between the drainage layer and soil.
This moss layer keeps soil from washing down into the drainage area. It also holds moisture and slowly releases it as the terrarium dries out.
Sheet moss goes on top of the soil after planting. I use it to cover exposed soil and create a natural forest floor look.
The moss layer should be thick enough to act as a barrier but not so thick that it blocks water flow. I aim for about half an inch of compressed sphagnum moss.
Living moss helps maintain humidity levels. As it absorbs and releases moisture, it creates a stable environment for terrarium plants.
Selecting and Arranging Terrarium Plants
Choosing the right plants for your container and arranging them properly is key. Closed terrariums need humidity-loving tropical species, while open terrariums work best with drought-tolerant plants or houseplants.
Picking Suitable Terrarium Plants
I always start by deciding if I’m building an open or closed terrarium. This choice guides the rest of my plant selection.
Closed terrarium plants thrive in humid, sealed environments. These include tropical species that love moisture and can handle limited airflow.
Open terrarium plants need good ventilation and lower humidity. They do well in containers without lids where air can circulate freely.
I look for species that stay small or have dwarf varieties. Large plants outgrow small containers quickly and become hard to manage.
Growth rate matters too. Fast-growing plants can overwhelm slower species in mixed plantings. I prefer plants that grow at similar speeds to keep balance.
Key factors to consider:
- Container type (open vs. closed)
- Mature plant size
- Light requirements
- Growth speed
- Humidity needs
I always check if plants need similar care conditions before combining them. Mixing tropical and desert plants does not work well.
Plants for Closed Terrariums
Closed terrariums act like miniature rainforests. I choose small, humidity-loving, slow-growing tropical plants for these conditions.
Ferns are great choices for closed terrariums. Maidenhair ferns, sword ferns, and button ferns all love the humidity and stay small.
Tropical foliage plants add color and variety. Nerve plant (fittonia) has ornate leaf patterns. Peperomia species offer thick, waxy leaves in many shapes.
Pilea plants, like the aluminum plant, bring bold variegated leaves. The polka dot plant adds bright speckled colors.
Vines and creeping plants naturally fill empty spaces. Creeping fig spreads quickly across surfaces. Baby tears create a carpet-like ground cover.
Moss ties everything together. Cushion moss, mood moss, and sheet moss all work well. They help create natural landscapes and keep moisture in.
I arrange taller plants toward the back or center. Medium-height plants go in the middle. Low-growing moss and creeping plants fill the front and edges.
Best Choices for Open Terrariums
Open terrariums need plants that handle lower humidity and good airflow. I focus on arid species or adaptable houseplants.
Succulents are perfect for open terrariums. Haworthia species stay small and have interesting patterns. Echeveria forms attractive rosettes in many colors. Sedum varieties offer different textures and shapes.
Small cacti add unique forms to desert-themed terrariums. Hedgehog cacti and barrel cacti work well in shallow containers. They need bright light and little water.
Air plants (tillandsia) do not need soil. They absorb moisture from the air and need only occasional misting. I place them on decorative branches or rocks.
Regular houseplants also work in open terrariums. Small philodendrons, spider plants, and English ivy adapt well to container life. They need more frequent watering than succulents.
I arrange open terrariums with the tallest plants in back. Trailing plants can spill over the container edges for visual interest. I leave space between plants for air circulation.
Good drainage is important for open terrariums. I use gravel layers and well-draining soil mixes to prevent root rot in moisture-sensitive plants.
Step-by-Step Terrarium Setup Process
To build your terrarium, start with drainage layers using gravel and charcoal. Next, place your plants thoughtfully, considering their size and growth patterns. Finish the setup with hardscape elements and moss to complete your miniature ecosystem.
Layering the Base Materials
I start every terrarium with a drainage layer using gravel or leca at the bottom of my container. This layer keeps water away from plant roots and stops rot.
Essential Base Layers:
- Drainage material: 1 inch of gravel, lava rock, or clay pebbles
- Activated charcoal: thin layer for filtration
- Mesh screen: prevents soil from mixing with drainage
- Substrate: 2-3 inches of terrarium soil mix
I add the drainage material first, spreading it evenly across the bottom. Next, I sprinkle on a thin layer of activated charcoal for water filtration.
The mesh screen goes on top to separate layers. I finish with quality terrarium soil that drains well but keeps some moisture.
For succulent terrariums, I use a sandier mix. Tropical terrariums get a moisture-retaining blend with coco coir and orchid bark.
Planting and Placement Techniques
I always start with my tallest plants first and work down to smaller ones. This helps me keep proper scale and visual balance.
Planting Order:
- Background plants (tallest)
- Feature plants (medium height)
- Ground cover plants
- Moss and small accents
I create holes in the substrate using a long spoon or brush handle. I gently place each plant with roots spread out.
For woodland terrariums, I put ferns in the back corners. Colorful foliage plants go in the middle for interest.
I plan my layout based on mature plant sizes. I space them to prevent overcrowding as they grow.
I lightly mist the soil during planting to make it easier to work with. This keeps the substrate from flying around inside the container.
Decorative Elements and Finishing Touches
I add hardscape elements like rocks or driftwood to create natural structure. These pieces anchor the design and complement the plants.
Finishing Elements:
- Decorative rocks or driftwood
- Sheet moss for ground cover
- Preserved moss for texture
- Small figurines (optional)
I partially bury larger rocks to keep them stable. I position driftwood to look like fallen logs in nature.
Sheet moss covers visible soil and creates a forest floor look. I tear it into natural pieces instead of perfect shapes.
Tropical terrariums get lush moss coverage. Succulent versions use decorative stones instead of moss.
I finish with a light misting from my spray bottle. Finally, I seal the container with its lid or plastic wrap to keep humidity in.
Light, Water, and Humidity: Creating the Right Environment
Your terrarium plants need the right balance of light, moisture, and air circulation to thrive. Terrariums do best with indirect sunlight and steady humidity levels that match your plant choices.
Lighting Options and Grow Lights
I recommend placing your terrarium near a window with bright, indirect light. Direct sunlight can overheat the glass and burn your plants.
Glass containers filter UV rays, so sun-loving plants struggle in terrariums. Choose shade-tolerant plants instead.
If you lack natural light, grow lights work well. LED grow lights make less heat than fluorescent ones.
Best lighting setup:
- Place 12-18 inches from grow lights
- Use full-spectrum LED lights
- Run lights for 12-14 hours daily
- Avoid placing near heating vents
I watch my plants for signs of too much or too little light. Yellow leaves mean too much light. Leggy, stretched growth means not enough light.
Watering Practices for Different Terrariums
Closed terrariums need very little water because they recycle moisture through condensation. Open terrariums dry out faster and need regular watering.
For closed terrariums, I add water only when the soil feels dry. I use a spray bottle to mist plants lightly.
Watering schedule:
- Closed terrariums: Every 2-4 weeks
- Open terrariums: Every 1-2 weeks
- Succulent terrariums: Every 2-3 weeks
I check for condensation on the glass walls. Too much condensation means overwatering. No condensation means the terrarium needs water.
Use distilled or filtered water when possible. Tap water contains chemicals that can harm sensitive terrarium plants.
Humidity Levels and Ventilation
Humidity-loving plants thrive in closed terrariums, while succulents prefer the lower humidity of open containers. I never mix these plant types together.
Closed terrariums naturally keep humidity between 80-90%. Open terrariums usually stay around 40-50% humidity.
Managing humidity:
- Briefly remove the lid if condensation builds up
- Use a humidifier near open terrariums if needed
- Group humidity-loving plants together in closed systems
I regularly check for mold or fungus growth, which can develop if humidity stays too high. Good air circulation helps prevent these issues.
For open terrariums with humidity-loving plants, I place a small dish of water nearby to increase moisture. This boosts humidity without overwatering the soil.
Managing Terrarium Maintenance and Common Problems
Regular maintenance keeps your terrarium healthy and stops most problems before they begin. Focus on routine pruning, cleaning, moisture control, and keeping harmful pests out.
Pruning, Cleaning, and Ongoing Care
I check my terrarium weekly for dead leaves, overgrown plants, and condensation. Remove any yellow or brown foliage with clean tweezers to prevent decay.
Weekly Tasks:
- Wipe glass walls with a soft cloth
- Remove dead plant material
Check soil moisture levels and adjust ventilation if needed.
For closed terrariums, I look for too much condensation on the glass. If water droplets cover over half the surface, I open the lid for a few hours to let moisture escape.
Pruning overgrown plants keeps your terrarium looking balanced. I trim back aggressive growers to give slower plants room to grow.
Clean the glass monthly using distilled water and a lint-free cloth. Avoid chemical cleaners that could harm your plants.
Preventing Mold, Rot, and Fungus Gnats
Excess moisture creates perfect conditions for mold, fungus, and bacteria. I control humidity by keeping ventilation adequate and avoiding overwatering.
Prevention Steps:
- Use a well-draining soil mix
- Add a drainage layer of pebbles or activated charcoal
- Remove standing water right away
- Maintain air circulation
Fungus gnats are tiny flying insects that breed in moist soil and feed on organic matter. I let the soil surface dry between waterings to prevent them.
If mold appears, I remove affected areas with tweezers and treat spots with hydrogen peroxide on a cotton swab. Poor air circulation often leads to these problems, so I open the lid more often.
White fuzzy growth on soil or plants signals fungal issues. I increase ventilation and reduce watering immediately when I see these signs.
Pest Management and Introduced Organisms
I often add springtails to terrariums because they eat mold, fungus, and decaying matter. They help keep the environment clean.
Beneficial Organisms:
- Springtails – Eat mold and decompose waste
- Isopods – Break down dead plant material
- Beneficial bacteria – Support healthy soil
I quarantine new plants for two weeks before adding them to terrariums. This keeps pests like spider mites or aphids out.
If I find unwanted insects, I remove them with tweezers first. For persistent bugs, I use insecticidal soap diluted to quarter strength and apply it carefully.
Covering ventilation holes with fine mesh stops pests from entering while keeping airflow. I check these barriers monthly to make sure they are secure.
Regular monitoring helps me catch pest problems early.
Frequently Asked Questions
Most people need supplies like glass containers, drainage gravel, activated charcoal, and the right soil to start a terrarium. The assembly process involves layering materials and choosing plants that fit your container.
What are the essential supplies for creating a terrarium?
I recommend gathering these basic materials: a glass container, potting soil, drainage gravel, and activated charcoal. You’ll also need small plants that fit your container.
Choose your container based on whether you want an open or closed terrarium. Glass fishbowls, mason jars, or geometric terrariums are good for beginners.
Get long tweezers or chopsticks for planting in narrow spaces. A small spoon helps move soil in tight areas.
You may want decorative stones, moss, or small figurines to personalize your terrarium. These items add interest but are not required for plant health.
Can you list the steps to assemble a terrarium for beginners?
I start by cleaning the container thoroughly with soap and water. Rinse all soap residue completely.
Add 1-2 inches of drainage material like gravel or small stones as the first layer. This prevents water from pooling at the bottom.
Add a thin layer of activated charcoal to filter toxins and stop odors. Half an inch works for most containers.
Add 2-4 inches of potting soil, depending on your plant’s root size. The soil should drain well.
Plant your chosen plants using tweezers or chopsticks for precise placement. Water lightly with a spray bottle to avoid overwatering.
What type of plants are best suited for a terrarium environment?
Closed terrariums work best with tropical plants that love high humidity. I choose ferns, moss, or nerve plants for these containers.
Fittonia plants with colorful veined leaves thrive in closed terrariums. Small ferns like maidenhair or button ferns also do well.
Open terrariums need plants that tolerate lower humidity. I use succulents, small cacti, or air plants for these setups.
Haworthia and small echeveria varieties stay compact and handle terrarium conditions. I avoid fast-growing plants that quickly outgrow their space.
What is the proper care and maintenance routine for a new terrarium?
Watering frequency depends on your terrarium type. Closed terrariums may only need water every few weeks or months.
I check soil moisture before watering by inserting a chopstick into the soil. If it comes out dry, the terrarium needs water.
Open terrariums dry out faster and usually need watering every 1-2 weeks. I use a spray bottle to mist plants gently.
I remove dead leaves right away to prevent mold. Pruning overgrown plants keeps them from taking over.
Light should be bright but indirect. I place terrariums near windows but out of direct sunlight to prevent overheating.
How can one create an open terrarium, and what are the differences from a closed one?
Open terrariums use containers without lids, allowing air to circulate. I choose wide-mouth containers like bowls or open geometric shapes.
The layering process is the same, but I pick plants that prefer lower humidity. Succulents and cacti are ideal for open containers.
These terrariums need more frequent watering because moisture evaporates quickly. I water when the soil feels dry.
Closed terrariums create their own water cycle through condensation. The humidity stays high, making them perfect for tropical plants.
I only open closed terrariums if I see too much condensation or mold. This lets excess moisture escape.
What are some creative terrarium designs or themes for personalizing my space?
I use succulents, colored sand, and small decorative cacti to create desert scenes. Tiny figurines or colored stones add extra charm.
Beach themes look great with air plants, white sand, and small shells. I choose blue or clear glass containers to mimic ocean colors.
Fairy gardens feature small plants along with miniature houses or bridges. I add fairy figurines to make the scene magical.
I change decorative elements for seasonal displays while keeping the same plants. For example, I use small pumpkins in fall or tiny ornaments in winter.
I create modern looks by arranging colored gravels or sands in geometric patterns. Layering materials in stripes or sections makes the design stand out.
Single-plant displays use one beautiful specimen, like a small orchid or unique succulent. This simple style highlights the plant’s natural beauty.